- ページ 2
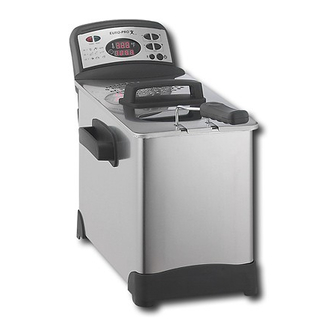
フライヤー Euro-Pro F1066のPDF オーナーズマニュアルをオンラインで閲覧またはダウンロードできます。Euro-Pro F1066 6 ページ。 120v., 60hz., 1700 watts 5 liter electronic deep fryer
Euro-Pro F1066 にも: オーナーズマニュアル (6 ページ)

IMPORTANT SAFETY INSTRUCTIONS
When using electrical appliances, basic safety precautions should always be
followed, including the following:
1.
Read all instructions for use carefully
and look at the illustrations before you
start using the appliance.
2.
Do not touch hot surfaces, always use
handles or knobs.
3.
To protect against electrical shock, do
not immerse cord and plug of this
appliance in water or other liquids.
4.
Close supervision is necessary when
any appliance is used by or near
children.
5.
Unplug from outlet when not in use
and before cleaning. Allow to cool
before putting on or taking off parts
and before cleaning the appliance.
6.
Do not operate any appliance with a
damaged cord or plug, or after the
appliance malfunctions, has been
dropped or damaged in any manner.
Return the appliance to EURO-PRO
Operating LLC for examination, repair
or adjustment. See warranty.
7.
Never plug in before the control panel
is installed in the body of the fryer and
the heating element is placed in the oil
container.
8.
Never overfill the fryer with oil. Fill
only between the minimum and
maximum levels, as indicated inside
the oil container.
SPECIAL SAFETY INSTRUCTIONS
• A short power supply cord is provided to
reduce the risk resulting from becoming
entangled in or tripping over a longer
cord. An extension cord (or longer
detachable cord) is not recommended
for use with deep fryers.
• Never plug in the control panel before it
is installed in the body of the fryer with
the heating element inside the oil
container.
This appliance has a polarized plug (one blade is wider than the other). To reduce
the risk of electric shock, this plug is intended to fit into a polarized outlet only one
way. If the plug does not fit fully into the outlet, reverse the plug. If it still does not fit,
contact a qualified electrician. Do not attempt to modify the plug in any way.
SAVE THESE INSTRUCTIONS
FOR HOUSEHOLD USE ONLY
9.
Be sure handle is properly assembled
to the basket and locked in place.
See detailed assembly instructions.
10. The use of accessory attachments not
recommended by the appliance
manufacturer may cause injuries.
11. Always insert heating element in the
appliance first, then plug into the wall
outlet. To disconnect, remove plug
from wall outlet then wait for the unit
to cool completely before removing
the heating element.
12. Extreme caution must be used when
moving any appliance containing hot
oil or other hot liquids.
13. Do not leave appliance unattended
while in use.
14. Do not use outdoors.
15. Do not let cord hang over the edge of
the table, counter or touch hot
surfaces.
16. Do not place on or near a hot gas or
electric burner, or in a heated oven.
17. Do not use appliance for other than
intended household use.
• Do not immerse the control panel and
heating element in water.
• When opening the lid after frying, first
release the lid by pushing the latch with
your finger, then wait a moment to allow
the steam inside to escape before
opening fully.
• To avoid a circuit overload, do not
operate another high wattage appliance
on the same circuit.
1
Rev. 11/03A
OPERATING INSTRUCTIONS cont.
IMPORTANT
Helpful Hints
Your deep fryer is equipped with a special Auto-Off Safety Feature. The
heating element will shut off when the timer stops.
You can re-set the deep fryer to 320 degrees by simply pressing the re-set
button located just below the thermostat on the front panel.
The temperature control allows you to set the desired temperature for each
recipe. Once the temperature is achieved, the ready light will turn on. This is
the point to set your timer. Once the time has elapsed, the element will shut
off and the oil begin to cool down. If you want to do another recipe, simply
press the re-set button, set your temperature and wait for the ready light.
Once illuminated, then set the timer.
If you would like to use the fryer continuously for multiple batches, do not
set the timer. Simply set the desired temperature, wait for the ready light
and begin!
10
