- ページ 4
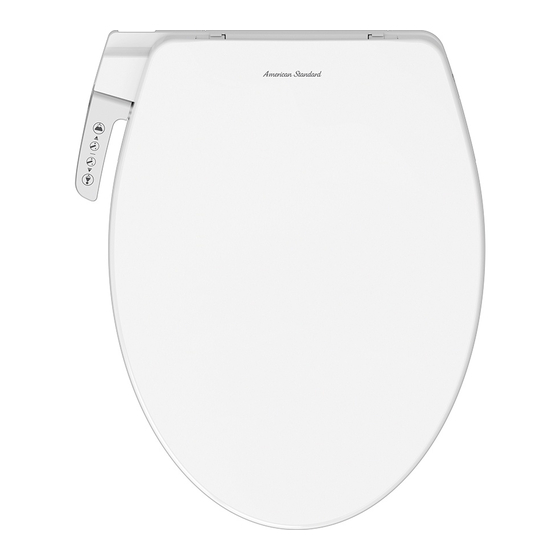
トイレ American Standard EB-FB110SWのPDF インストールとユーザーマニュアルをオンラインで閲覧またはダウンロードできます。American Standard EB-FB110SW 7 ページ。 Slim smart washer

Installation Procedure
(ขั ้ น ตอนในการติ ด ตั ้ ง )
First installation method (recommended):
วิ ธ ี แ รก (แนะนำ)
1.Dismantle the old seat and seat lid.
ถอดที ่ ร องนั ่ ง และฝาเก่ ่ า ออก
Loose the hinge and
remove the old seat
and seat lid.
ปลดบานพั บ แล้ ว ยกที ่
รองนั ่ ง และฝาเก่ า ออก
Seat and seat lid
ที ่ ร องนั ่ ง และฝา
3.Install installation template
วางแผ่ น แบบติ ด ตั ้ ง
As figure, install the installation template on the ceramic.
วางแผ่ น แบบติ ด ตั ้ ง ลงบนโถเซรามิ ก
Installation template
5.Take away the installation template
นำแบบติ ด ตั ้ ง ออก
Installation template
แผ่ น แบบติ ด ตั ้ ง
Second installation method
วิ ธ ี ท ี ่ ส อง
1. Refer to first installation method step 1 and 3. Dismantle the old seat and lid. Put the installation template on the ceramic.
ติ ด ตั ้ ง เหมื อ นวิ ธ ี แ รกในขั ้ น ตอนที ่
และ
คื อ ถอดที ่ ร องนั ่ ง และฝาเก่ ่ า ออก และวางแผ่ น แบบติ ด ตั ้ ง ลงบนโถเซรามิ ก
3
1
2. Refer to fist installation method step 4. Take the adaptable panel to the holes of the ceramic. Adjust position of the
connecting bolts with adjusting pieces. Screw in the butterfly nuts form underside of the ceramic.Then fix the adaptable panel.
ในขั ้ น ตอนที ่
วางบานปรั บ ให้ ต รงกั บ รู ข องโถเซรามิ ก จั ด ตำแหน่ ง สลั ก เกลี ย วยึ ด และตั ว ปรั บ ให้ เ ข้ า ที ่ สวมน๊ อ ตหางปลาเข้ า กั บ สลั ก เกลี ย ว
4
จากด้ า นล่ า งของโถ ขั น ยึ ด ให้ แ น่ น
3. Refer to first installation method step 5 and 6. Complete following installation procedure.
ติ ด ตั ้ ง เหมื อ นวิ ธ ี แ รกในขั ้ น ตอนที ่
และ
การติ ด ตั ้ ง เป็ น อั น เสร็ จ สมบู ร ณ์
5
6
2.Install expansive nuts
ติ ด ตั ้ ง น๊ อ ตต่ อ
As figure, insert
expansive nuts in the
holes of the ceramic.
ใส่ น ๊ อ ตต่ อ ลงในรู ข องโถ
เซรามิ ก ดั ง ภาพ
ยึ ด บานปรั บ
4.Fix the adaptable panel
As figure, take the adaptable panel to the holes of the
ceramic. Adjust position for connecting bolts and
adjusting pieces, make the connecting bolts aim at
corresponding expansive nuts. Then fix the adaptable panel.
วางบานปรั บ เข้ า กั บ รู ข องโถเซรามิ ก ปรั บ ตำแหน่ ง ของน๊ อ ตต่ อ และตั ว
ปรั บ จั ด วางให้ ส ลั ก เกลี ย วอยู ่ ต รงกั บ น๊ อ ตต่ อ แล้ ว ขั น ยึ ด ให้ แ น่ น ดั ง ภาพ
Keep the side with FRONT up
หั น ด้ า นหน้ า ขี ้ น
แผ่ น แบบติ ด ตั ้ ง
Installation
template
*Butterfly nut to be used for
น๊ อ ตหางปลาใช้ ส ำหรั บ วิ ธ ี ท ี ่ ส อง
the second method.
ติ ด ตั ้ ง ผลิ ต ภั ณ ฑ์
6.Install the product
Keep the fix slots under the product aim at slots on the
adaptable panel. Push the product to the end as figure
below.That completes installation.
ติ ด ตั ้ ง ผลิ ต ภั ณ ฑ์ โ ดยให้ ร ่ อ งยึ ด ข้ า งใต้ ส วมเข้ า กั บ บานปรั บ
ดั น ผลิ ต ภั ณ ฑ์ เ ข้ า จนสุ ด ดั ง ภาพ การติ ด ตั ้ ง เป็ น อั น เสร็ จ สมบู ร ณ์
ร่ อ งยึ ด ใต้ ผ ลิ ต ภั ณ ฑ์
The fix slots under
the product
Connecting water hose
(การต่ อ สายน้ ำ ดี )
1. Close the water valve and detach water supply hose
from water tank. Connect the t-shaped connector to
the water tank. Make sure that rubber packing is
inserted in between.
ปิ ด วาล์ ว น้ ำ และปลดท่ อ น้ ำ จากถั ง พั ก น้ ำ ต่ อ ข้ อ ต่ อ รู ป ตั ว ที เ ข้ า กั บ
ถั ง พั ก น้ ำ โดยให้ ย างรองอยู ่ ร ะหว่ า งกลาง
3. Connect the main body and T-shaped connector
with water inlet hose.
ต่ อ สายน้ ำ ดี เ ข้ า กั บ ตั ว ผลิ ต ภั ณ ฑ์ เ และข้ อ ต่ อ รู ป ตั ว ที
Do not lift the product with the seat cover and seat open.
This may cause a mechanical trouble.
ห้ า ม
ห้ า มยกที ่ น ั ่ ง และฝารองนั ่ ง ในขณะที ่ ก ำลั ง ปิ ด และเปิ ด อยู ่ เพราะอาจทำให้ เ กิ ด ความเสี ย หายแก่ ร ะบบการทำงานได้
Prohibition
2. Connect the water supply hose to the t-shaped
connector.
ต่ อ ข้ อ ต่ อ รู ป ตั ว ที เ ข้ า กั บ สายน้ ำ ดี เ ข้ า ถั ง พั ก น้ ำ
4. Open the water valve to check if there is any leakage.
เปิ ด วาล์ ว น้ ำ เพื ่ อ ตรวจสอบว่ า มี ก ารรั ่ ว ซึ ม หรื อ ไม่
