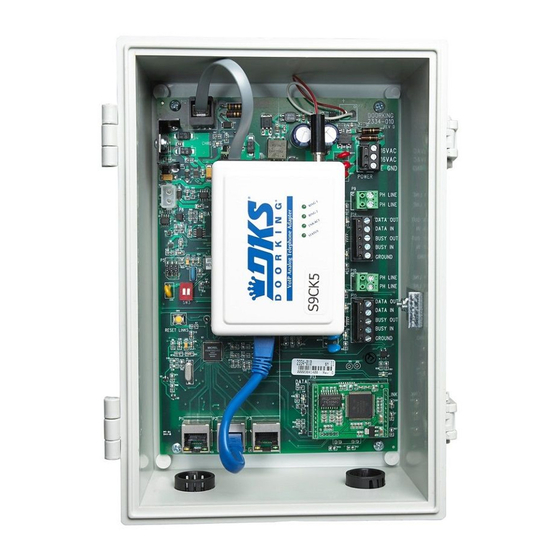
コントロールユニット DoorKing 1830 SeriesのPDF マニュアルをオンラインで閲覧またはダウンロードできます。DoorKing 1830 Series 3 ページ。 Voip / rs-232 control box

1830 Series VoIP / RS-232 Control Box
This cellular device cannot
be used for 911 calls.
The VoIP/RS-232 Control Box is fee based and operates on DoorKing's network website. The control box provides voice communication and
data communication plan selected at DoorKing's Server website.
The VoIP/RS-232 Control Box is designed to be used with: 1833, 1834, 1835, 1837, and 1838 entry systems.
Installation Options:
The VoIP/RS-232 control box MUST be wired to the telephone entry system's phone line (voice) and RS 232 connection (data). See page 2.
The VoIP/RS-232 control box will work with TWO 1830 entry systems connected to it. These are designated as System A and System B. See
next page to wire 2 1830 entry systems to the box.
Registration
The VoIP adapter and DKS TCP/IP adapter WILL NOT
function until registered with the DoorKing VoIP/Data server.
The registration page may be reached at:
https://dksdb.dksoftware.com/UserLogin.aspx
Before starting the registration process, be sure to have the VoIP ID number written down. This number is printed on a label on the VoIP adapter.
Also the Master Code of the phone entry system will be needed for the registration process.
Click the IM/VOIP DKS button on the first screen. Enter your personal information, then click the entry systems tab. Add an entry system by
selecting the
DKS VOIP/Data
service.
NOTE: VOIP/Data uses the VoIP adapter AND the DoorKing client mode DKS TCP/IP adapter. (DO NOT select the DKS VOIP only. This is for voice
ONLY and data will not function with this selection.)
Enter the VOIP ID number on the decal on VoIP adapter, the optional name of the system A entry system if desired, and your postal area code
which will be used for control box phone number selection. Finally, enter the Master Code of the System A entry system, then Click ADD. The entry
system will be added to the table above. Click the billing tab and enter billing information. When completed, the VoIP and DKS TCP/IP adapters will
be turned ON and a phone number will be automatically assigned to the control box.
control box for your records.
Installation Steps:
Install and wire control box to 1830(s) and your router (page 2).
1.
Power up control box (page 3).
2.
Register control box and System A 1830 online (see above).
3.
Test control box (page 3).
4.
Troubleshoot control box if necessary (page 3).
5.
Note: Installation steps assume that the 1830 system has already
been setup and functioning including the master code and
multiple system programming if 2 1830s are being used.
2334-065-C-6-18
Destructive Attack:
Level I
Line Security:
Level I
Endurance:
Level IV
Standby Power:
Level I
Box Installed at Router
Phone Line and RS-232
o l
n t r
C o
S T
S Y
OP
1.
Use
Nam
Nam
To
2.
Key
Line
Han
Ente
3.
Copyright 2018 DoorKing, Inc. All rights reserved.
1
500 Ft Max
NOTE: Your router MUST be
connected to the internet.
325 Ft Max
Ethernet Line - Cat5
Box Installed at Phone Entry System
Make sure to record the phone number assigned to the
x
B o
A
E M
ST
EM
Y SY
E EN
TR
ON
PH
TE
LE
AN
SC
TO
HO
LD
ON
S
T RU
CTI
ate
INS
s to
Loc
lay.
NG
ton
on
Disp
l Ord
er.
ER
ATI
Z"
But
e Num
ber
tica
ber
on
If
"A
Cod
to
Alph
abe
Num
e
Butt
on.
ll"
to
e and
are
er
In
"Ca
Cod
ll"
or
"Ca
l,
es
Ent
ss
Pre
s "#"
Ton
e.
pad
Cal
or
y,
Aga
Pres
in.
and
is
Try
Bus
n Dis
play
g Up.
r on
Ope
Inglewood, California 90301
DoorKing Part Number
2334-080
120 S. Glasgow Avenue
U.S.A.
