- ページ 12
トイレ Caroma Invisi Series IIのPDF インストレーション・マニュアルをオンラインで閲覧またはダウンロードできます。Caroma Invisi Series II 20 ページ。 Urinal concealed cistern
Caroma Invisi Series II にも: マニュアル (16 ページ)
In Ceiling Access
1.
Cistern can be a maximum height
of 3 metres above the inlet height of
the selected urinal.
2.
Calculate the finished floor height
(allowing for floor gradings and tile
thickness, etc.) and add this to the
known height of the selected urinal's
inlet. Mark this resulting height on
This is your datum
the stud -
and flush pipe centre line.
Cavity Depth can be 70mm
if cistern is installed completely
in-ceiling
90mm Min
Cavity Depth
Access Box converted
to top (refer to page 14.)
Note: Access to ceiling
must be provided
Ceiling void
5mm Min.
45mm Max.
Cladding Thickness
12
3.
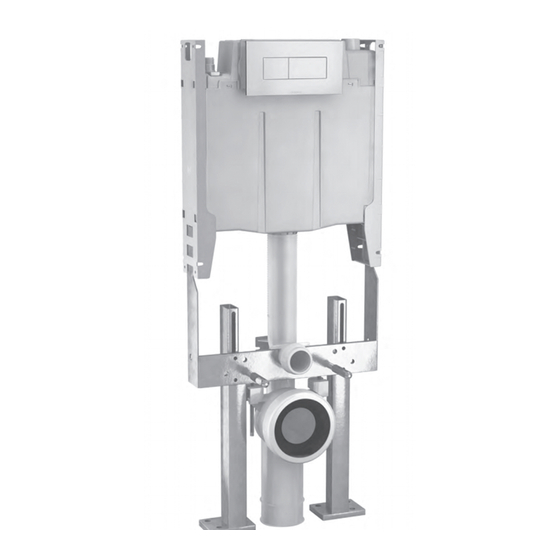
Screw cistern to studs via the 2
front, top and bottom holes in each
mounting bracket making sure the
water connection fitting is on the left
hand side of cistern.
Note: Cistern may be installed on wall
face (refer to page 12 - Induct Access)
.
430mm
- top of Top Mounted
Access Box
3 metres Max
to centre of inlet.
Where ceiling
space is restricted,
the Invisi II can be
lowered into wall
cavity.
Centre Line Buttons
(remote mounted)
Height to centre of the
selected urinal's inlet.
Refer selected urinal's
specificatrions
400mm – 420mm
45mm
- Water
Supply Connection
Datum
950mm
Recommended
(push button height)
Finished Floor Level
Installing the Cistern -
4.
Fabricate flush pipe using the
Copper Adaptor provided.
5.
Lubricate 'O'Ring on cistern tail using
soapy water and slide flush pipe on.
6.
Connect the water supply.
Water Supply
Connection
7.
Remove Dust Cover, turn Isolating
Tap ON, fill tank & set water level using
Adjusting Screw on the inlet valve.
ON
Dust Cover
8.
Check cistern and all joints for leaks.
9.
Turn Isolating Tap OFF. Continue
with Preparation for Fitout on page 15.
4 metres long (max.)
pneumatic tube (supplied)
237 002
OFF