コントロールユニット DSC Downlook DLM-7のPDF インストレーション・インストラクションをオンラインで閲覧またはダウンロードできます。DSC Downlook DLM-7 2 ページ。 Camera selector module

Specifications
Power
• 11 - 14.5VDC
• Operating Current: 35mA
Video
• Up to seven 1VP-P CCIR NTSC- or PAL-compatible cameras
• Video out terminal for local video monitor with 75W impedence
Mounting the Panel
It is suggested that the DLM-7 Camera Selector Module and the DLM-1
Video Module be mounted in a DLC-1 Cabinet. The DLC-1 Cabinet has
been designed especially for use with Downlook components.
Before attaching the cabinet to the wall, press nylon printed circuit
board mounting studs into the raised mounting holes from the back
of the cabinet. Mount the cabinet securely to the wall. It is
recommended that appropriate wall anchors be used when securing
the panel to drywall, plaster, concrete, brick or other similar surfaces.
Remove the DLM-7 circuit board from the cardboard packaging.
Press the DLM-7 Module onto the nylon mounting studs.
Video Input Connections
The DLM-7 Module uses NTSC or PAL compatible cameras. Use
only a CCIR camera, as older types may not function properly with
the DLM-7 Module.
Install the camera mounting hardware as per the manufacturer's
instructions and mount the camera. Connect the camera to a
monitor, and align the camera with the target area and adjust the
camera's focus. If an on-site monitor is to be permanently connected
between the camera and the DLM-7 module, the monitor connection
must be high impedance.
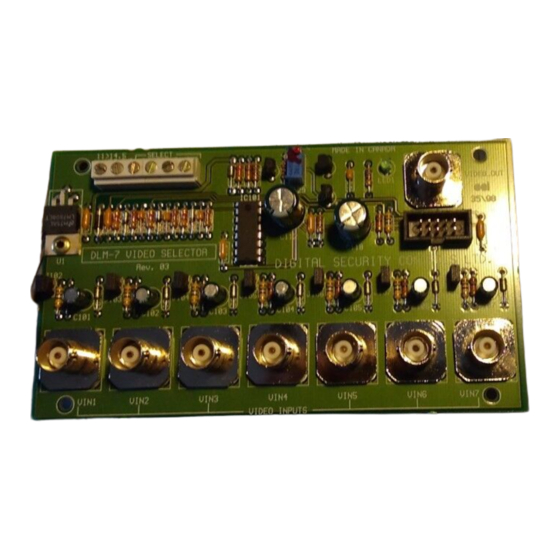
Connect the first camera to the VIN1 terminal and remove the
jumper clip from J102. If only one camera is used with the DLM-7,
it should be connected to input VIN1. Connect additional cameras
to BNC connectors VIN2 through VIN7. Up to seven cameras may
be connected to the DLM-7.
DLM-7 Downlook Camera
Power Requirements
The DLM-7 Camera Selector usually does not require an additional
power supply.
Connection to the DLM-1 Module
Ensure power is removed from all components before making
connections between the Downlook modules. Connect the DLM-7
Module to the DLM-1 Module with the 10-pin ribbon cable supplied.
Refer to the connection diagram below and ensure that the ribbon
cable is oriented properly.
Jumpers J102 through J108
Jumpers J102 through J108 are used to terminate unused video
inputs. If a video input is not used, short the pins for the terminal
using one of the supplied jumper clips. If a camera is connected
to a terminal, remove the clip from the jumper.
Local Video Output
A monitor may be connected to the DLM-7 to allow for local video
monitoring. The monitor will display the image from the currently
active camera. Connect a monitor with a high input impedence to
the VIDEO OUT terminal. If required, picture quality at the local
monitor may be adjusted with part R129. Use a small screwdriver
to adjust part R129; do not force the adjustment screw beyond its
natural range of motion.
System Programming
The DLM-7 itself requires no programming. Refer to the Installation
Manuals of the security system used with the Downlook system for
instructions on programming the system for use with multiple cameras.
The following restrictions apply to UL Listed applications:
1. The picture count shall not exceed 2.
2. The message/data format must be Sur-Gard 7/3.
3. Communication must be made to the listed Sur-Gard MLR2-DG
receiver with the MLRV method employed.
4. The DLM-1 and DLM-7 must be connected to only UL Listed video
equipment.
5. The module has been found to be compatible with the UL Listed
Sur-Gard P-16 and P-1664 units only.
firealarmresources.com
Selector Module
I NS T AL L AT I O N I NS T R U C T I ON S
LED1
29001204 R1
