- ページ 10
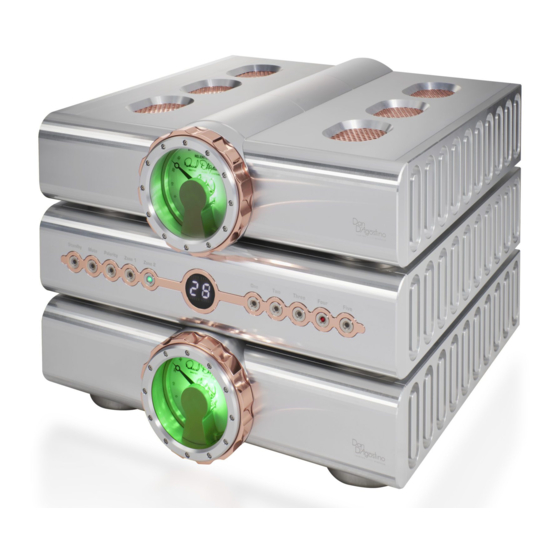
アンプ Dan D'Agostino RelentlessのPDF オーナーズマニュアルをオンラインで閲覧またはダウンロードできます。Dan D'Agostino Relentless 14 ページ。

Polarity: Press the Normal or Inverted button to flip the system's absolute polarity. There is no "right"
setting; it varies from recording to recording. Use the setting that sounds better on the recording
currently playing.
Dark Mode: These buttons dim the Relentless Preamplifier's front meters after a period of time for
listeners who prefer a dark environment.
The bottom row of the Player page includes queue control, favorites selections, stream options, and
play to choices. The stream option opens the page that reveals the Internet streaming sources, cloud
and network drives that the Relentless Preamplifier can access in the connected system (see below).
Stream screen
The Stream screen is divided into three sections. The items on this screen
will reflect the makeup of a particular system.
Internet Music: Accesses the various Internet-based and wireless sources
that the Relentless Preamplifier can access. Subscriptions are required for
these services.
Cloud: This section displays the cloud-based locations that have been
configured for music storage. For more information, please contact your
dealer.
Local Server: Displays local networked computers and hard drives through
DLNA. For more information, please contact your dealer.
Note: The network input will automatically be selected when any of the
streaming sources and music is selected for playback, and has to be selected
first on the Control Screen before selecting one of the streaming sources
on the Stream Screen.
Play To screen
Once a network source is chosen, press the Play To button and select the
Relentless Preamplifier from the list presented. The items on this screen
will reflect the makeup of a particular system.
Queue and favorites screens
Queue lists the current music selection being played from network storage locations.
Favorites allows you to organize your network stored music into favorite folders and playlists.
Streaming music services have their own specific queue and playlist functions.
1 6
MAI NTENAN CE
The Relentless Preamplifier requires no user maintenance other than to keep it clean and ensure that
the vents remain unobstructed.
The Relentless Preamplifier has a fine, highly polished finish that can be easily damaged. To clean the
preamplifier, spray a small amount of distilled water onto the supplied microfiber cloth and gently wipe
the preamplifier's surface along the direction of the metal grain, with light pressure only. Never use a
circular motion or heavy pressure, as this can permanently scratch the machined surfaces. Do not rub
the surface with the cloth, and do not spray any liquid directly onto the preamplifier.
If dust or other contaminants or objects collect around the vents at the top and bottom of the
preamplifier, remove small objects by hand and use a shop vacuum or hand vacuum to remove the
dust. Use a brush attachment on the vacuum to avoid scratching the preamplifier's surface.
If you should need to transport or ship the preamplifier, be sure to use the original packing materials.
Allow the preamplifier to cool down for at least one hour before you wrap and package it.
TRO U B LE S H OOTI N G
Preamplifier will not power up
If the front meters are not illuminated, follow the procedure outlined below. If one step succeeds in
activating the power, stop there and ignore the other steps.
1.
If the LED in the middle of the Standby button on the front of the preamplifier is lit, push
the button to turn the preamplifier on.
2. If the LED in the middle of the Standby button is not lit, check to make sure the AC cord
is plugged into the wall outlet.
3. Check at the back of the power supply to make sure the 15-amp IEC connector is pushed
all the way into the jack on the back of the power supply.
4. Check to make sure the three units are securely connected via their locking feet.
5. Open the fuse connector integrated into the power switch on the back of the power
supply. Check to see if the fuse is blown. (The conductor inside the fuse will be severed
and you may see burn marks on the fuse.) Be sure to replace the 10A fuse with one of the
proper value. Consult your dealer or Dan D'Agostino Master Audio Systems, LLC.
6. Check your household electrical box to make sure the circuit breaker has not been
tripped. If it has, flip the breaker back on.
7. If the breaker trips again, check the speaker cable connection on your amplifier and the
speaker to make sure that the terminals are not shorted, and check the entire length of
the cable to ensure there has been no damage to it.
8. If all of these steps fail to return power to the preamplifier, consult your dealer for service.
17
