マイク AnyTone D578UVのPDF 使用方法をオンラインで閲覧またはダウンロードできます。AnyTone D578UV 3 ページ。 Bt01 microphone
AnyTone D578UV にも: ファームウェア・アップデートの手順 (3 ページ), ファームウェアのアップデート方法 (17 ページ)

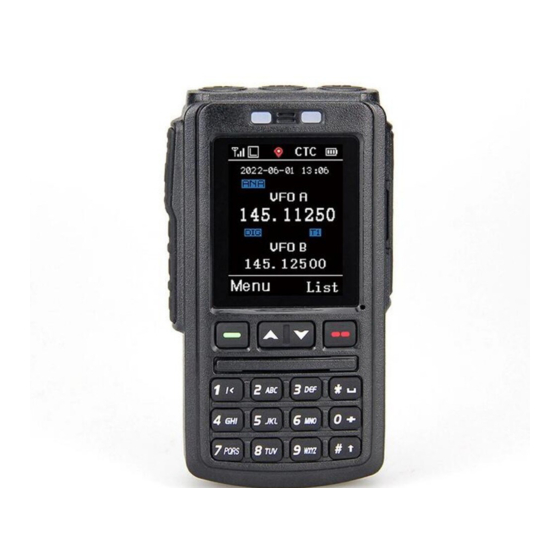
AnyTone is offering a Bluetooth Microphone (BT0101 Mic) which
includes a 2.5 inch display, keyboard, speaker and microphone.
The 4.25" x 2.5" x 1"compact design replaces a radio with have a
removable front design. The BT0101 Mic works together with the
AnyTone mobile D578UV/D578UVPRO/D578UVIIPRO radios
and offers full control of that radio from the wireless BT01 Mic.
The BT01 Mic also comes with a coiled 2' cable which can be
connected to the radio for direct control. The BT01 Mic has a built-
in battery which is charged via a type "C" USB connector from a
5 Volt supply. It further has a headset connector on the right side
so you can use a headset with microphone together with the BT01
Mic. The BT01 Mic also allows for a memory card to be inserted
next to the headset connection.
Initial Set-up
Use a standard 5V type "C" USB cable connected under the headset cover to charge the BT01
Mic. The front right LED lights will be red when the BT01 Mic is being charged, and the LED
light will go OFF when the charging is completed. The D578UV series of radios do require a
firmware update to work with the BT01 Mic. Use firmware V1.16b for the D578UV and V2.03b
for the D578UVII or later versions.
or when static.
The BT01 Mic will work with all D578UV / UVII version radios.
Connecting and using the BT01 Mic requires the latest Firmware, BT, BT APRS and CPS
updates. The BT FW update must be done using an Android type cell phone with a Bluetooth
connection
Hands Free Operation
The BT01 Mic can be used as a hands-free accessory. In order to accomplish this before
connecting the BT01 Display Microphone you must first pair the BT01 PTT Button with the D578
radio. Once this BT01 PTT connection is established you can move forward with setting up the
Display Microphone and use the BT01 PTT as a hands-free option.
Power ON
The BT01 Mic is powered on by pressing the top center [POW] button for 5 seconds. The LED
lights green and the screen display "Select Port" with 2 options: 1) BT01 PORT 2) UART PORT
for the cable connection. Press the Up/Dn button on the front to select "BT01 Port" or "UART
PORT".
The BT01 can be set to turn the radio ON /OFF Remotely as well.
BT01 Pairing to the D578UV
Power ON the BT01 Mic and select "BT01 Port", the screen displays "NO DEVICE
Author: Trygve Svärd, KD0PNQ updates by Duane Reese N6DMR 11-22-22
AnyTone D578UV BT01 Microphone
Instructions
BT01 Mic can be charged when in operation and connected
