- ページ 3
電動おもちゃの車 Concourse VogueのPDF 取扱説明書をオンラインで閲覧またはダウンロードできます。Concourse Vogue 9 ページ。 Push buggy
Concourse Vogue にも: シート取り付け説明書 (2 ページ), 取扱説明書 (18 ページ)
2
ATTACHING THE WHEELS
1
INSERT
FRONT WHEEL
2
3
CLICK INTO
POSITION
4
5
PRESS AND
INSERT WHEEL
concoursegolf.com
We recommend you attach
the wheels prior to unfolding
the buggy.
Attach the 360 degree
swivelling front wheel first as
shown.
CHECK
WHEEL IS
SECURE
Now, attach the two main
wheels to the buggy frame as
shown.
CHECK
WHEEL IS
SECURE
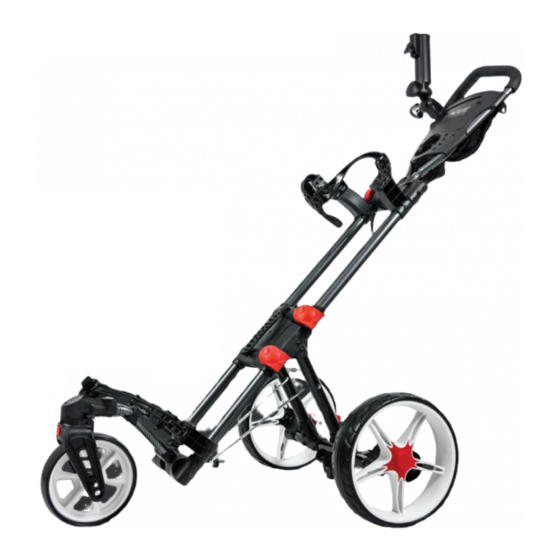
The buggy should now have
the front and both main
wheels attached whilst still
folded down as shown.
3
UNFOLDING THE BUGGY
1
UNLOCK
CLIP
LOCK
CLIP
Version 3
concoursegolf.com
(STEP 1)
NOTE: IT IS IMPORTANT TO
UNLOCK THE SECURING CLIPS
AS SHOWN BELOW BEFORE
ATTEMPTING TO UNFOLD
THE BUGGY. DO NOT TRY TO
FORCE OPEN THE BUGGY. IT IS
DESIGNED TO EASILY UNFOLD
WHEN THE SECURING CLIPS
ARE OPEN/UNLOCKED.
Unlock/Open the securing clip
that extends the front wheel
2
first. Pull the front wheel out
from the frame, extending the
front part of the buggy frame.
PULL
THE FRONT
WHEEL OUT
Lock the securing clip once
the front wheel is extended,
3
so the front section of the
buggy frame is securely in
position.
Version 3