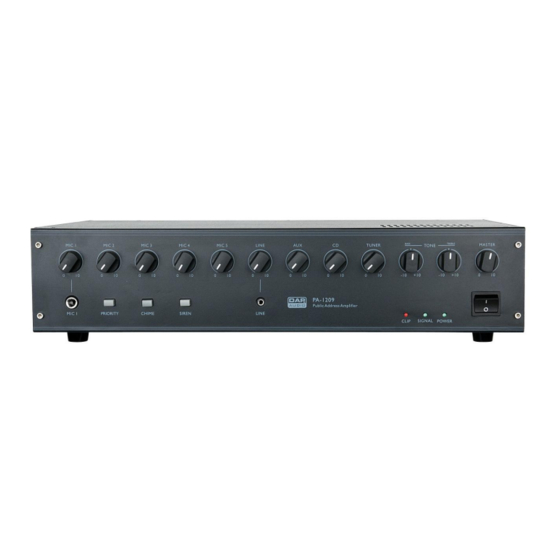
10. Bass control
Use to adjust the Bass frequencies to your preference.
11. Treble control
Use to adjust the treble frequencies to your preference.
12. Master control
Use to adjust the volume level to your preference.
13. Mic 1 input
Mic level balanced TRS jack input for channel 1. Accepts balanced and unbalanced inputs.
14. Priority button
Pushing this allows you to switch the PA-1209 in priority mode. In priority mode, all channels except
channel 1 are muted as a (optional) microphone connected to channel 1 picks up a sound.
15. Chime button
Pushing this button will start the chime.
16. Siren button
Pushing this button will start the siren.
17. Line input
3,5mm stereo mini jack input for connecting a line level device such as an I-pod, CD player etc.
18. Clip LED
The clip LED indicates peak levels at the output of the amplifier. If the clip LED frequently blinks or lights
continuously, the output is likely to enter clipping. If this happens, we strongly suggest lowering the master
(12) control.
19. Signal LED
Indicates an audio signal is present at the output.
20. Power LED
Indicates, the device is switched on.
21. AC power switch
This is the main Power switch. Press to turn the amplifier on.
Backpanel
Fig. 2
22. AC-selector
Before connecting your PA-1209 to the mains, make sure the AC-selector is set to the proper voltage
used in your country. If you're not sure, consult a skilled technician.
7
