D. ASSEMBLY
1
1
A
A
L
L
O
O
3
I
3
I
5
5
B
B
K
K
1. Attach the battery case (K) to the gearbox (A) with two small screws (N).
2. Insert the long joint at the back of the LED robot eyes onto the semi-circular joint at the front of the gearbox as shown.
3. Connect the three black wires from the robot's eyes, gearbox and battery case together in the gearbox's left hole with a terminal cap
(H) as shown. Repeat the process with the three red wires in the other hole.
4. Insert the bend in the middle of the robot foot (C) around the leg joint's (I) smaller hole. The wire should fit into the diagonal slots next
to the smaller hole as shown.
5. Insert the robot leg (B) into the leg joint. Make sure the robot leg is placed on top of the robot foot with the bend inserted around the
leg joint's big hole. Place a leg joint cover (J) over the leg joint. Secure the connection between the robot's leg and foot by screwing in a
flat top screw (M) into the leg joint hole that is closer to the robot foot.
6. Repeat step 5 & 6 to create the second robot leg. Each completed robot leg should look like this.
2
2
D
D
4
4
J
J
C
C
6
6
N
N
7
7
9
9
11
11
7. Slide the top of the robot leg up through the small horizontal hole at the right side of the gearbox. The robot foot should face inwards as
shown. Then secure the top hole of the leg joint to the circular joint at the bottom of the gearbox with a flat top screw. Repeat this process
with the other leg on the opposite side.
8. Attach the right robot arm (E) to the gearbox joint above the right leg joint with a flat top screw. The joint at the end of the arm should
press against the front of robot leg. This will allow the arms to move in sync with the legs. Repeat this process with the left robot arm (F)
on the left side of the robot.
9. Insert 2 x 1.5V AAA batteries. Secure battery case cover (L) on top with a small screw.
E. OPERATION
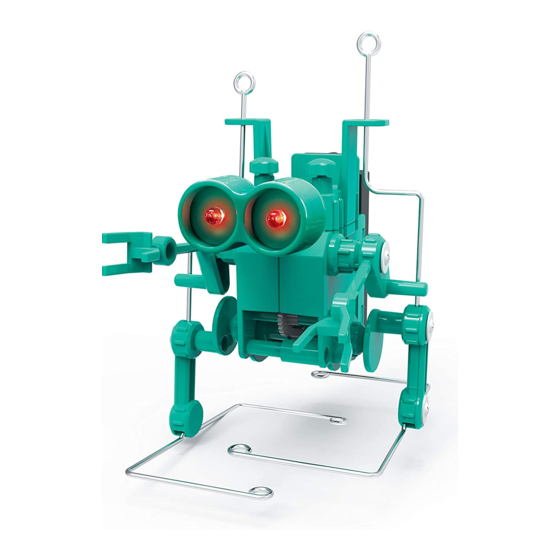
10. Turn the battery on by flipping the switch on at the top of the battery case.
11. The red LED eyes of your Wacky Robot will turn on while it walks! And watch the cool way the legs and arms move in sync with each
other.
12. Insert the optional jaw (G) included in this kit to the back of the LED robot eyes as shown to make the robot lookm ore wacky.
8
8
F
F
10
10
O FF
O N
O FF
O N
M
M
12
12
G
G
ON
OFF
ON
OFF
D
D
H
H