- ページ 5
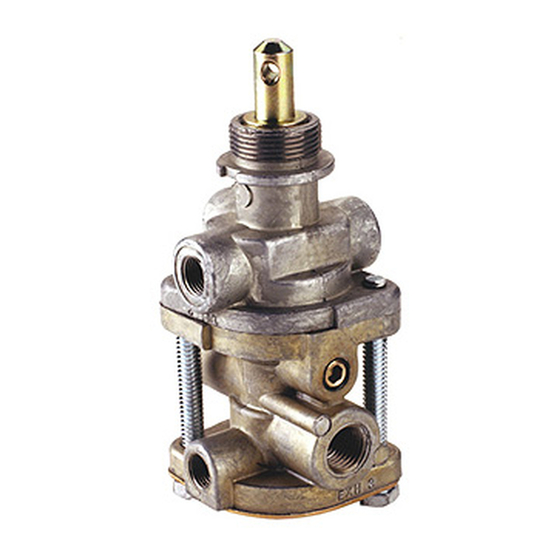
コントロールユニット BENDIX PP-7 TRAILER SUPPLY VALVEのPDF マニュアルをオンラインで閲覧またはダウンロードできます。BENDIX PP-7 TRAILER SUPPLY VALVE 6 ページ。 Trailer supply valve

PREVENTIVE MAINTENANCE
Important: Review the Bendix Warranty Policy before
performing any intrusive maintenance procedures. A warranty
may be voided if intrusive maintenance is performed during
the warranty period.
No two vehicles operate under identical conditions, as a
result, maintenance intervals may vary. Experience is a
valuable guide in determining the best maintenance interval
for air brake system components. At a minimum, the PP-7
valve should be inspected every 6 months or 1500 operating
hours, whichever comes first, for proper operation. Should
™
the PP-7
valve not meet the elements of the operational
tests noted in this document, further investigation and service
of the valve may be required.
OPERATING AND LEAKAGE CHECKS
To perform the following test, an accurate vehicle test gauge
installed in a spare hose coupling is required. The vehicle
dash gauge(s) should be checked for accuracy against
the test gauge prior to making these tests.
1. Block or hold the vehicle by means other than the
service air brakes.
™
2. With the PP-7
trailer supply valve button out and the
parking control valve in the exhaust, or brakes applied
position, build the air system pressure to governor
cut-out.
3. Apply a soap solution to the exhaust vent and the plunger
™
stem of the PP-7
valve to check for leakage. Leakage
should not exceed a 1 inch bubble in 5 seconds at either
point.
4. Depress the control button of the PP-7
a soap solution to the exhaust vent and the exhaust
port. Leakage should not exceed a 1" bubble in 5 seconds
at either point.
5. Install the test gauge and coupling on the trailer supply
coupling (tractor emergency hose coupling) at the rear
of the tractor.
6. Place the tractor parking control valve in the "brakes
released" position and observe an immediate rise in
pressure on the test gauge. The pressure registered on
the test gauge should equal dash gauge or system
pressure.
7. Apply a soap solution to the exhaust port of the PP-7
valve. Leakage should not exceed a 1" bubble in 5
seconds.
8. With the tractor air system at governor cut-out pressure,
shut off the engine and note the dash gauge pressure.
Quickly disconnect the test gauge and hose coupling
from the tractor-trailer supply line coupling. Leakage from
the tractor-trailer supply line should cease immediately
and button of the PP-7
air pressure after the performing of the preceding test
™
valve and apply
™
valve should be out. Dash gauge
should be within approximately 10 P.S.I. of the initial
pressure.
9. Reconnect the test gauge to the tractor-trailer supply
line and depress the button of the PP-7
the drain cocks of No. 1 and No. 2 service reservoirs
slightly. Note at what pressure (descending) the button
™
of the PP-7
tractor-trailer supply line. This should occur between
20-45 P.S.I. air system pressure.
™
If the PP-7
™
trailer supply valve fails to function as described
or if leakage is excessive, it is recommended that it be
returned to the nearest Bendix authorized outlet for a factory
remanufactured valve. If this is not possible, the valve should
be repaired using only genuine Bendix replacement parts,
in which case the following should prove helpful.
NOTE: Maintenance piece number 287367 kit is available
for the PP-7
all the necessary parts to completely repair it, from
any authorized Bendix outlet.
REMOVAL
1. Chock the vehicle wheels and drain all air system
reservoirs completely.
2. Disconnect all air lines leading to and from the PP-7
valve and mark them for proper reconnection.
3. Using a drift pin punch, remove the spirol pin (1) Fig. 2
which secures the button to the plunger. Remove the
button (2).
4. Using a 1-5/16 inch wrench, remove the special thin
nut which secures the PP-7
remove the valve.
DISASSEMBLY
1. Mark the upper and lower body halves to show their
relationship to each other.
2. Remove the two 1/4 inch-20 cap screws, that secure
the lower valve body to the upper valve body, using a
7/16 inch wrench. Separate the two body halves.
3. Remove and discard the square cut sealing ring (3)
between the upper and lower body halves.
4. Remove the end plate (4) and o-ring (5) from the lower
body and discard the o-ring.
5. Remove the control piston (6) and piston return spring
™
(7).
6. Remove the large (8) and small diameter o-rings (9) from
the piston and discard them.
7. Remove the internal truarc retaining ring (10) from the
lower body.
8. Remove the o-ring retainer (11) and remove and discard
the o-ring (12).
9. Remove the inlet exhaust valve (13) and return spring
(14).
™
valve pops out and exhausts the
™
trailer supply valve, which contains
™
valve to the panel and
valve. Open
™
5
