- ページ 2
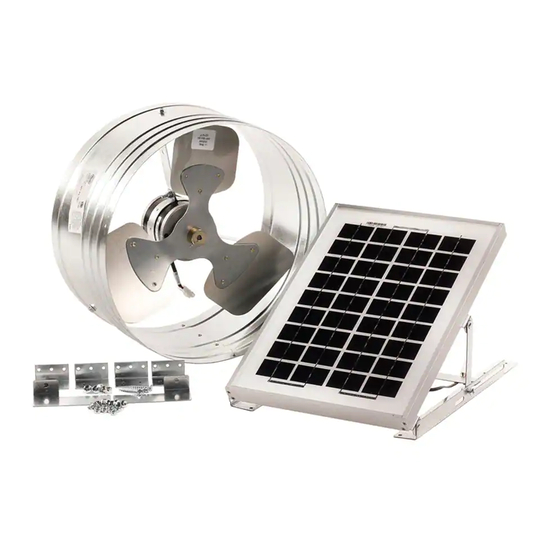
扇風機 GAF Master Flow Green Machine PGSOLARのPDF 取扱説明書をオンラインで閲覧またはダウンロードできます。GAF Master Flow Green Machine PGSOLAR 6 ページ。 Solar-powered gable vent

NOTE: Always ensure there is proper attic intake
ventilation at or near the soffit area of the roof. This
is required for a balanced ventilation system and to
help avoid premature ventilator motor failure. Use
the chart located on the outside of the package or
visit gaf.com/ventcalculator to ensure the minimum
recommended intake ventilation is installed on the
home. Always consult local building codes for
ventilation requirements.
1. Determine Location
Place Solar-Powered Gable Vent behind an
existing gable wall louver or install a Master Flow
Gable Louver (not included). The fan should be
approximately 3" (76 mm) to 4" (102 mm) away
from the exterior louver.
2. Attach Mounting Brackets To Unit
Carefully remove unit and mounting accessories kit
from the carton. The fan mounting kit included (8)
bolts, (8) Nylok
nuts, and (4) mounting brackets.
®
Take the mounting brackets (long side) and align
with the 2 holes on the shroud. With holes aligned,
take 2 bolts with the head on the inside of the shroud
and push through each hole. Take the Nylok
and fasten to each bolt. Repeat this process until all
4 mounting brackets are firmly fastened to shroud
(Figure 1a & 1b).
3. Mounting the Unit
Place mounting brackets so end is flush with the
stud. For studs 16" (406 mm) on center, mounting
brackets are predrilled to this size. Screw or nail unit
to framing through pre-punched holes in mounting
brackets (Figure 2a). For studs over 16" (406 mm)
on center, install two 2" x 4" (51 mm x 102 mm)
supports, 14" (357 mm) apart. Mount the unit to
the two 2" x 4" (51 mm x 102 mm) support through
the pre-punched holes in the mounting brackets
(Figure 2b).
V971247
4. Determine Location and Mount Solar Panel
Locate solar panel on the part of the roof closest to
the gable fan as possible. For optimal power, ensure
the solar panel faces south. Make sure the location is
not shaded by trees or other nearby structures during
the day (Figure 3).
Remove the included solar panel mounting kit from
the carton. The kit contains deck screws, (2) 1/4"-20
bolts, (2) Nylok
nuts, and (2) "L"-shaped wings.
®
Place the solar panel in the desired location,
making sure that the top rails extend at least 1.5"
(38.1 mm) above shingle course overlap. Align the
®
"L"-shaped wings making sure that the bolt hole in
each "L"-shaped wing is in the center of the short
slot in the rail. Use a grease pencil or chalk to trace
the outline of the "L"-shaped wings on the shingle as
shown in (Figure 4a).
Note: To avoid possible weather infilitration, do not place
the "L"-shaped wings or the top rails on the vertical
spaces between the shingle tabs.
Remove the "L"-shaped wings from the shingle and
lay the solar panel aside. At the location traced above,
nuts
carefully pry up the shingles and slide each "L"-shaped
®
wing under a shingle and align each wing with a deck
screw. Release and press the shingles into place (Figure
4b). Apply roofing cement or urethane sealant under the
shingles to secure them to the roof.
Carefully pry up the shingles where the top rails will
attach. Determine this location by aligning the solar
panel frame between the installed "L"-shaped wings
and centering the short slots in the rails with the
mounting holes in the "L"-shaped wings. Slide the top
rails under raised shingles and attach each rail to the
roof deck with a deck screw. Release and press the
shingles into place (Figure 4c). Apply roofing cement or
urethane sealant under the shingles to secure them to
the roof. Finish by attaching the "L"-shaped wings to the
rails with the bolts and nuts provided and tighten them
securely (Figure 4d).
INSTRUCTIONS
MODEL: PGSOLAR
Note: Excessive application of asphalt roofing cement
can cause blistering of shingles.
5. Adjust Solar Panel
When adjusting the solar panel, be sure to tilt the
panel to maximize direct exposure to the sun. To
tilt the solar panel, loosen the two screws/nuts
(Figure 5a) on the rail mount/linkage connection.
Then raise the panel to desired location and
re-tighten (Figure 5b).
Note: The optimum angle can be calculated by using
the approximate latitude of the house plus 20 degrees.
The solar panel should face south, when possible.
6. Connect Solar Panel to Gable Vent
Run included wire from solar panel to the gable
vent fan through an open slot in the exterior louver.
Be sure to route the wire around the gable fan
housing and to the motor (Figure 6). Complete
connection by aligning and fastening the two ends
of the wire connector.
CAUTION: THIS UNIT IS WIRED AT THE FACTORY AND
IS READY TO RUN. THIS FAN AUTOMATICALLY STARTS
WHENEVER A LIGHT SOURCE SHINES ON THE SOLAR
PANEL. ALWAYS EXERCISE CAUTION WHEN IN THE
VICINITY OF THE FAN.
Note: Nylok
®
is a registered trademark of Nylok
Corporation, LLC.
We protect what matters mos t
™
