- ページ 2
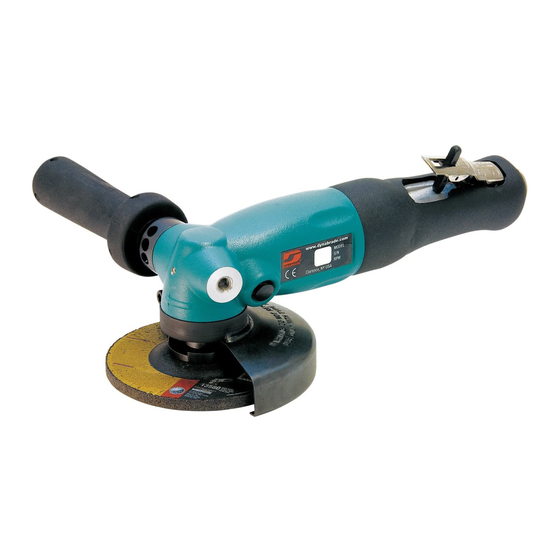
グラインダー Dynabrade 52633のPDF 運営とメンテナンスをオンラインで閲覧またはダウンロードできます。Dynabrade 52633 8 ページ。 4", 4-1/2", 5" right angle grinders

Warning: Always wear eye protection. Operator of tool is responsible for following: accepted eye, face, respiratory, hearing and body protection. Always use wheel guard. Make sure it is positioned to
best protect the operator and make sure it is securely fastened. Wheel guards that are worn, damaged or have been subject to a wheel breaking must be replaced.
Caution: Hand, wrist and arm injury may result from repetitive work, motion and overexposure to vibration.
• Keep hand and clothing away from working end of the air tool.
Operation: Be sure that any loose clothing, hair and all jewelry is properly restrained.
• Secure inlet bushing on air tool with a wrench before attempting to install the air fitting to avoid damaging housing assembly.
• BEFORE MOUNTING A WHEEL, after all tool repairs and whenever a grinder is issued for use, check tool RPM (speed) with tachometer with air pressure set at 90 PSIG
while the tool is running. If tool is operating at a higher speed than the RPM marked on the tool housing, or operating improperly, the tool must be serviced and corrected before use.
Warning: Wheel speed rating must be approved for at least the tool RPM rating. Check accessory manufacturer for details on maximum operating speed or special mounting instructions.
TYPE 27 Wheel Mounting
• Disconnect air source from the tool.
• Clean spindle and flange mounting surfaces. Inspect for nicks, cuts, sharp edges and thread wear.
• Use only Dynabrade model specific flanges. Install backup flange with raised boss facing outward as shown in diagram.
Warning: DO NOT use bushings or adapters to mount wheels with larger holes.
4" Models: Thread backup flange onto spindle and firmly secure with a wrench.
4-1/2" & 5" Models: Slide backup flange onto spindle thread and align slot over wrench flats.
• Check for flange flatness and runout by rotating spindle.
• Inspect wheels for cracks and/or defects before mounting. Abrasive may have been dropped without notice.
Warning: Never force a wheel onto raised boss.
• Before mounting wheel visually inspect for cracks and/or defects. DO NOT use a defective wheel.
• Install wheel center hole over the backup flange's raised boss as shown in diagram. Using spindle lock hand tighten wheel
onto tool spindle, then secure firmly with wrench. For 1/8" thick wheels, mount outer flange with raised boss
facing outward. Warning: Over tightening the flange can cause damage to the wheel and/or flanges.
• Remove flanges for threaded hub wheels. Thread wheel clockwise onto spindle. Check wheel is properly secure by engaging
spindle lock and attempt to rotate wheel. (Opposite direction of arrow on tool housing.)
• Position guard to best protect the operator.
• Connect tool to air source. Be careful NOT to depress throttle lever in the process. Do not expose air tool to inlet pressure above 90 PSIG or (6.2 Bars).
Warning: After installing the accessory, make sure that no one is in the unguarded plane of the wheel before starting the grinder. IN A PROTECTED AREA, test run the wheel at a reduced speed to
check for good balance. Gradually increase tool speed. DO NOT USE if tool vibration is excessive. Correct cause, and retest to insure safe operation. Test wheel at its free speed (RPM) in a protected
area for at least one minute before applying the wheel to the work.
• DO NOT engage spindle lock while spindle is rotating.
• Make sure that work area is uncluttered, and visitors are at a safe range from the tools and debris.
• Air tools are not intended for use in explosive atmospheres and are not insulated for contact with electric power sources.
• Use a vise or clamping device to hold work piece firmly in place.
• Do not apply excessive force on tool or apply "rough" treatment to it.
• Always work with a firm footing, posture and proper lighting.
• Ensure that sparks and debris resulting from work does not create a hazard.
• Always be aware of bystanders in work areas.
• This tool has side exhaust. Rotate muffler cover by hand to desired exhaust direction. Exhaust may contain lubricants, vane material, bearing grease, and other materials flushed through the tool.
Warning: Grinding certain materials can create explosive dust. It is the employers responsibility to notify the user of acceptable dust levels.
• Grinding can cause sparks which can cause fires or explosions. It is the users responsibility to make sure the work area is free of flammable materials.
• Use side handle provided to best control tool during grinding.
LUBRICATOR SETTING
1 DROP/MIN.
20 SCFM
• Check all connections and air hoses for good condition
and proper installation.
• Dynabrade Air Power Tools are designed to operate at
90 PSIG (6.2 Bar/620 kPa) maximum air pressure at the
tool inlet, when the tool is running. Use recommended
regulator to control air pressure.
• Ideally the air supply should be free from moisture.
To facilitate removing moisture from air supply, the
installation of a refrigerated air dryer after the
compressor and the use of drain valves at each
tool station.
OPERATING INSTRUCTIONS
Report to your supervisor any condition of the tool, accessories, or operation you consider unsafe.
Air System
(Sloped in the direction of air flow)
To Tool Station
Drain
Valve
Tool Housing
Direction Arrow
Back-Up
Flange
Outer Flange Nut
Closed Loop Pipe System
Regulator
Filter
Lubricator
Ball
Valve
➤
Drain
Air Hose
Valve
Air Tool
90 PSIG MAX
Drain Valve
(6.2 Bar)
2
Side View
Safety Guard
Type 27 Wheel
Spindle
Face of Wheel must be within bend of guard lip.
Air Flow
Refrigerated
Air Dryer
Ball
Valve
Air Flow
Air Compressor
and Receiver
