- ページ 5
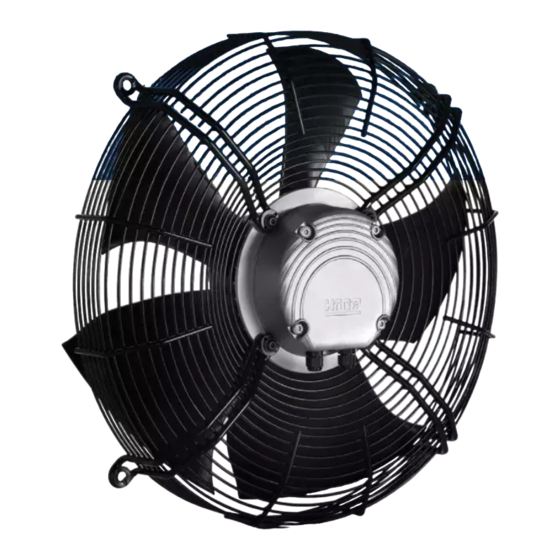
扇風機 HIDRIA R10R-63LPS-ES50B-03C11のPDF ユーザーマニュアルをオンラインで閲覧またはダウンロードできます。HIDRIA R10R-63LPS-ES50B-03C11 8 ページ。 Fan with electronically commutated external-rotor motor

04
INSTALLATION AND CONNECTION
This unit should only be installed by a qualified technician. Inspect the motor bearings for proper operation prior to installation.
Do not install the fan on an unstable surface. First install the device on the application, than connect the protective earth!
The method of fixing stated is not to depend on the use of adhesives since they are not considered to be a reliable fixing means.
Ensure that the air-gap between the fan impeller and the stationary housing is constant. Distortion due to an uneven surface of basis may lead to
a fan failure. Air-gap between blade and cone-inlet (housing) should be of min. 3 mm.
Fan must be fixed to stationary housing 4x M8 at 90° on diameter as indicated on enclosed technical drawing. Use screws with property class of
8.8. Secure all threaded joints with e.g. Loctite or by using self-locking screws.
The system manufacturer or the machine builder is responsible that the inherent installation and security information are harmonized with the
valid standards and guidelines (eg. EN 13857). To prevent dangerous situation and possible injuries the height and the diameter of inlet cone
must be appropriate dimensions.
The fan is primarily constructed for installation with rotor on bottom or with shaft in horizontal.
Main electrical installation must be protected against short circuit with fuse of 10A and installation must be constructed properly according to valid
national rules. An universal Residual Current Device (RCD or FID) type A or better (type B or B+) with sensitivity of 300mA and short time
delayed intervention can be used. In the case that the power supply system is implemented with a phase-to-phase voltage with a grounded star
point, residual current device type B must be used.
Recommended cable for connecting fan is at least 3x0.50mm² ordinary PVC cable acc. to IEC 60227-5 (eg. H05V2V2-F, 3G 0,5 mm²), no longer
than 2m, outer diameter max. 6.5mm for power supply and separated ordinary PVC cable (eg. H03VV-F, 5X 0,5 mm²) , no longer than 2m, outer
diameter max. 6.5mm for control circuit.
Fan performed with terminal box is as supplied fitted with a sealing plug in the cable glands as a preventive against ingress of water or moisture
inside the terminal box. If the cable is not installed through the cable gland, sealing plug must remain in the gland!
Cable-end of the fan must be connected in a dry environment to prevent that water penetrate through cable into motor housing.
Means for disconnection must be incorporated in the fixed wiring in accordance with the wiring rules.
The fan is intended only to be connected to the fixed wiring or application's circuit. An all-pole separating switch which must be incorporated to
wiring must disconnect also the fan.
The electrical connection must correspond to the enclosed connection diagram.
Secure connection cable to the fan guard grill or to the motor holder with cable fasteners.
The fan is constructed for installation with rotor on bottom or with shaft in horizontal.
Where the fan is installed in shaft-horizontal position, the cable exit on the motor must be in down position.
Before putting into operation, check the resistance of protective-earth circuit (max. 100 mΩ acc. to IEC 60335).
CONNECTING DIAGRAM : See page 2 of appended technical drawing 0310-4-0139
POWER CIRCUIT L, N, PE: black(L1), blue(N), green/yellow(PE).
- alarm rele contact: white(TK) - white(TK)
CONTROL CIRCUIT:
- 0-10V analog input : yellow(0-10V) - blue(GND)
- MOD BUS : green(RS-A) - brown (RS-B)
- Sensor supply : red(+10V) - blue(GND)
Control circuit is SELV isolated from main power supply (including an external power supply for sensors).
If the fan is equipped with connection terminals WAGO® (figure 1),
please follow the instructions for inserting the cable
into the connection terminal (figure 2):
1. Use screwdriver of 2.5 - 3.5mm width.
2. Push the spring of terminal pin.
3. Push the cable end into terminal.
4. Release the spring - screwdriver.
Dimensions:
See Appendix - technical drawing : VENTILATOR 0310-4-0139
© Copyright HIDRIA d.o.o., All rights reserved. Document is subject to change without prior notification.
USER'S GUIDE R10 AXIAL FAN , Code: 0000, Iss: 3.02.2020
Figure 1, terminals
Figure 2, instructions
5 / 8
