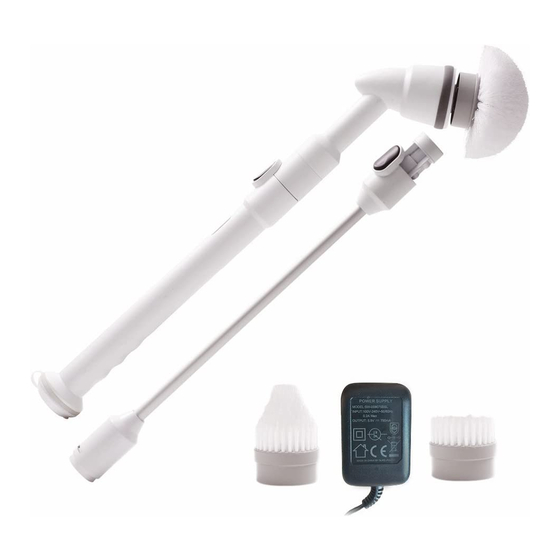
- ページ 2
洗浄装置 High Street TV Turbo Scrub Deluxe KitのPDF 取扱説明書をオンラインで閲覧またはダウンロードできます。High Street TV Turbo Scrub Deluxe Kit 2 ページ。

• Always store the unit indoors.
• To disconnect, turn all
controls to the OFF ("O")
• Keep hair; loose clothing, and
position, then remove plug
all parts of the body away from
from outlet .
moving parts.
• Do not operate any appliance
• Do not use the appliance
with a damaged cord or plug,
when charging cover is open.
or after the appliance
• Do not submerge the handle
malfunctions or is dropped or
in water or other liquid.
damaged in any manner.
Return appliance to the
• Use only as described in this
nearest author ized service
manual. Use only
facility for examination, repair,
recommended parts.
or electrical or mechanical
• Only use attachments
adjustment.
recommended or sold by the
manufacturer.
PLEASE RETAIN THESE INSTRUCTIONS
CHARGING INSTRUCTIONS:
Do NOT exceed 12 hours of consecutive charging. Doing so may
lead to shortened overall battery life. It is not necessary to wait until
battery power is fully depleted before recharging.
1. Be sure ON / OFF button on
5. Allow Turbo Scrub™ to charge for 3
"Handle" is in OFF position .
hours and 30 minutes. Red light will
remain lit when battery is completely
2. Open "Charging Port Cover" located
charged.
on bottom of "Handle" of unit.
6. When done, remove 'Wall Adapter "
3. Insert cable end of 'Wall Charger "
from unit and wall, and close "Charging
into "Charging Port."
Port Cover".
4. Plug 'Wall Charge r" into wall outlet .
Red light next to "Charging Port" will
blink RED to show unit is charging .
ASSEMBLY INSTRUCTIONS:
If using Extension Pole:
on "Head" and press together until
l . Be sure ON/OFF button on
you hear a "click."
"Handle" is in OFF position.
Without Extension Pole:
2. Line up connection tab of
1. Be sure ON/OFF button on
"Extension Pole" and "Release
"Handle" is in OFF position.
Button" of "Handle". Press together
2. Line up connection tab of "Head"
until you hear a "click."
and "Release Button" on Handle.
3. Line up connection tab of "Head"
Press together until you hear a
and "Release Button" on Extension
"click."
Pole. Press together until you hear a
3. To attach brush attachment of your
"click."
choice, simply line up tabs of Brush
4. To attach brush attachment of your
Attachment and "Brush Connector"
choice, simply line up tabs of "Brush
on "Head" and press together until
Attachment" and "Brush Connector"
you hear a "click."
OPERATION INSTRUCTIONS:
WARNING:
• Always use rubber gloves and
area. Always follow surface manufac-
proper eye wear to avoid contact
turer's guidelines for cleaning and
from splashing of soaps or
maintenance.
detergents on skin and/ or eyes while
• Do not use with abrasive cleaners
head is spinning and when brushes
on any surface.
are removed or attached.
• Avoid exposing the unit to exces-
• When done using Turbo Scrub™,
sive water. If Turbo Scrub™
turn unit off while brush is still in
accidentally becomes submerged in
contact with surface to avoid getting
water or water gets into "Charging
splashed with soaps or detergents .
Port", shake out liquid and allow
• Always test on a small, inconspicu-
Turbo Scrub TM to dry overnight .
ous area before using on a larger
l. Choose proper Brush Attachment
2. Wet the intended area and apply
and attach to Turbo Scrub™ as
desired cleaning product.
directed in Assembly Instructions."
3. Place tip of brush on surface to be
• All-Purpose Brush: Best for large
cleaned.
jobs, cleaning tile, and grout.
4. Being sure you have a firm hold of
• Corner Brush: Best for corners,
the handle, press ON/OFF button
once for HIGH speed or twice for
door tracks, and tight spaces .
LOW speed. If using on HIGH
• Heavy Duty Brush: Best for tough
speed, you will need to press
jobs, where you need to focus power
ON/OFF button twice to turn off.
on a certain area .
