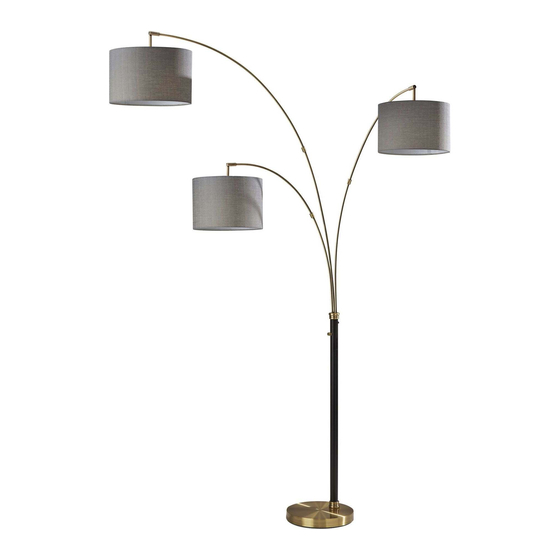
屋外ライト Adesso Bergen 4210-21のPDF 組立手順をオンラインで閲覧またはダウンロードできます。Adesso Bergen 4210-21 2 ページ。 3 arm arc lamp

Please visit our website or scan QR code to view
a Video on assembling our patent pending No
Tools Arms
A note on packaging:
Due to the fragile nature of this product, we have chose to use
Styrofoam only where it is needed to protect it and deliver the
best quality product to our customer. We are aiming to reduce
the use of plastic and styrofoam in the packaging of our
products where possible and are investigating more
environmentally friendly alternatives to use. We hope you
enjoy your purchase!
Assembly Instructions (English)
ASSEMBLY INSTRUCTION FOR
Bergen 3 Arm Arc Lamp
Model# 4210-21
Please begin assembly by laying all parts down on the ground. The
arms are easiest to assemble if you assemble them first, before they are
attached to the lamp body.
1. Assemble arc arms (A),(B) and (C) by placing the top arc tube into
the bottom arc tube and securing each arm by tightening each metal
collar joint (D). Simply slide joint (D) over the threaded tube and
screw down to tighen. If you have trouble here, slightly lift up the
upper arm to relieve the tension on the joint while screwing the parts
together.
Attention: Be sure to align the consistency of the curve on each
arm.Do not tighten the metal collar joints all the way yet. This way,
when you set the arms onto the base later, you can get the arm curves
perfect and then tighten the joints.
2. Fold the excess cord and insert into tube (F).
3. Place part (E) into tube (F), then tighten it with screw (N) .
the curved arms are facing the same direction as the switch when
tightening the screw.
4. Screw tube (F) and (G) together until tight
5. Remove the bushing (E) from the base and throw away.
6. Insert tube (G) into decorative accent (I), base (J) & washer (K), then
tighten it with nut (L) using wrench (M) from underneath the base.
You may need to pull any excess cord gently through the base.
Note: The Arc lamp should face forward with the arms reaching
over the base (see diagram below). Now you can make sure the
arm curves are aligned and tighten the joints.
7. Socket rings (P) comes pre-assembled to the sockets. Before placing
the shade onto the socket, please unscrew this socket ring.
8. Place shade (O) onto socket and tighten it with socket ring (P).
9. Now you can stand up the lamp.
GENERAL PRODUCT INFORMATION:
This product is suitable
for dry locations only.
---------------------------------------------------------------
IMPORTANT SAFETY INSTRUCTIONS:
This portable lamp has a polarized plug as a feature to reduce the risk of
electric shock (one blade is larger than the other). This plug will fit in a
polarized outlet only one way. If the plug does not fit fully in the outlet,
reverse the plug. If it still does not fit, contact a qualified electrician.Do not
use with an extension cord unless the plug can be fully inserted.
ALTER THE PLUG .
----------------------------------------------------
BULB TYPE :
Use only with maximum of 3*100 watt incandescent
bulbs or 3*26W CFL bulbs. (bulbs not included) Must use all
incandescent or all CFL bulbs.
PARTS DIAGRAM
(1) * Screw (G)
353 West 39
4210-21
Be sure
DO NOT
th
nd
Street 2
Floor New York, NY 10018
Tel: (212) 736 4440 Fax: (212) 736 4806
www.adessohome.com
1.0
