- ページ 2
レシーバー GAMA Electronics RF340-4PR-ASLのPDF 取扱説明書をオンラインで閲覧またはダウンロードできます。GAMA Electronics RF340-4PR-ASL 5 ページ。
GAMA Electronics RF340-4PR-ASL にも: 取扱説明書 (5 ページ)
WWW.GAMAINC.COM
Each Transmitter has its own unique internal address that is transmitted whenever a switch is pressed. The Receiver needs to be
programmed to respond only to Transmitters it is intended to operate with. The following steps configure the Receiver to operate with a
particular Transmitter(s). Up to thirty Transmitters can be programmed to one Receiver. Please read the entire programming procedure
before starting. Prior to programming the Receiver, verify that the Receiver is connected to the input power. When the Receiver enters
program mode, all previous transmitter addresses that were programmed will be erased from the Receiver's memory.
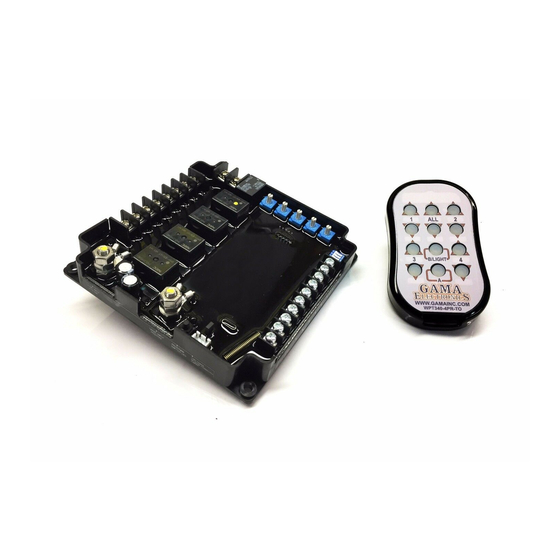
1. Locate the pushbutton labeled "PROGRAM" on the Receiver. Press and hold this button until the red LED next to the program button
illuminates (approximately 2 seconds). The Receiver is now in the transmitter program mode. Release the pushbutton. At this point all
previously programmed transmitter addresses are erased from the Receiver's memory.
2. Press and release any button on the Transmitter and verify that the red LED on the Receiver extinguishes and then illuminates (blinks
once). Release the button.
3. Repeat previous step for additional Transmitters that will operate with this particular Receiver. The red LED on the Receiver will
extinguish and illuminate one time for the first Transmitter being programmed, twice for the second, three times for the third, four times
for the fourth etc. The Receiver will not respond to Transmitters that have already been programmed.
4. After 5-seconds of no switch being pressed on the transmitter(s) the Receiver will return to normal operation. The red LED on the
Receiver will blink rapidly, then extinguish. The Receiver is now in the normal mode of operation. This completes the programming
instructions. The Receiver will retain all of its programming even when power is removed.
The automatic time out of the Receiver after last switch activation is adjustable from no time-out, up to 1-hour time-out. To turn the
Receiver on, first press and release the "A" button on the Transmitter. Within two seconds, press and release the "B" button on the
Transmitter. The LED on the Receiver will illuminate and the Receiver will now respond to transmitter commands and will automatically
turn off after the time set by the switch. The switch used to adjust the time-out set point is located on the Receiver and can be set for the
time shown in the tables below. When the Receiver is configured for no time-out, the transmitter is always active and does not require
the 2-button turn-on sequence.
Switch for Time-Out Set Point
DIP Switch Position 0: No Time Out, Always Active
DIP Switch Position 1: 1 Minutes
DIP Switch Position 2: 2 Minutes
DIP Switch Position 3: 3 Minutes
DIP Switch Position 4: 4 Minutes
DIP Switch Position 5: 5 Minutes
DIP Switch Position 6: 10 Minutes
DIP Switch Position 7: 15 Minutes
DIP Switch Position 8: 20 Minutes
DIP Switch Position 9: 25 Minutes
DIP Switch Position A: 30 Minutes
DIP Switch Position B: 35 Minutes
DIP Switch Position C: 40-Minutes
DIP Switch Position D: 45-Minutes
DIP Switch Position E: 50-Minutes
DIP Switch Position F: 55-Minutes
Programming Instructions
Automated Time Out Adjustments
RF340-4PR-ASL
Switch for Current Trip Set Point
DIP Switch Position 0: 1.0-Amperes
DIP Switch Position 1: 2.0-Amperes
DIP Switch Position 2: 4.0-Amperes
DIP Switch Position 3: 6.0-Amperes
DIP Switch Position 4: 8.0-Amperes
DIP Switch Position 5: 10.0-Amperes
DIP Switch Position 6: 12.0-Amperes
DIP Switch Position 7: 14.0-Amperes
DIP Switch Position 8: 16.0-Amperes
DIP Switch Position 9: 18.0-Amperes
DIP Switch Position A: 20.0-Amperes
DIP Switch Position B: 22.0-Amperes
DIP Switch Position C: 24.0-Amperes
DIP Switch Position D: 26.0-Amperes
DIP Switch Position E: 28.0-Amperes
DIP Switch Position F: 30.0-Amperes
Instruction Manual
Page 2 REV A 06/16/20