- ページ 7
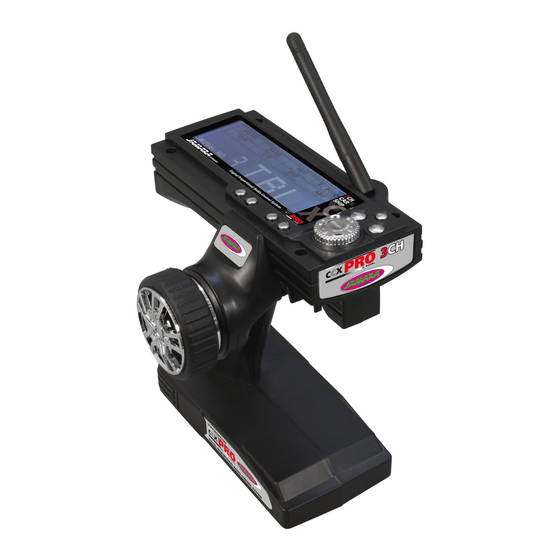
送信機 Jamara CCX ProのPDF インストラクションをオンラインで閲覧またはダウンロードできます。Jamara CCX Pro 12 ページ。 2,4 ghz
Jamara CCX Pro にも: 取扱説明書 (20 ページ), インストラクション (12 ページ), インストラクション (12 ページ), インストラクション (4 ページ), 取扱説明書 (16 ページ)

FR - NAME
Dans ce menu vous pouvez affecter un nom à chaque modèle (max. 3 lettres).
„Model No."
=
numéro du modèle
„ACB"
=
Abréviation
Appuyez sur la touche „Enter". Afin de sélectionner l'option „NAME" il faut tourner le bouton Enter.
La première lettre (ici le A) commence à clignoter. En tournant le bouton Enter vous pouvez choisir la
lettre souhaitée. En appuyant la touche „End" vous passez au champ suivant. Réitérez le processus
jusqu'à la troisième lettre. Lorsque vous avez renseigné votre identifiant appuyez sur la touche „Enter"
pour mémoriser.
Pour quitter le menu, appuyez sur „BACK".
Inversion du sens de rotation des servos
Channel:
numéro de canal de 1 à 3.
REV:
inversion du sens de rotation du servo
NOR:
sens de rotation normal
Appuyez sur la touche „Enter". Tournez celui-ci afin d'arriver au canal souhaité. Appuyez sur „END"
pour modifier le réglage. Le réglage clignote, choisissez maintenant le sens de rotation „REV" ou
„NOR" avec le bouton rotatif et confirmez en appuyant sur Enter.
E POINT
Avec ce réglage vous pouvez déterminer le débattement de vos servos. Si le servo de direction
devait avoir une course différente à droite ou à gauche en position extrême, vous pouvez ajuster
ceci avec cette fonction.
Valeur de sortie est de 100%.
Possibilité de réglage de 0 à 120%
Appuyez sur la touche Enter et sélectionnez „E POINT" dans le manu. Afin de déterminer le servo
à régler bougez le canal (1, 2 ou 3) (1 = direction, 2 = commande des gaz, 3 = touche canal 3).
Appuyez sur „END" afin de parvenir au niveau du réglage du canal. Appuyez sur „Enter" et sélecti-
onnez „E POINT" dans le menu. Programmé la valeur souhaitée et confirmez avec le bouton rotatif
et confirmez en appuyant sur Enter.
TRIM
Avec ce réglage vous pouvez déterminer la position de neutre des différents servos.
Valeur de sortie est de N00
Possibilité de réglage de L30 en passant par N00 jusqu'à R30 et de F30 en passant par N00 jusqu'à
B30.
L = gauche ; N = position centrale ; R = droite ; F = avant ; B = arrière
Appuyez sur la touche „Enter" et sélectionnez „TRIM" dans le menu. Le canal clignote. Appuyez sur
„END" afin d'arriver dans le mode de réglage du canal. Avec la touche rotative sélectionnez la valeur
souhaitée puis confirmez avec la touche Enter.
GB - NAME
In this menu you can assign a name to each model (max. 3 characters).
„Model No." =
model number
„ACB"
=
shortcut
Press „Enter". To select the option „Name" turn the enter button. The first letter (here A) starts to
flash. By turning the Enter button you can select a letter. Press the „End" key to switch to the next
letter. Repeat the process for the third letter. Once you have entered your code, confirm by pressing
the „Enter" key.
To exit the menu, press „BACK".
Servo reverse direction
Channel:
Channel number 1 to 3.
REV:
Reverse servo direction
NOR:
Normal servo direction
Press „Enter". Turn the knob to get to the desired channel. Press „END" to change the setting. The
setting is flashing, now select the button „REV" or „NOR" and press Enter.
E POINT
With this setting you can set the steering angle of your servos. If your steering servo differs at full
scale (left or right) differ, you can adjust it with this setting.
Output value is 100%.
Displacements from 0 to 120%
Press „Enter" and select „E POINT" in the menu. To select the servo direction, press the channel
(1, 2 or 3) ind the desired direction (1 = wheel, 2 = throttle, 3 = third channel key). Press „END"
to enter the setting of the channel. Select with the rotary knob to set the value and press Enter to
confirm the value.
TRIM
With this setting you can set the neutral position of the servos.
Output value is N00
Setting of L30 to N00 to R30 and F30 to N00 and B30.
L = left, N = zero, R = Right, F = Forward B = Back
Press „Enter" and select „TRIM" in the menu. The channel will flash. Press „END" to enter the setting
of the channel. Select with the rotary knob to set the value and press Enter to confirm the value.
7
