- ページ 5
芝生とガーデン用品 Gardena C 1030 plusのPDF 取扱説明書をオンラインで閲覧またはダウンロードできます。Gardena C 1030 plus 15 ページ。 Water computer
Gardena C 1030 plus にも: 取扱説明書 (15 ページ)
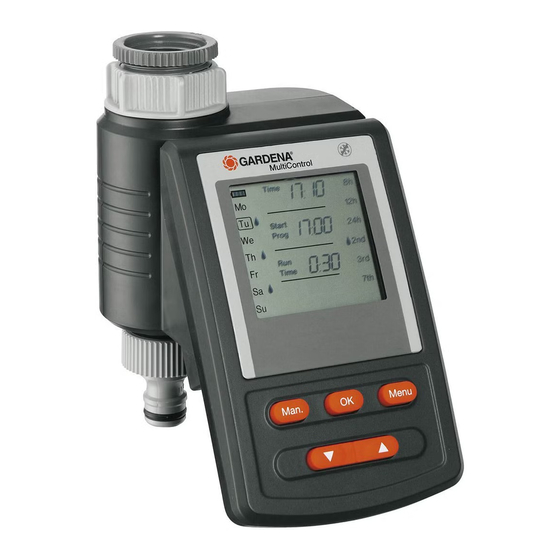
4. Putting Your Water Computer into Operation
Insert battery:
E
Connect Water Computer :
H
G
I
Connect soil moisture
or rain sensor (optional) :
E
J
The Water Computer must only be operated with a 9 V alkali-
manganese (alkaline) battery type IEC 6LR61.
E
1. Remove controller
housing of the Water Computer.
2. Insert battery in the battery
F
compartment
. Observe
z
correct polarity
P
shows all the LCD-symbols for
2 seconds and then moves to
the time / day of week level.
E
3. Install controller
The Water Computer is fitted with a sleeve nut
(G 1 " ) (33.3 mm) thread. The adaptor supplied
Water Computer to be connected to taps with a (G ³⁄₄ " ) thread
(26.5 mm).
1. For tap with a G ³⁄₄ " (26.5 mm) thread :
H
Screw adaptor
on to the tap manually (do not use pliers).
G
2. Screw sleeve nut
thread by hand (do not use pliers).
3. Screw tap connector
Apart from scheduled watering there is also the option of including
how damp the soil is or rainfall into the watering programme.
If the soil is damp enough, the programme will be stopped, or a
programme will be prevented from starting. Manual operation via
Man. On / Off is unaffected by this.
The "Soil moisture sensor-controlled watering" mode can only be
selected when using a soil moisture sensor.
E
1. Remove controller
2. Place soil moisture sensor in the watered area
– or –
place rain sensor (with extension cable if necessary)
outside the watered area.
3. Insert the sensor in the sensor connection
Computer.
An adapter cable may be required to connect older sensors,
which can be purchased from GARDENA Service,
GARDENA Adapter cable Art. No. 1189-00.600.45.
from the
z
P
. The display
on the housing again.
of the Water Computer on to the adaptor
I
on to the Water Computer.
from the housing of the Water Computer.
F
G
for taps with
H
allows the
J
of the Water
5