- ページ 4
アビオニクス・ディスプレイ Garmin GMA 340のPDF 補足取扱説明書をオンラインで閲覧またはダウンロードできます。Garmin GMA 340 10 ページ。 Audio panel
Garmin GMA 340 にも: パイロット・マニュアル (12 ページ), パイロット・マニュアル (4 ページ), パイロット・マニュアル (8 ページ), インストレーション・マニュアル (43 ページ), パイロット・マニュアル (8 ページ), パイロット・マニュアル (12 ページ)

Section 9
Cirrus Design
Supplements
SR20
A fail-safe circuit connects the pilot's headset directly to the COM1
transceiver in the event of a power failure to the audio control panel or
the panel is switched 'OFF.'
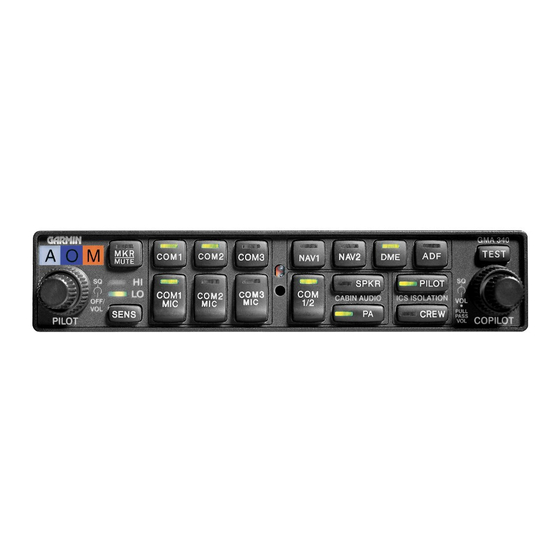
Test
Pressing the TEST button illuminates all Panel LEDs and the Marker
Beacon Annunciators full bright. During normal operation, a photocell
mounted at the approximate center of the control panel senses
ambient light to allow automatic LED and annunciator intensity
adjustment. Nomenclature dimming is controlled by the INST lights
control on the instrument panel bolster.
Audio/Transceiver Selection
Audio selection is performed through the eight selector push buttons in
the center of the Audio Control Panel. All audio selector push buttons
are push-on, push-off. Selecting an audio source supplies audio to the
headphones or cabin speaker. Selected audio sources are indicated
by illumination of the push-button switch.
Navigation receiver audio source is selected by depressing NAV1,
NAV2 (if installed), MKR, DME (if installed), or ADF (if installed) will
select that radio or device as the audio source. Audio level of
navigation receivers is controlled through the selected radio volume
control.
Transceiver audio is selected by depressing COM1, COM2, or COM3
(if installed). When the audio source is selected using the COM1,
COM2, and COM3 buttons, the audio source will remain active
regardless of which transceiver is selected as the active MIC source.
Both transceiver audio and MIC (microphone) can be selected by
depressing COM1 MIC, COM2 MIC, or COM3 MIC (if installed). Both
pilot and copilot are connected to the selected transceiver and both
have transmit and receive capabilities. Pilot and copilot must use their
respective Push-To-Talk (PTT) switch to transmit. The intercom will
function normally. During transmissions the active transmitter's COM
MIC button LED blinks at a 1 Hz rate indicating active transmission.
Split COM Function
Pressing the COM 1/2 button activates the split COM function. When
split COM is active, COM 1 is the pilot mic/audio source and COM2 is
4 of 10
P/N 11934-S01
Revision 1: 07-18-05
