- ページ 5
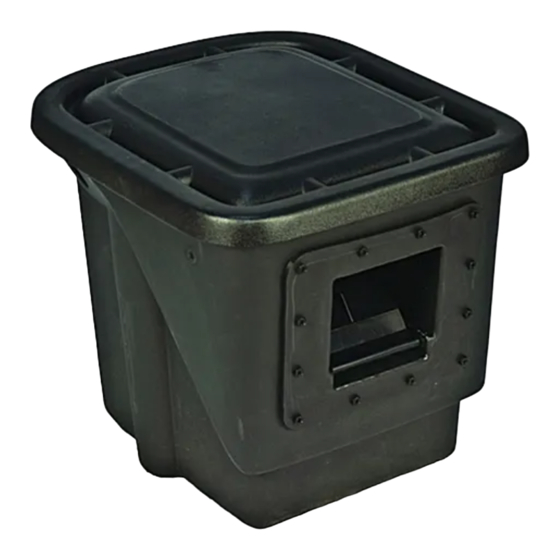
芝生とガーデン用品 AquaScape Signature Series 200のPDF 使い方とメンテナンスをオンラインで閲覧またはダウンロードできます。AquaScape Signature Series 200 16 ページ。 Pond skimmer
AquaScape Signature Series 200 にも: 使い方とメンテナンス (16 ページ), 取り付け方法とメンテナンス (16 ページ)

• Make sure the excavated area under the skimmer is
compacted and level.
• The skimmer should be excavated down to a depth so
that the proposed water level in the pond is approximately
¾" below the top of the opening of the skimmer.
(See Ex. 4) If installing on an existing pond use the known
water level as your guideline on how deep to excavate the
skimmer.
• Re-check all your measurements, including length and
width of pond, plant shelf depth, and overall pond depth.
STEP 4
INSTALLING THE SKIMMER
• You've already roughed out
a hole approximately 21"(l) x
18" (w) x 18" (h) deep during
the excavation phase. Use
a 2' bubble level in order to
make sure your skimmer is
properly set into position.
Your skimmer should be
level from side to side and
front to back.
• If installing the optional overfl ow you will need to drill a hole
for a 2" bulkhead fi tting using a 3" hole saw in the back of
the skimmer. Information on the fi ttings required to install
the optional overfl ow can be found in the replacement
parts section located on page 8 of this manual. There
is a drill point in the plastic approximately 3 1/2" below
the top edge for reference. Install the bulkhead into the
hole following the orientation in Ex. 5. A barb fi tting or
PVC fi tting can then be threaded into the bulkhead. Use
silicone sealant or tefl on thread tape on the threads of the
www.aquascapeinc.com |
Ideal Water Level
3/4" Below
Soil Level on
1st Shelf
Front of Skimmer
Ex. 4
CAN 1-866-766-3426 |
pipe fi ttings, in order to help provide a watertight seal. The
pipe for the overfl ow can be connected later in the project,
during step 7.
Optional Overfl ow Fitting Orientation
Rubber
Bulkhead
Gasket
• Make sure skimmer is set so the desired water level in
the pond is approximately ¾" below the top of skimmer
opening. (See Ex. 11 on previous page)
Attaching the skimmer faceplate
WARNING
Power tools are not recommended for installing the
screws and may strip the nut inserts
• Position the liner against the
skimmer opening, making sure
there is slack below the opening.
This will help reduce tension
on the faceplate when placing
boulders in front of the unit. Use
your fi nger or a screwdriver to
mark the outer perimeter of the
skimmer opening on the liner.
(See Ex. 6)
• Mark a second box 1.5" inside
of it. This insures that you don't
cut too much of the liner, which
would result in a possible leak.
(See Ex. 7)
• Cut the inner box using a pair of
scissors, and insert the skimmer
faceplate into the hole.
(See Ex. 8)
• Make sure skimmer faceplate
is in the upright position. The
hinge should be at the bottom.
(See Ex. 9)
• Temporarily install the faceplate
and liner to the skimmer using
two screws in the upper corners.
Using an awl or nail poke the
fi rst hole in the liner all the way
through to the inside of the fi lter
box. Be careful not to damage
the threads on the nut inserts
when punching the holes with the awl. Remove the awl or
nail while holding the faceplate and liner in place and begin
US 1-866-877-6637
Plastic
Washer
Barb Fitting
Nut
Ex. 5
Ex. 6
Ex. 7
Ex. 8
Ex. 9
5
