b.
Plumbing
The heater must be connected to the mains cold water supply. This must have a minimum running pressure of 69kPa
(0.7 bar, 10 psi) and a maximum pressure of 690kPa (7.0 bar, 100 psi).
Before connecting the pipe work to the shower, ensure that pipe work is flushed out.
1.
It is recommended that a WRAS (Water Regulations Advisory Scheme) listed isolating valve is fitted to the incoming
mains cold water before the shower unit. This will allow the unit to be serviced or exchanged without having to turn
off the water at the water stop valve.
2.
The heater can be fed from a header tank provided this has a minimum head of 7 metres (23ft).
3.
Ø15mm copper or stainless steel pipe should be used.
To avoid cross threading, DO NOT REMOVE the brass nut from the elbow when positioning the pipe.
If top entry is required, turn the elbow 180° into the required position.
If rear entry is required, treat as top entry with an additional "Yorkshire" elbow (soldered type) for fitting i nto the rear
channel.
In multiple, correct pipe work sizes should be calculated to maintain adequate flow to each shower.
4.
It is permissible to use a WRAS (Water Regulations Advisory Scheme) approved sealant sparingly whilst avoiding
excess finding its way into the shower operating parts.
5.
With isolating valve connected, flush the pipe work through to remove any particles etc, before making the final
connection to the shower. Blockage in the water ways (particularly the handset and solenoid valve) will prevent the
heater working properly. Note: You may be charged for a service call if it is due to incorrect installation.
6.
The shower is designed to have an open outlet and should only be used with "Creda" recommended fittings.
Do not connect the handset until after the shower front cover and corner section are fitted.
WARNING: DO NOT FIT A TAP ON THE SHOWER OUTLET.
TAKE CARE TO AVOID RESTRICTING THE OUTLET OF THE PRESSURE RELIEF DEVICE
c) Electrical
The electrical installation must be in accordance with the current BS.7671 (IEE Wiring Regulations) and Part "P" of the
Building Regulations.
1.
The shower is designed for a single phase AC electrical supply.
Please check the rating plate on the unit to see what details apply to your unit.
AS A GUIDE ONLY
(* Only applies if external earth impedance is less than 0.35 Ohms)
Rating
Cable Sizes
6.0mm²
8.5 / 7.8kW
240 / 230V
10.0mm²
and
6.0mm²
9.5 / 8.7kW
240 / 230V
10.0mm²
.
10.5 / 9.6kW
240 / 230V
10.0mm²
Remember to upgrade the cable if it runs in thermal insulation in a loft , or for a longer distance.
2.
A means for disconnection in all poles must be incorporated in the fixed wiring in accordance with the wi ring rules.
We recommend a ceiling switch mounted in a convenient position.
3.
Cut back cable as in diagram 9. Connect cable to terminal block making sure that all the retaining screws are
VERY tight and that no cable insulation is trapped under the screws.
4.
WARNING: THIS APPLIANCE MUST BE EARTHED
Fuse / MCB
Cable Length
21m Max.
40A Type B MCB
35m Max.
12m Max.*
45A BS.1361 fuse
21m Max.*
45A BS.1361 fuse
12m Max.*
6
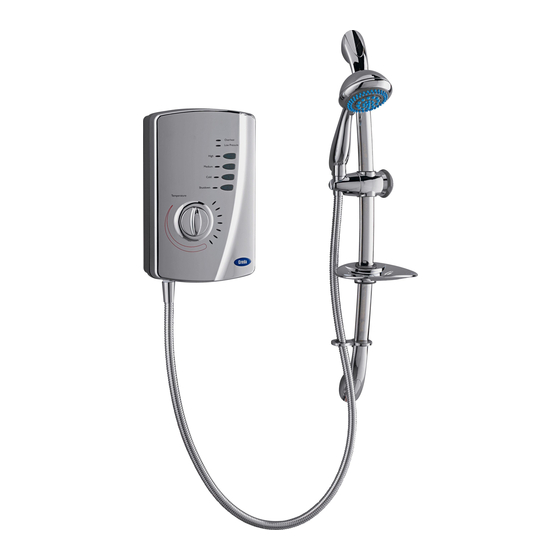
How your Creda Shower Works
Your shower is designed for convenience, economy and safety of use.
1. Water is heated instantaneously as it flows over the heating elements in the copper cylinder (diagram 2)
2. The required water temperature is achieved by adjusting the rate of water flow.
Diagram 3 shows the principle involved in relating temperature rise to flow rate.
The higher the water rate the lower the temperature rise and vice versa. The temperature
of the water supplied from the mains can vary considerably throughout the year from 5 to
20°C. This means that in the winter, flow rate will be less than in the summer to achieve
the same outlet temperature.
In summer the "MEDIUM" power setting may give adequate hot water.
3. The heaters are only switched on when sufficient water is flowing.
This is done automatically by a switch which works on water pres sure.
4. The water is turned on and off by the solenoid valve built into the shower.
This is switched on by button "A", "B" or "C".
5. The flow of water is automatically held at the leve l set by the user even though the supply pressure may vary
(See "How to use your shower" note 6).
6. If the water supply falls below a set limit, the pressure switch will operate and switch off
the power to the elements. This is indicated by the "low pressure" light illuminating
(see "How to use your shower" note 7).
7. As a further safeguard, a thermal cut-out switches the power off if the water
temperature climbs above the set limit and the "overheat" light will come on.
This cut-out gives an audible click when switching off, but will reset itself if cold water is
run through the shower for 10 to 20 seconds, and the "overheat" light will go out.
8. The pressure relief device is to s afeguard against abnormal pressure conditions, and
provides a level of appliance protection should an excessive build up of pressure occur
within the shower.
9.
There are a number of defined spray plate setting modes (patterns) adjustable by
rotating the spray plate (see diagram 4).
These modes (patterns) have a positive click to identify them.
The spray plate rotates through a full circle (360°).
IN ORDER TO MAINTAIN THE PERFORMANCE OF YOUR SHOWER,
YOU MUST CLEAN THE SHOWERHEAD REGULARLY.
All water contains particles of lime -scale, which build up in the showerhead and unit
reducing the performance. It is therefore important to clean the showerhead by simply
rubbing the rubber nozzles, or soaking in a proprietary lime -scale remover and rinsing
thoroughly before use.
NOTE: After use it is normal for some water to drip from the showerhead for a few
moments. This inhibits scale build-up over prolonged use.
3