スイッチ Crestron 8x8 DigitalMedia DM-MD8X8のPDF クイック・スタート・マニュアルをオンラインで閲覧またはダウンロードできます。Crestron 8x8 DigitalMedia DM-MD8X8 4 ページ。 8x8 digitalmedia switcher
Crestron 8x8 DigitalMedia DM-MD8X8 にも: パンフレット (3 ページ)
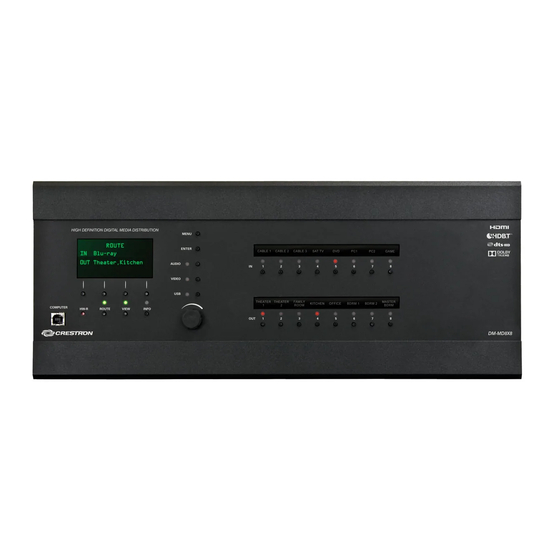
DM-MD8X8/16X16/32X32
1
Before Starting
CAUTION: Do not connect power cords until instructed to do so.
!
NOTE: Before beginning any of these QuickStart procedures, make
certain that all DigitalMedia
™
cables are installed throughout the home.
NOTE: Unless stated otherwise, all illustrations and procedures apply
equally to all switchers.
2
Install/Replace Input/Output Cards
Input and output cards are typically installed prior to shipment of the
DigitalMedia switchers. If, however, input cards (or output cards for the
DM-MD8X8/32X32 only) need to be installed or replaced in the field,
follow the instructions below. For more information, refer to the latest
version of the DigitalMedia Card Installation Guide (Doc. 6757), available
from the Crestron website (www.crestron.com/manuals).
CAUTION: Input and output cards are electrostatic-sensitive devices.
!
Wear a grounding strap or touch the metal chassis of a known
grounded device before handling and installing cards.
NOTE: Make sure that the power cord is not connected before
installing any input or output cards.
A. Remove screws securing the card to be replaced or the plate covering
the card slot to be used. Insert the card into the slot side rails, and make
certain the card is fully seated before using the attached screws to secure it
in position. (Leave cover plates in place on unused card slots.)
3
Connect Outputs
The illustration immediately to the right shows the special connectors used for
the three cables contained within Crestron's DigitalMedia
HDMI cable, and CresFiber with an SC50UM connector. Refer to the illustra-
tions at the far right for typical wiring configurations.
A. Use DigitalMedia cable (DM-CBL-P or DM-CBL-NP), to connect switcher
outputs directly to a DM-RMC-100 Room Controller. If required, first connect to
a DM-DR Repeater and then connect the output of the Repeater to the Room
Controller.
For detailed instructions on operation and setup of the DM-DR Repeater and
the DM-RMC-100 Room Controller, refer to the latest version of their respective
Operations & Installation Guides (Doc. 6745 and Doc. 6743).
B. Use HDMI cable, CBL-HD, to connect HDMI outputs to a local HDMI
display/receiver.
C. Use two CresFiber cables to connect the 'D' and 'M' fiber outputs to the
corresponding connectors on a local DM-RMC-100-F. DMNet control data is
carried along with video data on the 'D' cable.
1
For details, refer to the latest version of the DM-MD8X8/16X16/32X32
™
DigitalMedia
Switchers Operations Guide, Doc. 6755.
QUICKSTART DOC. 6756D (2022813, 1 of 2)
DigitalMedia
™
Switchers
B. Cards may be installed in any of the slots provided,
but it is suggested that the cards be installed into the
slots in numerical order.
Typical Input Card
Installation
DM-MD8X8
Input Slots 1 - 4
Output Slot 2
™
cable, plus CBL-HD
www.crestron.com
04.10
©2010 Specifications subject to
change without notice.
DM-MD16X16
Input Slots 1 - 8
Output Slot 1
Input Slots 5 - 8
NOTE: Output cards for the DM-MD16X16 are
not field configurable. If you need a different
configuration, contact Crestron customer service.
'D' Video
Data
'M' Data
Management
'D' Video Data
HDMI Output
'M' Data Management
'DMNet' Control & Power
'DMNet'
Control & Power
'D' Video and
Control Data
CBL-HD - HDMI Output
'M' Data
Management
CresFiber - CONN-SC50UM
888.273.7876
201.767.3400
All brand names, product names, and trademarks
are the property of their respective owners.
DM-MD32X32
Output Slot 1
Input Slots 9 - 16
Input Slots 1 - 16
Output Slot 2
DM-CBL-P
or
DMCO-22
DM-CBL-NP
DM-DR
Repeater
DMCO-11
Local HDMI
Display/Receiver
CBL-HD
CresFiber
DM-RMC-100-F
Output Slots 1 - 4
Input Slots 17 - 32
Output Slots 5 - 8
DM-CBL-P
or
DM-CBL-NP
DM-RMC-100
Room Controller