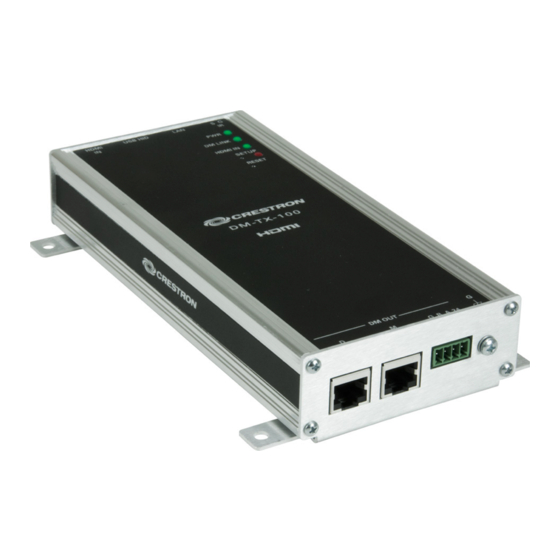
送信機 Crestron DigitalMedia DM-TX-300FのPDF クイック・スタート・マニュアルをオンラインで閲覧またはダウンロードできます。Crestron DigitalMedia DM-TX-300F 2 ページ。 Digitalmedia transmitters

DM-TX Series
1
Before Starting
CAUTION: Do not connect power cords until instructed to do so.
!
NOTE: Before beginning any of these QuickStart procedures, make
certain that all DigitalMedia
cables are installed throughout the home.
™
2
Mounting
The DM-TX-100/100-F has attached mounting brackets and is
designed to be mounted on a flat surface or attached to a rack rail in
the back of an equipment cabinet. It may also be used portably for
connection to a wall plate input, and is compact enough to fit discreetly
inside a presentation lectern or beneath a table.
The DM-TX-200, supplied with a mounting bracket and attaching
screws, is designed to be mounted on a flat surface and can even be
concealed inside a raceway.
The DM-TX-300N/300N-F is designed to be mounted in an equipment
rack using supplied "ears." These ears must be installed prior to
mounting the unit. The only tool required is a #2 Phillips screwdriver.
WARNING: To prevent bodily injury when mounting or servicing this
!
unit in a rack, take special precautions to ensure that the system
remains stable. The following guidelines are provided to ensure your
safety:
•
When mounting this unit in a partially filled rack, load the rack
from the bottom to the top with the heaviest component at the
bottom of the rack.
•
If the rack is provided with stabilizing devices, install the
stabilizers before mounting or servicing the unit in the rack.
NOTE: If rack mounting is not required, rubber feet are provided for
tabletop mounting or stacking. Apply the feet near the corner edges on
the underside of the unit.
NOTE: Reliable earthing of rack-mounted equipment should be
maintained. Particular attention should be given to supply connections
other than direct connections to the branch circuit (e.g., use of power
strips).
1
For details, refer to the latest revision of the DM-TX-100, DM-TX-200,
and/or DM-TX-300N series DigitalMedia
6741, or 6907, respectively.
QUICKSTART DOC. 6804C (2024043)
DigitalMedia
Transmitters
™
Optional rack
rail mounting.
Transmitter Guides, Doc. 6810,
™
www.crestron.com
©2010 Specifications subject to
change without notice.
01.10
DM-TX-100/100-F
HDMI
USB HID
LAN
S G
IN
IR
PWR
Mounting Brackets (2)
DM LINK
Use appropriate hardware (not
HDMI IN
SETUP
supplied) to mount unit.
RESET
DM-TX-100
DM OUT
G
D
M
G B A 24
DM-TX-300N/300N-F
Mounting Ears (2)
Remove and use the three screws on each
side to attach the "ears" to the unit for rack
mounting. Do not attach if unit is to be placed
on a shelf or stacked. (Refer to NOTE at left.)
888.273.7876
201.767.3400
All brand names, product names, and trademarks
are the property of their respective owners.
DM-TX-200
Mounting Bracket
Use two screws (supplied) to
attach to unit for flush mounting.
Do not attach if unit is to be placed
in a raceway.
