- ページ 26
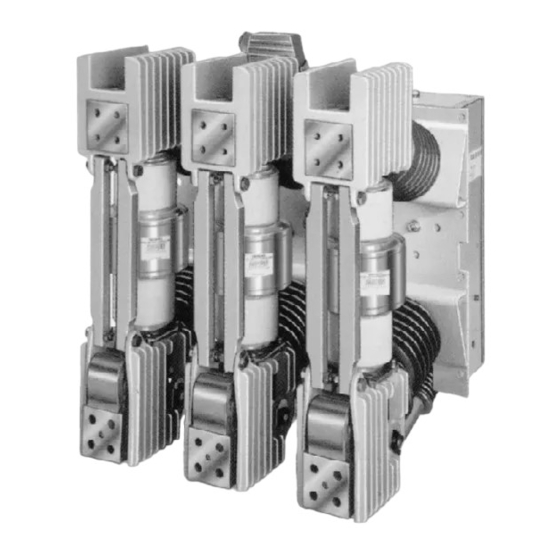
産業機器 Siemens 3AHのPDF 取扱説明書、インストール、操作、メンテナンスをオンラインで閲覧またはダウンロードできます。Siemens 3AH 33 ページ。 Vacuum circuit breaker operator module
Siemens 3AH にも: インストレーション オペレーション&メンテナンス (20 ページ), 取扱説明書 (38 ページ)

Overhaul
2.5 Attach struts (28) to the upper pole support (20)
replace hardware (M10), but do not tighten at this
time.
2.6 Couple levers (48.6) to the eyebolt (36.3), using
the pin supplied. Apply retention clips. Appro-
priate pin is modestly chamfered, not to be con-
fused with pin or the insulated coupler.
2.7 Raise terminal clamp (29.2) against the spacer
(29.3) on the movable terminal of the vacuum tube
(36.1) and position the interrupter (30) so that its
groove faces the connecting surface of flexible
strap (29.1). Refer to Figure 18 and employ tech-
nique illustrated to fasten terminal clamp. Note
opposing wrenches. Tighten the bolt(s) of the ter-
minal clamp to a torque of 40 Nm (30 ft. lbs.), tak-
ing care to see that the terminal of the interrupter
is not subjected to excessive bending movement.
NOTE: Excessive bending movement exerted while
fastening the terminal clamp will damage the vacuum
interrupter.
2.8 Align pole support (20) correctly and tighten bolt
fastening it to the post insulator. Fasten securely
all bolts associated with struts (28).
2.9 Tighten interrupter fastening bolt (31.2) on the up-
per pole support (20) holding the interrupter firmly
by its upper insulator and operate levers (48.6),
by hand, to see whether the movable contact
moves freely. If any binding or lack of freedom is
noted, loosen bolt (31.2) and adjust the interrupter
in pole support by turning and moving it slightly.
2.10 The centering ring (28.1) has been loose and "float-
ing" during installation of the vacuum interrupter.
Check that the movable contact is free to move
vertically without binding, and then tighten the
hardware which secures the centering ring. Re-
check that the movable contact is free to move
vertically without binding.
2.11 Attach insulating coupler (48) and lever (48.6) to-
gether, using pin (48.5). Apply retaining clips.
Correct pin has ends which have been generously
chamfered.
2.12 Open and close breaker several times and then
check to see that all bolted joints and devices are
tight.
3. Checking the Contact Stroke
3.1 Open the circuit breaker.
3.2 Free insulating coupler (48) by removing pin
(48.5). The interrupter contacts must now close
automatically as a consequence of atmospheric
pressure.
3.3 Observe the terminal clamp (29.2) through the
openings on each side of the lower pole support
(40). Using vernier calipers measure the distance
from the bottom surface of the terminal clamp to
the bottom edge of the cutout opening. Measure
carefully and record your result.
3.4 Connect the insulating coupler (48) using pin (48.5)
and the retaining clips provided.
3.5 Repeat the measurement described in step 3.3
again with care to maximize accuracy. Record
your result.
3.6 Determine difference between the measurements
made under steps 3.3 and 3.5. Your result should
be 19-20mm (0.748-0.787 in.)
3.7 If you fail to achieve the listed results carefully,
repeat the entire procedure making certain of your
measurements.
3.8 Loosen locking nut on eyebolt on insulated cou-
pler (48), and retain position of the eye. Make
adjustments in one-half turn increments. After
adjustment is completed, tighten eyebolt locking
nut to 26-34 ft-lb. (35-45 Nm).
4. After eyebolt is tightened to proper torque, repeat all
measurement procedures, making certain they are in
agreement with values indicated in 3.6.
5. Complete all other maintenance procedures. Com-
pletely reassembled breaker should pass high poten-
tial test before it is ready for service.
Hydraulic Shock Absorber
The 3AH mechanism is equipped with hydraulic shock ab-
sorber and a stop bar that functions when the breaker
opens. See item 61.8, (Figure 6). The shock absorber
should require no adjustment. However, at maintenance
checks, the shock absorber should be examined for evi-
dence of leaking. If evidence of fluid leakage is found, the
shock absorber must be replaced to prevent damage to
the vacuum interrupter bellows.
25
