- ページ 29
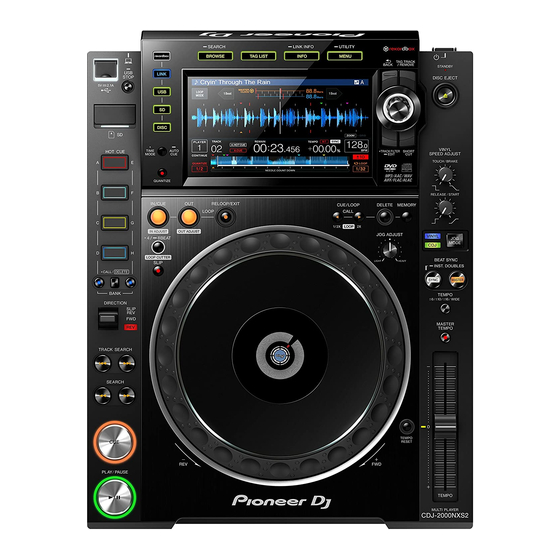
DVDプレーヤー Pioneer CDJ-2000NXS2のPDF 取扱説明書をオンラインで閲覧またはダウンロードできます。Pioneer CDJ-2000NXS2 43 ページ。 Multiplayer
Pioneer CDJ-2000NXS2 にも: 取扱説明書 (17 ページ), クイック・スタート・マニュアル (4 ページ), 接続マニュアル (7 ページ)

Operating the CDJ-2000NXS2 in
combination with other devices
When connected by a LAN cable to a Pioneer DJ's DJ mixer, operations
such as starting playback on this unit can be controlled with the DJ
mixer's fader.
! Connect this unit to a Pioneer DJ's DJ mixer beforehand. For instruc-
tions on connecting, see Connections on page 9 .
! For instructions on setting the player number, see Connecting to a
mixer with only one LAN port on page 9 .
! Also refer to the description of the fader start function included in
the operating instructions of Pioneer DJ's DJ mixer.
Starting playback using a DJ
mixer's fader (Fader Start)
1 Connect this unit to a Pioneer DJ's DJ mixer using a
LAN cable.
For instructions on connecting, see Basic style on page 9 .
2 Turn on the DJ mixer's fader start function.
3 Set cues on this unit.
4 Move the DJ mixer's channel fader or cross fader.
This unit's pause mode is canceled and the track is played
instantaneously.
! When the channel fader or cross fader is set back to its original posi-
tion, playback cues back to the set cue point and the pause mode is
set (Back Cue).
Browsing tracks
The various devices and the rekordbox library on the connected com-
puter can be browsed to display a list of the tracks.
! When a storage device (SD, USB) on which no rekordbox library
information is stored is browsed, the folders and tracks (music files)
are listed in a layer structure.
Switching to the browse screen
Press the device button corresponding to the device you
want to display.
When a button is pressed, the contents of the corresponding source are
displayed on a list.
rekordbox
LINK
rekordbox
USB
USB
LINK
STOP
USB
SD
SD
DISC
SD
DISC
HOT CUE
TIME
AUTO
MODE
CUE
A
E
! [DISC] button: Displays music files on the inserted disc.
! [SD] button: Displays music files on the inserted SD memory
card.
! [USB]: Displays music files in the connected USB device or
mobile device on which rekordbox is installed.
! [LINK] button: Displays music files on a storage device (SD, USB)
connected to other DJ player or mobile device on which rekord-
box is installed.
! [rekordbox] button: Displays music files in rekordbox.
! When the browse screen is displayed, the [BROWSE/SEARCH] but-
ton lights.
! When the [BROWSE/SEARCH] button is pressed while the browse
screen is displayed, the browse screen closes and the screen returns
to the normal playback screen.
When the [BROWSE/SEARCH] button is pressed again, the previous
browse screen opens.
SEARCH
LINK INFO
UTILITY
BROWSE
TAG LIST
INFO
MENU
TAG TRACK
STANDBY
BACK
/ REMOVE
DISC EJECT
VINYL
TRACK FILTER
SHORT
SPEED ADJUST
EDIT
CUT
TOUCH / BRAKE
Description of the screen
1
2
3
1 List of
The contents of the selected medium are displayed.
contents
Displays the name of the upper folder or media of the displayed
2 Upper level
item.
Part of the artwork registered in rekordbox is displayed here.
When the [INFO/LINK INFO] button is pressed, the jacket photo
turns off and the track names are displayed along the left edge.
3 Jacket photo
For lists of playlists and playing histories, a serial number is
displayed.
If there is no rekordbox library, the track names are constantly
displayed along the left edge.
4 Cursor
Turn the rotary selector to move the cursor up and down.
The categories displayed with rekordbox can be selected.
When the [INFO/LINK INFO] button is pressed, the details of
5 User-set
the track selected with the cursor are displayed.
categories
If there is no rekordbox library, the details of the track selected
with the cursor are displayed.
Distinguishing the currently playing device
The currently playing device and the device displayed on the browse
screen can be distinguished according to how the device buttons are lit.
! Lit: That device is being browsed.
! Flashing: Tracks on that device are loaded.
Basic operations on the browse screen
Selecting items
1 Display the browse screen.
= Switching to the browse screen (p. 29 )
2 Turn the rotary selector to select an item.
The jump function can be used by pressing the rotary selector for over 1
second.
= For details on the jump function, see Searching using the jump
function on page 30 .
3 Press the rotary selector to enter the item.
When there is a lower layer, that layer opens. When a menu, etc., is
displayed, the selected item is entered.
When the rotary selector is pressed while the cursor is set at a track, that
track is loaded in this unit.
4
5
En
29
