- ページ 12
自動車アクセサリー Firestone Air-rite 2581のPDF 取付説明書をオンラインで閲覧またはダウンロードできます。Firestone Air-rite 2581 17 ページ。

8
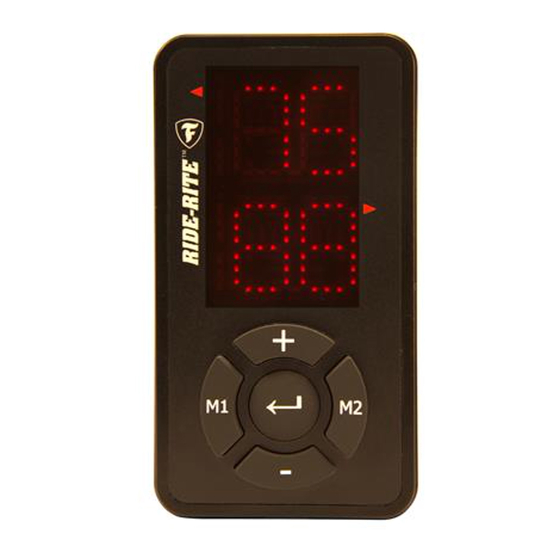
USING THE WIRELESS CONTROLLER
Use the Wireless Controller to adjust the air pressure in your Air Springs.
You can select the Air Springs individually, or both at the same time. Determine
sides when in vehicle, facing forward. If desired, use the supplied Velcro Tabs to
secure the remote to the vehicle.
F3 REMOTE FUNCTIONS
On/Off
Hold Enter button for 3 seconds to turn the remote ON/OFF .
Inflating/Deflating Pressure for Both Air Springs
Turn on the remote to enter the main menu. Press Enter
to adjust both air springs. Adjust pressure by pressing
(+) or (-) button to desired pressure setting. Press the
Enter button when desired setting is reached.
Inflating/Deflating Pressure for Individual Air Springs
Turn on the remote to enter main menu. Press Enter
to adjust both air springs. Press Enter again to adjust
individual air springs. Adjust pressure by pressing
(+) or (-) button to the desired pressure setting. Press
the Enter button when the desired setting is reached.
2 Memory Button Settings
Press M1 or M2 button. Preset pressure should appear.
M1 is preset to 5 PSI. M2 is preset to 20PSI. Press the
Enter button again to adjust pressure. To change the pre-
set pressure, press M1 or M2. Change the preset pres-
sure by pressing (+) or (-) button. To save the pressure
setting to memory, press and hold Enter button for 3
seconds. The display will flash rapidly to indicate the new
pressure setting is saved. After saving the new pressure,
the menu will revert to main menu.
Changing Units to PSI/BAR
Press (+) and (-) buttons together for 3 seconds. Once in
the unit measurement menu, press (+) for PSI and (-) for
BAR. Press Enter again to save the desired unit measure-
ment and revert back to main menu.
Tank Mode
To convert to Tank Mode, unplug power to the ECU,
install the tank and repower the ECU. The system will
automatically enter Tank Mode.
Tank Mode Menu
Press and hold M1 and M2 buttons for 3 seconds to
enter Tank Mode. While in Tank Mode, T will appear on
the top row and the current tank pressure on the bottom
row. Preset tank pressure range is 110-145/90-120. M1
is preset to 110/145. M2 is preset to 90/120. Note: In Tank
Mode, it is not advised to set air springs above Tank
Pressure lower limit. User should first raise the lower
limit threshold to a higher range before increasing
pressure in Air Spring.
11
F3 REMOTE ERROR CODES
Error Definition
Communication Error: An error message E/CN will dis-
play if communication from the ECU to the remote is not
established for 2 seconds.
Leak Error: The remote will display EL in the top row if a
leak is present and either t-tank, L-left air spring or r-right
air spring on the bottom row to notify which component
is leaking.
Bad Pressure Sensor: The remote will display EP in the
top row if a bad pressure sensor is present and either
t-tank, L-left air spring, r-right air spring in the bottom to
notify which component has the bad pressure sensor.
Compressor Error: The remote will display EC on the top
row if the compressor exceeds 4 minutes of runtime.
Low Battery: The remote will display Lo Bt on the display
if batteries are below the rated voltage of 3.0 V. Note:
when the low battery indicator is present, the remote
will be unable to save the last setting by the user.
WIRELESS CONTROLLER
AS-1 AIR
PRESSURE
(LEFT AIR
SPRING)
MEMORY 1
SETTING
DECREASE
AIR PRESSURE
AS-2 AIR
PRESSURE
(RIGHT AIR
SPRING)
INCREASE
AIR PRESSURE
MEMORY 2
SETTING
ENTER
riderite.com
