- ページ 2
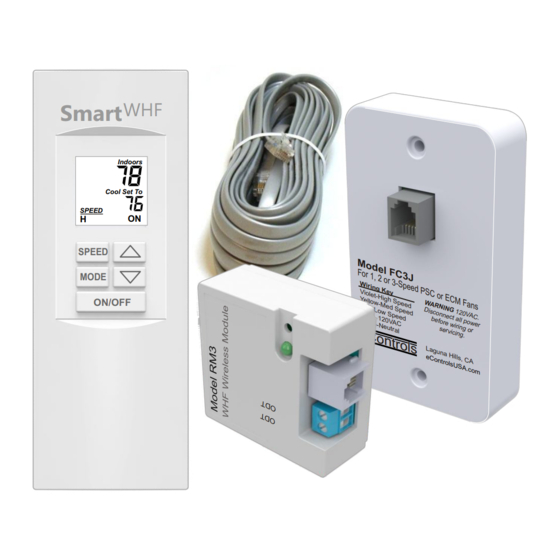
リモコン eControls Smart WHF Control RT3KのPDF インストーラー・マニュアルをオンラインで閲覧またはダウンロードできます。eControls Smart WHF Control RT3K 4 ページ。 Whole house fan remote control

Step 4. Establish Communication Between
RT3 Remote and RM3 Module
The RT3 Remote and RM3 Module are
prelinked and automatically establish
communication once the units are powered.
Use the pull tab on the back of the RT3
Remote to activate the AAA batteries
already installed. Tilting the remote up will
light the LCD and establish communication
with the RM3.
Model RM3
WHF Radio Module
Laguna Hills, CA
eControlsUSA.com
Step 5. Set the Number of Fan Speeds
The RT3 is factory set to a two speed fan. For three-speed or
one-speed fan installations, the number of fan speeds available
needs to be changed to reflect the type of fan installed.
To change the number of speeds, PRESS and HOLD
until the first option is displayed. PRESS
display the number of speeds. PRESS
fan or PRESS
to set a 1-speed fan.
Optional TS3 Outdoor Temperature Sensor
Install under the eaves of the home, out of direct sunlight,
away from a vent - in a location where the temperature
reading will not be influenced.
Drill a 3/8-inch hole for wiring access.
With the two screws provided, attach the base to the wall
with the optional rubber gasket between the wall base.
Center the hole in the base over the drilled hole. Note the
wiring flange on the base is positioned at the bottom.
With the wire nuts provided, attach the two sensor wires to a
2-conductor, 18 or 20 gage, thermostat cable and pass the
cable through the 3/8-inch hole drilled in the wall.
Attach the cover to the base with the screw. Be sure the wire
access opening is at the bottom of the cover.
Pull Tab
The RM3 LED turns solid
green and WL is displayed
on the RT3 once the units
are communicating, usually
within seconds.
MODE
again to
MODE
to set a 3-speed
The optional TS3 Outdoor
Temperature Sensor is used
to delay fan operation when
the outdoor temperature is too
warm to provide cooling.
Step 6. Checking the Installation
CHECK FAN OPERATION
PRESS
then PRESS
MODE
PRESS
to turn the fan ON. Fan should be running.
ON/OFF
CHECK FAN SPEEDS
Verify that the fan is running in High speed. For a 3-Speed fan,
PRESS
then PRESS
SPEED
to Medium (M). PRESS
the fan speed to Low (L). PRESS
to return to High (H) speed.
For a 2-Speed fan, PRESS
lower the fan speed to Low (L). PRESS
PRESS
to return to High (H) Speed.
PRESS
to turn the fan OFF.
ON/OFF
RETURN TO TEMPERATURE CONTROL
PRESS
MODE
then PRESS
TEMPERATURE CONTROL.
Troubleshooting
LED on RM3 Radio Module not lit.
Ensure that the cable is completely plugged into the
connectors on the RM3 and the FC3J. Ensure the fan is
powered.
RT3 Remote doesn't seem to be communicating
The RT3 and RM3 are prelinked to each other and are
identified by an ID # on the back of the units. Ensure that the
RT3 and the RM3 ID #s match.
Fan speeds available seems incorrect.
Ensure that the number of speeds set in Step 5 correspond to
the type of fan installed - 1-speed, 2-speed or 3-speed fan.
check with your installer or the whole house fan manual if
unsure about the type of fan installed.
Screw attaches cover
to base.
TS3 Sensor
2
to select TIMER CONTROL.
to lower the fan speed
SPEED
then PRESS
then PRESS
SPEED
then PRESS
SPEED
SPEED
to select
To Module
MODEL 43339
Rubber Gasket
Base
Cover
ODT
ODT
RM3 Radio Module
to lower
to
then
