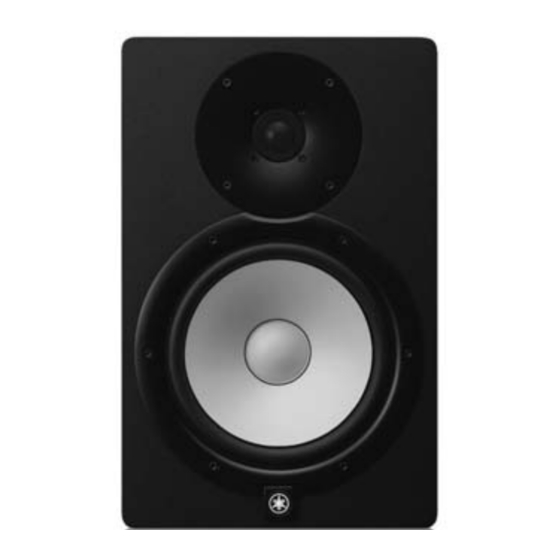
HS8/HS7/HS5
2.
Speaker HF (Tweeter)
(Time required: About 1 minutes)
2-1
Remove the four (4) hexagonal socket screws marked [50B].
The speaker HF (tweeter) can then be removed. (Fig. 2)
2-2
Remove the SPOUT connector assembly (yellow/blue)
attached to the speaker HF (tweeter) terminal. (Photo 2)
*
When you attach/remove the SPOUT connector
assembly to/from the speaker terminal, be sure to
put pressure in the parallel direction. The speaker
terminal will be broken if you put pressure in another
direction.
Speaker HF (Tweeter)
(スピーカ HF (ツイ ーター) )
[50B] x 4
3.
AMP Assembly
(Time required: About 6 minutes)
3-1
Remove the speaker LF (woofer). (See procedure 1.)
3-2
Remove the speaker HF (tweeter). (See procedure 2.)
3-3
Disconnect the connectors of the LED connector
assembly (red/white). (Photo 3)
3-4
Remove the ten (10) screws marked [100] . The AMP
assembly can then be removed. (Fig. 3)
*
When installing the AMP assembly, first tighten the
two (2) priority screws in order as shown in Fig. 3.
4.
LED (LEDW) Circuit Board
(Time required: About 10 minutes)
4-1
Remove the speaker LF (woofer). (See procedure 1.)
4-2
Remove the speaker HF (tweeter). (See procedure 2.)
4-3
Remove the AMP assembly. (See procedure 3.)
4-4
Remove the hotmelt. The LED (LEDW) circuit board
can then be removed. (Photo 4)
*
When installing the LED (LEDW) circuit board, apply
the hotmelt to the LED (LEDW) circuit board entirely.
4-5
Unsolder the leads of the LED (LEDW) circuit board.
The LED circuit board and LED connector assembly can
then be separated. (Fig. 3)
8
Photo 2
(写真2)
SPOUT connector
assembly (Yellow)
(SPOUT束線 (黄) )
2.
スピーカ HF(ツイーター)
(所要時間:約 1 分)
2-1
[50B]のの 6 角穴付ネジ 4 本を外し、スピーカ
HF(ツイーター)を外します。 (図 2)
2-2
スピーカ HF(ツイーター)端子に取り付けられ
ている SPOUT 束線 (黄/青) を外します。 (写真 2)
※
SPOUT 束線をスピーカ端子に取り付けおよび外す際に
は、必ず水平方向に力を加えてください。無理な方向に
力を加えるとスピーカ端子が折れる危険性があります。
(スピーカ HF (ツイ ーター) )
Mark "
" shows terminal direction of speaker HF (Tweeter).
( 印はスピーカ HF (ツイーター)の端子の方向を示します。)
Fig.2 ( 図2)
SPOUT connector
assembly (Blue)
(SPOUT束線 (青) )
Speaker HF (Tweeter)
(スピーカ HF (ツイ ーター)
Photo 2 ( 写真2)
3.
アンプ Ass'y(所要時間:約 6 分)
3-1
スピーカ LF (ウーファー) を外します。 (1 項参照)
3-2
スピーカ HF (ツイーター) を外します。 (2 項参照)
3-3
LED 束線のコネクターを外します。 (写真 3 )
3-4
[100] のネジ 10 本を外し、 アンプ Ass'y を外します。
(図 3)
※ アンプ Ass'y を取り付けるときには、優先ネジ 2 本を図
に示す順で先に締めてください。 (図 3)
4.
LED(LEDW)シート(所要時間 : 約 10 分)
4-1
スピーカ LF (ウーファー) を外します。 (1 項参照)
4-2
スピーカ HF (ツイーター) を外します。 (2 項参照)
4-3
アンプ Ass'y を外します。 (3 項参照)
4-4
ホットメルトを取り除き、LED(LEDW)シート
を取り外します。 ( 写真 4)
※ LED(LEDW)シートを取り付けるときには、ホットメ
ルトを LED(LEDW)シート全体に塗布します。
4-5
LED(LEDW)シートのリードのハンダ付け部か
らハンダを取り除き、LED シートと LED 束線を
別けます。 (図 3)
Speaker HF (Tweeter)

