- ページ 9
ホブ Zanussi ZGG65414のPDF ユーザーマニュアルをオンラインで閲覧またはダウンロードできます。Zanussi ZGG65414 16 ページ。
Zanussi ZGG65414 にも: ユーザーマニュアル (16 ページ), ユーザーマニュアル (16 ページ), ユーザーマニュアル (21 ページ)
2. Keep the control knob pushed for approxi-
mately 5 seconds; this will let thermocou-
ple to warm up. If not, the gas supply will
be interrupted.
3. Adjust the flame after it is regular.
If after some tries the burner does not
light, check if the crown and its cap are in
correct positions.
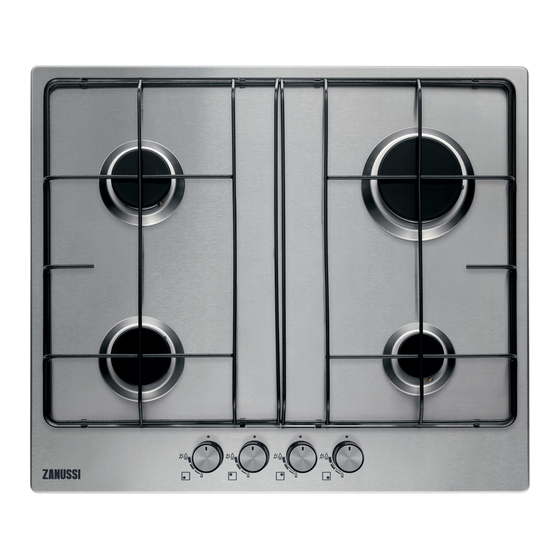
Burner cap
1
Burner crown
2
Ignition candle
3
Thermocouple
4
Warning! Do not keep the control knob
pushed for more than 15 seconds.
Helpful hints and tips
Energy savings
• If possible, always put the lids on the pans.
• When the liquid starts to boil, turn down the
flame to barely simmer the liquid.
Warning! Use pots and pans with
diameter applicable to the dimension of
burner.
Do not use cooking vessels on the hotplate that
overlap its edges.
Burner
Rapid
Front Semi-rap-
id
www.zanussi.com
1
2
3
4
Diameters of cookware
180 - 260 mm
120 - 180 mm
If the burner does not light after 15 seconds,
release the control knob, turn it into off position
and try to light the burner again after minimum
1 minute.
Important! In the absence of electricity you
can ignite the burner without electrical device;
in this case approach the burner with a flame,
push the relevant knob down and turn it
counter-clockwise to maximum gas release
position.
If the burner accidentally goes out, turn the
control knob to the off position and try to
light the burner again after minimum 1 minute.
The spark generator can start automatical-
ly when you switch on the mains, after in-
stallation or a power cut. It is normal.
Turning the burner off
To put the flame out, turn the knob to the sym-
bol
.
Warning! Always turn the flame down or
switch it off before you remove the pans
from the burner.
Burner
Rear Semi-rap-
id
Auxiliary
Warning! Pots must not enter the control
zone. Flame will heat up the control zone.
Do not put the same pan on two burners.
Warning! Make sure pot handles do not
protrude over the front edge of the
cooktop and that pots are centrally positioned
on the rings in order to achieve maximum
stability and to obtain lower gas consumption.
Diameters of cookware
120 - 220 mm
80 - 160 mm
9