- ページ 3
ペイントスプレー California Air Tools 365のPDF マニュアルをオンラインで閲覧またはダウンロードできます。California Air Tools 365 9 ページ。 5 gallon pressure pot with hvlp spray gun and hose
Assembly
Read the instructions carefully
Read instructions carefully before using this product. This equipment can be used to supply material up to
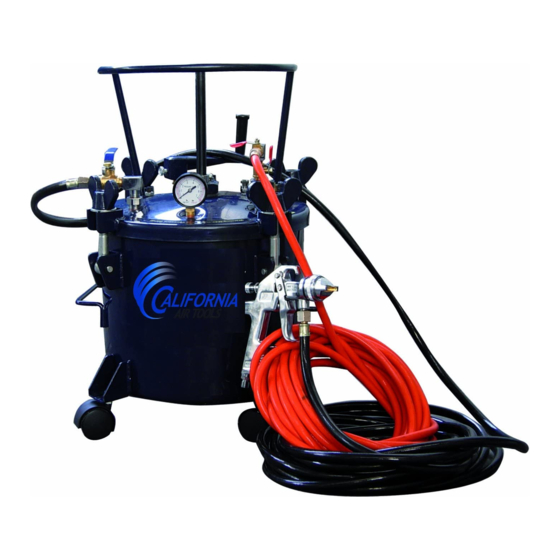
a maximum of 60 pounds (PSI). This equipment has an agitator, air regulator, pressure gauge, safety
valve and outlet for the material. The tank has been coated to last. The agitator allows you to maintain the
uniformity of the material before being applied as long as the material is not too heavy. This tank can also
be used with other materials other than paint.
The picture above illustrates the best set up and operation of this equipment.
Important Notes
This picture is only for the purpose of illustration, the filter "B", the compressor "A" and
operator safety equipment are all sold separately.
This product is subject to slight changes as to what is presented in this owner's manual.
Without notice in both changes in design and parts can occur in order to better increase the
performance of the product.
Air Compressor
Use an air compressor that can produce at less 90 PSI.
1.
WARNING!
Ensure the air supply is clean and does not exceed 90psi while operating the tool.
Too high air pressure and unclean air will shorten the product life due to excessive wear, and may
be dangerous causing damage or personal injury.
2. Drain the air compressor air tank daily. Water in the air line will damage the tool.
3. Clean air inlet air filter weekly.
4. The air hose should not be longer than 50ft.
The minimum hose diameter should be 1/4" I.D. and fittings must have the same inside dimensions.
5. Keep hose away from heat, oil and sharp edges. Check hose for wear, and make certain that all
connections are secure.
Assembly Instructions
1. Install the regulator assembly to the swivel adaptor on the tank lid.
Check the bottom of regulator for location of tank connection
2. Install the handle in the treaded hole in the center of the tank lid. Tighten hex nut.
3. Connect the air supply hose to the air inlet fitting on tank regulator. (Right or left optional)
4. Attach the atomization air hose to an air outlet fitting which is directly opposite air inlet fitting.
5. Connect material hose to the fluid outlet adaptor located on the tank lid.