- ページ 2
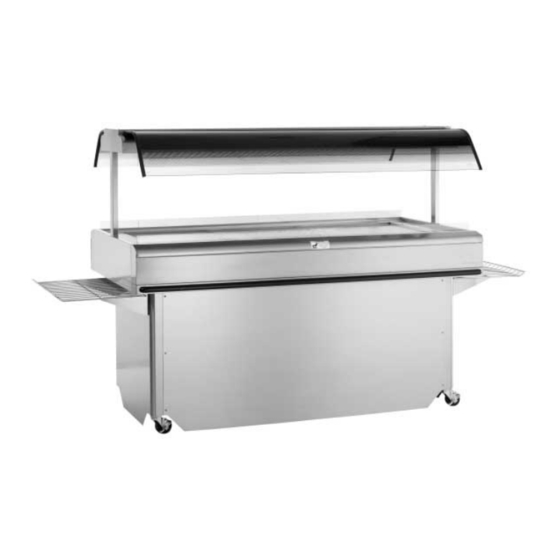
マーチャンダイザー Alto-Shaam ITM-48のPDF 取扱説明書をオンラインで閲覧またはダウンロードできます。Alto-Shaam ITM-48 12 ページ。 Island takeout merchandiser
Alto-Shaam ITM-48 にも: パンフレット&スペック (4 ページ)

U N PA C K I N G a n d S E T - U P
The Alto-Shaam Merchandiser has been
thoroughly tested, checked for calibration, and
inspected to insure only the highest quality
cabinet is provided. When you receive your
cabinet, check for any possible shipping damage and report it at
once to the delivering carrier.
section located in this manual.
In order to maintain established National Sanitation Foundation
standards, all stationary floor models must be sealed to the floor
with a R.T.V. or silastic meeting N.S.F. requirements or have
6" (153mm) unobstructed clearance beneath the unit. Warranty
will become null and void if these directions are not followed.
Save all the information and instructions packed inside the
cabinet. Complete and return the warranty card to the factory as
soon as possible to assure prompt service in the event of a warranty
parts and labor claim. Any and all claims for warranty must include
the full model number and serial number of the cabinet.
E L E C T R I C A L I N S TA L L AT I O N
1. Use a licensed electrician for installation of permanent wiring or
receptacles in accordance with local and national country codes.
2. An identification tag is permanently mounted on the cabinet.
Plug the unit into a properly grounded receptacle ONLY.
Arcing will occur when connecting or disconnecting the unit
unless all controls are in the OFF position.
S E R IA L N U MB ER AN D WA RRA NT Y CO DE
I D EN T IF I C AT I ON MOD EL NU MBER
MODEL
SERIAL NO.
VOLTS
MAX I MU M R ATE D V O LTA G E
ENSURE POWER SOURCE
MATCHES VOLTAGE S T A M P E D
O N N A M E P L A T E O F U N I T
START-UP
Before operating the unit, clean both the interior and exterior of
the unit with a damp cloth and mild soap solution. Rinse well.
Make sure all accessories supplied with the case are installed
correctly. Become familiar with the operation of the controls.
Read this manual carefully and keep it in a secure location.
See Transportation Damage and Claims
EXAMPLE
MA XIM UM RAT ED
WAT TAG E
xxx-xx
WATTS
xxxx-xx
xxxx
xxx
AC
1 PH
xx
HZ
ALTO-SHAAM INC. MILW. WI. PAT. NO. 3521030
MAXI MUM RAT E D F RE QU ENC Y
#880 Operation & Care Manual • 1
– HOT MERCHANDISER
®
O P E R AT I O N A L P R O C E D U R E S
Indicator Light
All controls are located in a concealed area
1. Turn "ON" the breaker switch.
2. Following is the recommended preheat
sequence:
a. Set lower cable heat thermostat to "9" .
b. Set upper calrod heat thermostat to "9".
c. Turn "ON" the light power switch.
d. Turn "ON" the lights.
An indicator light will illuminate when the thermostats are turned
"ON". The indicators will remain lit as long as the unit is
preheating or calling for heat. This unit should be preheated,
for a minimum of 45-60 minutes before loading the case with
food. When preheating is completed, the indicator lights will
turn off. Preheat the unit along with any empty serving pans or
containers which will be used to transfer hot foods for display.
3. L o a d p r e p a c k a g e d h o t f o o d s i n t o t h e
m e r c h a n d i s e r .
Before loading food into the unit, use a pocket-type meat
thermometer to make certain all products have reached an
internal temperature of 160° F (71°C) or higher. If any food
product is not at proper serving temperature, use a Halo Heat
cooking and holding oven or Combitherm Oven to bring the
product within the correct temperature range.
✔
Use hand protection when handling hot items.
✔
Do not stack food containers.
✔
Be certain only hot PREPACKAGED foods in appropriate
heat tested containers are used in this hot display case.
4. R e s e t t h e r m o s t a t s a s n e e d e d .
Since proper temperature range depends on the type of
products and the quantities being held, it is necessary to
periodically use a pocket thermometer to check each item to
make certain the correct temperatures are being maintained.
Local health regulations may vary regarding minimum serving
temperatures. Proper temperature range is usually 160°F
(71°C) or higher. Normally, this will require a thermostat
setting of "8" although a higher or lower setting may
sometimes be required.
Control Perimeter Panel
On/Off Power Switch for lights
Breaker Switch
Light Switch
Upper Calrod Heat Thermostat
Lower Cable Heat Thermostat
behind the perimeter panel.
