- ページ 3
バイクアクセサリー Custom Dynamics CD-LR-04-RのPDF インストレーション・インストラクションをオンラインで閲覧またはダウンロードできます。Custom Dynamics CD-LR-04-R 3 ページ。 Luggage rack led light bar
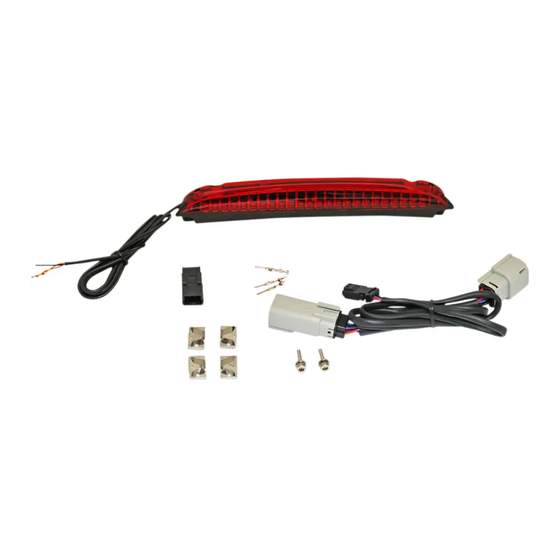
13. Drill a 1/4" hole in the plastic plate located in the front
of the Tour Pak and route the LED Assembly wiring har-
ness out of the Tour Pak and under the seat. See Fig-
ure 8.
14. Located the factory rear lighting wiring harness con-
nectors under the seat. See Figure 9.
15. Plug in the included Adapter Harness to the rear light-
ing wiring harness. See Figure 10.
Note: If installing this product with a Magic Strobes™
Brake Light Flasher, the provided Adapter Harness should
be plugged in down stream of the Magic Strobes™ module
to enable brake flashing on the LED Assembly.
16. Route the female JAE connector from the Adapter Har-
ness through the factory hole in the Tour Pak (where
grommet was removed in Step 13).
17. Align the provided Male JAE Connector with the female
plug (do not plug in completely).
18. Match up color of the pre-pinned wires from the LED
assembly with the female JAE connector of the Lug-
gage Rack Adapter Harness in the following configura-
tion: Yellow to Blue, Red to Red, Black to Black. Insert
each pinned wire into the corresponding Male JAE Con-
nector port. Pins should snap in place and not pull
back out of male connector when installed correctly.
19. Use provided tie wraps to secure wires from becoming
cut, frayed, or pinched.
20. Reconnect the negative battery cable to the negative
of the battery.
21. Install motorcycle seat.
22. Test operation of all lighting before riding.
Questions? Call us at: 1 (800) 382-1388 M-TH 8:30AM-5:30PM / FR 9:30AM-5:30PM EST
Installation Instructions - Page 3
8
7
9
10
09-2018