- ページ 12
コントロールユニット Alutech CUL11のPDF 接続および操作マニュアルをオンラインで閲覧またはダウンロードできます。Alutech CUL11 20 ページ。

FAULTS AND RECOMMENDATIONS ON ThEIR ELIMINATION
the working area. While operating the leveller, monitor all movements of the leveller. Never
touch moving parts of the leveller. No one should be in the working area of leveller.
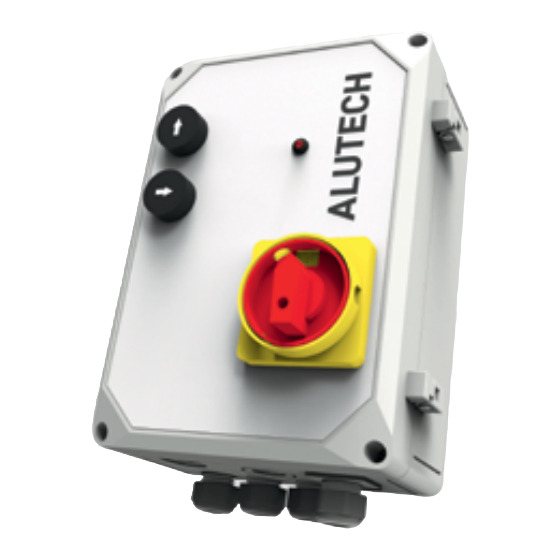
Turn the on-off switch 1 (fig. 1) to the I position ('ON' position) to apply the supply voltage to
the control unit module.
Loading platform control:
•
press and hold
release
•
after releasing
The lip will extend.
Control of
2 seconds. If
button, the platform will start lowering automatically. In this case press
again for at least 2 seconds for the ramp to restart extension.
button running time (holding)—60 seconds.
button running time (holding)—40 seconds.
•
after the required lip extension, depress
starts automatically lowering in the intermediate position to the vehicle loading level
(floating position—platform follows the movements of vehicle floor).
Returning the leveller to the initial position:
•
in order to return the leveller to the initial position press and hold
(fig. 1) until the leveller lifts and the lip returns into the initial position (retracts back).
•
release
position.
•
switch the on-off switch 1 (fig. 1) to '0' position ('OFF' position).
The scheduled maintenance of the control unit should be performed as a part of loading equip-
ment service works in strict compliance with the current regulations.
7.
FAULTS AND RECOMMENDATIONS ON ThEIR
ELIMINATION
Fault
Fault
After turning the
switch 1 (fig. 1) into
I position, LED 4
does not light up
After turning the
switch 1 in I position,
LED 4 flashes rapidly
After turning the
switch 1 in I position,
LED 4 flashes rarely. hL3
LED lights up
10
10
control button 2( fig. 1) to lift the platform. When lifting is completed,
button and the platform will stop.
button press and hold
button will be allowed only after control of
button is pressed after more than 2 seconds since releasing
button and after 2 seconds the leveller automatically lowers into the initial
Possible cause
Possible cause
No supply voltage
Incorrect mains
connection or low
supply voltage
No connection
of valves (valve)
button 3(fig. 1) for 2 seconds.
button and after 2 seconds dock leveller
Recommendations
Recommendations
Check the mains voltage. Make sure that the
control unit is connected to the mains (section 4
'Electric module'). Make sure and replace, if
necessary, the fuses. Check that the jumper is
set at OUT + 24 V and IN + 24 V contacts of J5
connector. Check that LED 4 is connected
Check the mains voltage. Check that all wires
of power cable are connected to the unit (no
broken wires). Switch wires for power cable
connection, for example, at L1 and L2 contacts
of J1 connector (ensure the correct phase
sequence)
Ensure that valves of the hydraulic unit are
connected
INSTALLATION AND OPERATION MANUAL | CUL11 CONTROL UNIT
button for more than
button
control button 2
