- ページ 9
電子キーボード DOEPFER LMK2+のPDF ユーザーマニュアルをオンラインで閲覧またはダウンロードできます。DOEPFER LMK2+ 12 ページ。 Midi master keyboard usb version
DOEPFER LMK2+ にも: クイック・スタート・マニュアル (6 ページ)

7.3.7 CONTROLLER (7)
Third button in the lower row
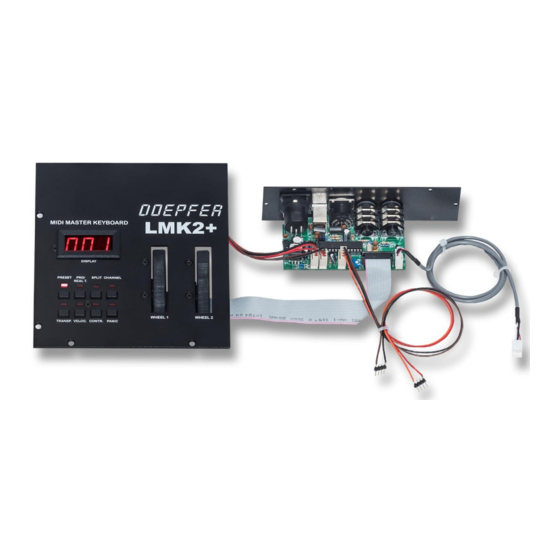
This menu serves to activate or deactivate the wheels, the after touch, the external footswitches and the
external foot controller in the 4 keyboard zones. Additionaly the controller number for the wheel without spring is
determined in this menu. When entering this menu the number of the currently selected keyboard zone is shown
on the left side of the display, on the right side on of the following abbreviations is to be seen:
Abbrev.
r1
r2
EC
AF
F1
F2
Repetitive operation of the menu button steps through all the above abbreviations. When reaching "F2" the next
step leads to "r1" of the following zone. The process is circular, i.e. after F2 in zone 4 one jumps back to r1 in
zone 1 and starts over again. To turn off the selected controller (controller means in this case one of the above
elements) in the selected keyboard zone one has to press any key left of the number key 1 on the keyboard. To
turn on the selected controller one has to press any key right of the number key 1 (including key 1 itself). The
decimal point of the right digit displays the activity of the selected controller. If this point is illuminated the
controller is "on" otherwise it is "off".Except for wheel 1 (r1) the absolute number of the key has no meaning
when turning on the controller. It may be any number key from 1 to 32. For wheel 1 (r1, wheel without spring)
the number of the key is equal to the controller number assigned to this wheel. So any Midi-controller in the
range of #1....#31 may be assigned to wheel 1 (e.g. #1 = modulation). To get an information about the controller
number of wheel 1 the number is displayed for a short time when selecting wheel 1 before the abbreviation "r1"
appears. Whenever you press a number key 1...31 on the keyboard in this mode the new controller number
appears shortly in the display followed by "r1". To turn off wheel 1 you have to do the same as for the other
controllers i.e. to press any key left of number key 1 on the keyboard. In this case no controller number appears
in the display rather "r1" is displayed immediately (without illuminated decimal point).
7.3.8 PANIC (8)
Fourth button in the lower row
This is a panic button which can be used in any operational mode, rather than an actual menu. When this button
is pressed an "All Notes Off"-instruction is sent on all 16 Midi-channels. Additionally Modulation (Controller #1) is
set to 0, Volume (Controller #7) to 110 and Pitch-Bend to 64 on all 16 Midi-Channels. The function is used
primarily in the event of "stuck notes" in order to switch off all sound generating devices. Please note that the
devices connected to the LMK2+ must be able to recognize the "All Notes Off"-instruction.
Meaning
wheel 1 (without spring)
wheel 2 (spring loaded)
external foot controller
after touch sensor
external foot switch 1
external foot switch 2
LMK2+/USB User's Guide Page 9
Function
Midi-controller 1...31
Pitch wheel
Volume (Midi-Controller #7)
Monophonic After touch
Sustain (Midi-Controller #64)
Sostenuto (Midi-Controller #66)
