- ページ 5
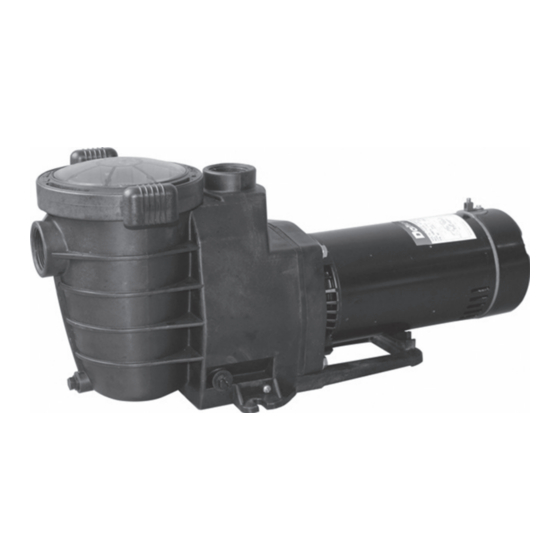
プールポンプ Doheny's 72767のPDF 設置、操作、部品をオンラインで閲覧またはダウンロードできます。Doheny's 72767 8 ページ。 Silencer pumps

CHAPTER 5
: ELECTRICAL DATA
Refer to information on motor nameplate for
electrical service data. All motors should have
fused disconnect switch or circuit breaker. Be sure
wire size is sufficient for pump HP and distance from
power source. Wiring should be done in accordance
with applicable codes by a competent electrician.
We recommend the installation of a ground fault
circuit interrupter for maximum safety
CHAPTER 6
: PUMP START UP
Gravity Fed Above Ground Pumps
Do not operate pump until it has been primed as
water acts to cool and lubricate the seal. For pumps
without strainer bodies and located above water,
close suction line valve and fill pump with water
in order to prime.
Self Priming Inground Pumps
For pumps with strainer bodies and located above
water, prime by removing strainer cover and filling
strainer body with water. Pumps located below
water level will selfprime if all piping is also below
water level. After pump has been primed, energize
motor and open all suction and discharge line
valves. It may take some time for pump to remove
air from suction lines. If no flow is observed in five
minutes, stop the motor and re-prime. If the pump
fails to operate, check for air leaks. Refer to Trouble
Shooting section. After about ten minutes of
operation, check the return fittings for air bubbles.
A continuous flow of air indicates leaks in suction
line. Locate and correct any leaks immediately.
Controlling the Output
Keep the gate valve in the suction line fully open
during operation. Should it be necessary to control
the output, use a valve in the return line
Caution: Do not retighten strainer Ring-Lok during
operation.
Caution: Do not operate pump with closed suction
or discharge valves.
CHAPTER 7
: WINTERIZING
Consult your dealer for advice on winterizing your
equipment if freezing temperatures occur in your
locality. His knowledge of your equipment makes
him the best qualified source of information. Follow
his recommendations, and if these include draining
the filter system, proceed as follows:
1. If your system does not contain a filter, proceed
to step 2.
A. For sand filters: BACKWASH for 3 to 5
minutes and set dial valve to WINTERIZE.
B. For cartridge filters: Clean the filter element
and store in a dry place.
10411 80th Avenue Pleasant Prairie, WI 53158 | Orders and Customer Care: 1-800-574-7665 | Fax: 1-800-323-5932 | Doheny.com
2. Drain system by loosening drain plugs (drain
plugs will drain without completely removing
the plug from unit) and/or removing pipe caps.
CHAPTER 8
: WATER CHEMISTRY
A proper and consistent use of chemicals is
necessary to maintain clean, sanitary water, prevent
a spread of germ infection and control the growth of
algae which can spoil the appearance and
enjoyment of your pool or spa. Chlorine is the most
commonly used chemical to provide clean, sanitary
water. Either dry or liquid chlorine (calcium or
sodium hypochlorite) can be used which should be
added daily as it is dissipated by dirt, germs, sun
and wind. It is also important that the correct level
of acidity or alkalinity of the pool water be
maintained. This is the pH of your pool with pH 7.0
being neutral. Readings above 7.0 are alkaline and
below are acid. A desirable range is 7.2 – 7.4.
CHAPTER 9
: PUMP MAINTENANCE
1. Motors are self-lubricating – no lubrication is
required.
2. Clean hair & lint strainer if you have a strainer
body pump.
3. Visually inspect motor for blockage of air vents
on motor shell. Remove any debris after
breaker off.
4. Shaft seals may become worn and must be
replaced if leakage is observed.
CHAPTER 10
: CLEANING
Switch power off. Close valves in suction and return
line. Unscrew strainer Ring-Lok counterclockwise
and remove the strainer cover from hair and
lint strainer and lift out strainer basket. Clean and
replace the basket. Take care to seat basket
properly. Clean O-Ring and re-lubricate with a
non-pretroleum based lube, try Jack's Magic Lube.
Clean O-Ring seats on cover and strainer. Refit
cover and strainer – hand tighten only – and open
valves. Put pump back into operation. Caution: Do
not retighten strainer during operation.
CHAPTER 11
: SERVICE & REPAIR PARTS
Order all repair parts through your dealer. Give the
following information when ordering repair parts:
1. Unit nameplate data.
2. Description of part
