- ページ 9
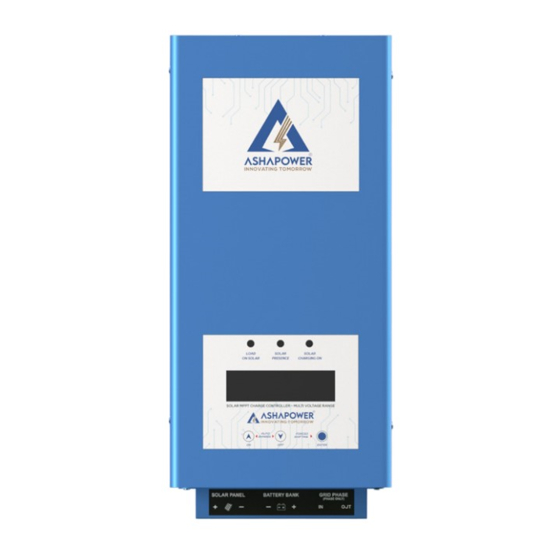
コントローラー ASHAPOWER SURYA-50のPDF ユーザーマニュアルをオンラインで閲覧またはダウンロードできます。ASHAPOWER SURYA-50 13 ページ。 Solar mppt charge controller

Changing the default settings of MPPT charge controller
Before changing the default settings values of the device, ensure the maximum ampere and voltage
Note:
ratings applicable for your battery type and brand (SMF, LEAD-ACID, GEL) This device is not designed for
direct charging of lithium Phosphate battery . Blind settings may cause severe damage to the batteries and
charge controller. Default values given are for lead acid C10 grade solar batteries.To reset to default settings
enter settings menu 16 F-RST and set the value to "1". (Refer user manual function settings page)
Refer battery user manual for recommended charging ampere and voltage for the connected batteries.
Never try to change the default settings of the device without the help of technical advice. Note down the default
settings of the device before changing. Read function settings page before changing default settings of the
device.
How to Enter settings mode of MPPT charge controller.
Accessing settings menu allows the user to customise and calibrate the charge controller
Connect the charge controller to the desired battery bank. Consecutive pressing of the ENTER button (
displays the existing function settings of the charger.
To enter Setup mode , keep pressing OFF button ( ) for 3 seconds and press ENTER button ( ) also
without releasing OFF button (
number and model name. Press the ENTER button (
shown in the function settings page.Use the ON button ( ) to increase and OFF button ( ) to decrease the
default values. When kept idle for 5 seconds or gone through all settings menu new settings will be saved and
the device goes to normal mode.
When default settings are changed charge controller will be in Auto bypass OFF mode. To turn ON the
Auto bypass mode press and hold UP button ( ) for 2 seconds.
CONVERTING A NORMAL INVERTER TO A SMART SOLAR INVERTER
USING MPPT CHARGE CONTROLLER
Before starting it is better to make a plan of your solar energy needs and ensure your existing inverter and
batteries are suitable for solar application. When a battery is charged with limited charging ampere (6Amp to
10Amp ) for long hours it delivers good energy backup. Solar charging and discharging is a daily process with
high current from solar panels. We get only 4 to 5 hours average sun light in a day and have to charge the
batteries in this time. C10 grade solar batteries above 100 Ah have the capacity to handle high current charging
and discharging. Usually inverter batteries are either C20 grade or C10 grade normal batteries. An inverter
battery is always connected to grid power and continuously charging the batteries in limited ampere for
long hours (6AMP to 10AMP) and gives good back up. That is why we don't get enough backup from normal
batteries when charged from solar power with high current. If we use normal batteries for solar charging with
limited charging current they can't be fully charged before evening. So always insist on C10 grade solar
batteries for solar applications. Now check your home inverter is provided with a grid charging ON/OFF switch.
Most of the branded normal type inverters are not provided with a grid charging ON/OFF switch on them. When
we use this type of normal inverter in solar o -grid system it will charge batteries from grid power and we do
not get actual solar benefit.Customers use external grid changeover relay systems to overcome this problem.
HOW THE CHARGE CONTROLLER DRIVES THE CONNECTED INVERTER
Most of the SMU type solar MPPT charge controllers are provided with an inbuilt relay to control grid power
to the inverter.Remove grid power phase wire from your inverter and connect to PHASE IN terminal of
MPPT.Connect a wire from the PHASE OUT terminal of MPPT to the PHASE IN terminal of the inverter. (Never
connect the neutral wire of grid power to any connectors of MPPT). When charging starts terminal volt of the
battery rises to the preset voltage 14.2 V (this value is adjustable) MPPT disconnects the AC mains to the
inverter and the connected load on the inverter works on battery power (solar power). when the battery
terminal volt goes down (in the evening or cloudy sky) and reaches 11.5 V (this value is adjustable) MPPT
reconnect grid power to the inverter. If your inverter is a normal type without a grid charging disabling switch
it will charge the batteries and we don't get the solar benefit. To overcome this it is better to limit the load on
the inverter and keep the battery terminal volt always high. Some customers use solar power only in the
daytime and shift the load to AC mains by keeping the shifting to AC mains voltage 12.0 V or more. Fitting an
external grid change over the relay system for bypassing grid power directly to load is also applicable. If we
use an inverter with a grid charging ON/OFF switch we can keep the switch in o position to avoid charging
from the grid. Only on cloudy days we can keep the switch in on position and charge the batteries from grid
power.
) for 3 seconds. Now MPPT enters setup mode, displaying version
) to scroll through the various setup menu as
9
)
