- ページ 5
コンピュータ・ハードウェア Cypress CP-255DのPDF 操作マニュアルをオンラインで閲覧またはダウンロードできます。Cypress CP-255D 12 ページ。 Cypress pc/hd to 1080p dvi scaler box
Cypress CP-255D にも: 操作マニュアル (11 ページ), 操作マニュアル (16 ページ)

(4).Operation Controls and Functions
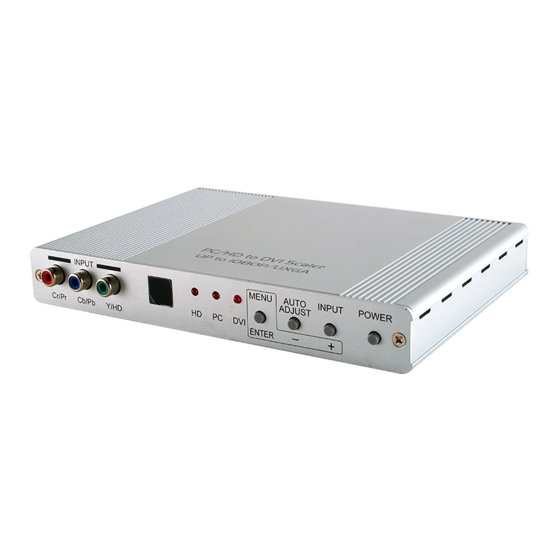
Front Panel
1. Power: Press the button to turn ON or turn OFF (standby) the power of the unit.
2. Menu/Enter: This button serves two purposes.
a. Press the button to bring up OSD main menu as shown in the
"OSD Operation". (page 7)
b. To act as a "Enter" key to enter sub menu or to adjust setting value of the
selected parameter.
3. +/- button:
The buttons provide 3 functions:
a. Input select ("+"): Press the "+" button repeatedly to select your desired
input source. The input sources are toggled through in the following
sequence.
b. Auto Tune ("-"): Press the "-" button to carry out picture auto adjust for
analog inputs (component or PC). The CP-255D will fine tune the position
(centering) and color of the output picture.
c. When in the OSD menu mode: Press the +, - button to move up or down
the highlight bar to your desired parameter. Or once a parameter is
selected with MENU/Enter button, press the button to adjust setting value
of your selected parameter.
4. Input LED Indicators: When one of the LED illuminates its corresponding source
5. IR Sensor: Infrad remote control sensor.
6. Component Input: Connects this input connector to the Component output
connector of your source equipment using the enclosed 3RCA to 3RCA
cable.
The CP-255D accepts both interlaced component input (480i, 576i) and
deinterlaced progressive input (480p, 576p...1080p).
The input range is 480i, 570i~1080i, 1080p.
Rear Panel
1. PC input: Connects this PC input connector to the VGA output of your
PC. The acceptable PC resolutions range from VGA~WUXGA.
INPUT
Cb/Pb
Cr/Pr
Y/HD
6
YPbPr (YCbCr)
is being selected as input.
DC 5V
DVI OUT
5
4
MENU
HD
PC
DVI
ENTER
5
4
2
PC
PC OUT
DVI IN
3
2
2
AUTO
INPUT
POWER
ADJUST
+
-
3
1
DVI
PC IN
1
