- ページ 6
アンプ Ashly Protea NE8250.10のPDF 取扱説明書をオンラインで閲覧またはダウンロードできます。Ashly Protea NE8250.10 20 ページ。 Network enabled multi-channel power amplifiers
Ashly Protea NE8250.10 にも: 取扱説明書 (16 ページ), 取扱説明書 (16 ページ), 仕様 (2 ページ), 仕様書 (2 ページ), 取扱説明書 (16 ページ), 取扱説明書 (16 ページ), 取扱説明書 (20 ページ)

Operating Manual - NE Multi Channel Power Amplifier
Physical Description
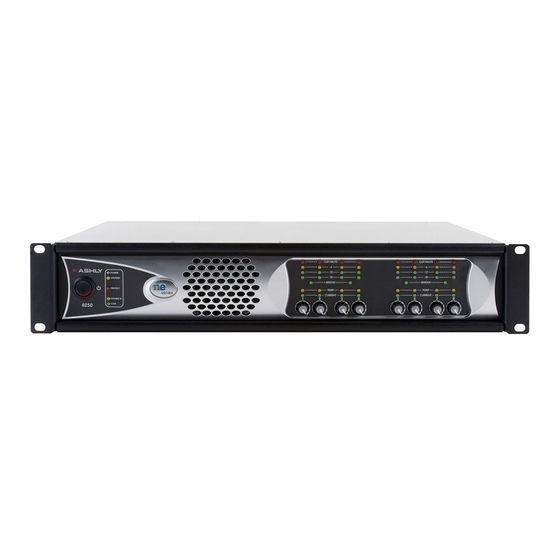
Each model in the NE Multichannel series is 2RU. The model number is indicated in the lower left corner of the front panel.
Amplifier Front Panel
1. Mounting Holes – For rack mounting
2. Power Switch – Switches the unit on or off. Note: The power switch can be disabled from software.
3. Status LEDs – Indicates status of Power, Standby, Protect, Power Switch Disable, and Ethernet activity.
4. Air Vents – Cool air enters the sides and is blown out the front.
5. Channel Controls – Channel control area.
6. Signal LEDs – The lowest LED will begin to light when the output voltage is -18dBu below rated output. The Clip LEDs
will begin to flash when output voltage is 1/2 volt below the rated output power supply voltage.
7. Bridge – This LED indicates that the channel pair is selected to BRIDGE mode from the back panel switch, and that only
the odd input channel level control is active.
8. Temp and Current LEDs – The Temp LED indicates an excessively high operating temperature and that countermeasures
are being used to cool the amplifier. The Current LED confirms that the amplifier output is delivered to a speaker load.
9. Channel Attenuators – These control the input signal level to the amplifier. They can be disabled from software.
10. Factory Reset – To reset all internal configurations (including passwords) back to their original factory settings, press and
hold this recessed front panel momentary switch during power up until all channel LEDs are lit. Upon reset completion, the
LEDs will turn off and the amp will resume normal operating mode.
Amplifier Rear Panel
(illustration on next page)
1. Optional Network Audio – This factory option allows connection to a Dante or Cobranet audio network.
2. Optional AES3 - This slot is for factory installation of an AES3 digital audio input module.
3. Ethernet Port - This RJ45 jack is for connecting to an Ethernet network for software control.
4. Input Connector - This is used for a three wire (G, +, -) balanced input on Euroblock connectors.
5. Normal/Bridge Switch - This switches the channel pair to Bridge Mode.
6. Euroblock Speaker Connectors - Used to connect speakers to individual output channels or in bridged mode.
7. Remote Standby - These two contact closure pins are wired to a switch to remotely place the amp in standby.
8. Preset Recall - These four pins (and GND) can be wired to remote switches to recall up to four amplifier presets.
6
