- 1. IMPORTANT! Read before Operating this Equipment
- 2. Power Supply
- 3. Product Service Centres
- 4. Preparations for Installation
- 5. Installation
- 6. Connecting to the Ac Mains Supply
- 7. Connecting to the System Amplifier
- 8. Operation
- 9. Front Panel Display
- 10. Program Memory Storage
- 11. Loading a Disc
- 12. Playing a Disc
- 13. Troubleshooting Guide
- 14. Specifications
- 15. Warranty
- 16. Laser Product
Cyrus CD 6
CD 8
SE
2,
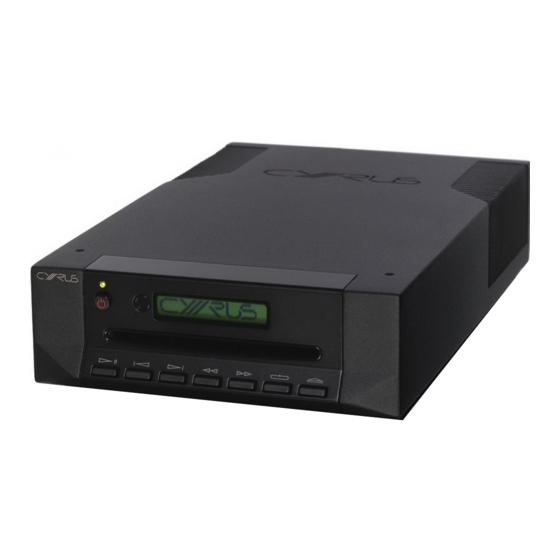
OPERATION
(Refer to Fig.2)
Key to the front panel drawing:
1. CD Loading Slot
2. Standby Key
3. Standby Light
4. Remote Eye
5. Display Window
6. Stop/Eject
Switching On
The mains power to the CD 8
unattended for a long period when the mains power at the wall socket should
be switched off or the product disconnected from the AC supply.
When power is applied, the STANDBY key
c
Standby light
shows red when the CD 8
operational.
Loading a Disc
Before loading a disc, check that the display reads 'No Disc', indicating that a
disc is not already loaded. To load a disc, hold the disc label side upwards
and place it gently into the CD Loading Slot. Once a third of the disc is
loaded, the disc will be automatically loaded through the front panel. The
display will show 'Reading' while checking the contents of the disc.
Playing a Disc
1@
Press the PLAY/PAUSE key
from track 1 unless otherwise selected.
Pausing
1@
Press the PLAY/PAUSE key
held at the precise point of interruption and the PAUSE symbol will show on
the display. Press the PLAY/PAUSE key
Fast Forward/Reverse
h
The SEARCH FORWARD
and SEARCH REVERSE
to locate a specific point within a track. The search will commence initially at a
slow speed increasing after a few seconds if the key is held down.
The Search keys will also search through next or previous tracks if held down
long enough.
Previous/Next Track Selection
1)
Pressing the NEXT
or PREVIOUS
backward through the tracks on the CD. Track indications appear on the
display.
Repeat
g
The REPEAT key
can be used to replay the entire disc or programmed
tracks.
When REPEAT is selected, its symbol shows on the display. Press the key a
second time to clear Repeat.
If a program selection has been stored, the REPEAT key
continuous play of this program sequence.
Stop/Eject Key
When a disc is playing, press the STOP/EJECT Key
immediately.
If the disc is already stationary, one touch of the STOP/EJECT key
eject the CD.
CD XT
CD
SE
SE
2,
2,
7.
Repeat
8.
Search Forward
9.
Search Reverse
10.
Next Track
11.
Previous Track
12.
Play/Pause
should normally be left on unless left
SE
2
b
is used for power control. The
is in Standby and green when
SE
2
on the front panel. Playback will commence
to pause the current track. The disc will be
1@
again to resume playing the disc.
i
keys may be used
1!
keys allow you to change forward or
g
f
to stop the disc
T TRANSPORT
Program Memory Storage
The CD 8
has two program modes – Program and Exclude. Program sets
SE
2
the CD 8
to play the sequence of tracks you like, Exclude sets the CD 8
SE
2
to skip the tracks you don't like. To set the CD 8
SE
2
a selection of tracks, follow this sequence-
1.
Load a disc.
2.
Press the MEMORY STORE key on the remote control once to set
Program mode (the display will read 'Enter Tracks') or twice to set
Exclude mode (the display will read 'Skip Tracks').
3.
Enter the sequence of tracks to be stored (or skipped) with the remote
control numeric keypad. A maximum of 30 tracks may be stored in the
program memory. If an error is made in the programming sequence,
pressing the STOP/EJECT key will cancel the last entry.
4.
When all the tracks have been stored, press the MEMORY key again
(the display will now read 'Program Ready'.
5.
Press play to begin playing the tracks in the programmed sequence.
NOTE:
1. 'MEMORY FULL' indication will show on the display when the program
stored exceeds 30 tracks or a stored program time of 100 minutes or
greater.
2. When engaging STOP while a program is stored, an extra press is
needed to clear the memory. Thus:
•
Press STOP/EJECT once to stop the disc.
•
Press STOP/EJECT a second time to clear the memory.
•
Press STOP/EJECT a third time to eject the CD.
•
One continuous press will accomplish all operations.
FRONT PANEL DISPLAY
Key to the Front Panel Display drawing:
1. Track Display (Two Digit)
Track number, disc reading and error display.
2. Mode Indicator
Indicates the current operation mode (play, pause etc.)
3. Time Display
When the disc is stopped this indicates the total time.
When the disc is playing, either elapsed time for the current track or time
remaining to the end of the disc
5. Repeat Indicator
This symbol indicates that repeat is set.
6. Memory Display
Indicates when a program is stored in the memory.
7. Text display area
For status messages.
will allow
f
will
4
User Instructions
to Program or Exclude
SE
2
(Refer to Fig.3)
d
will be shown.
