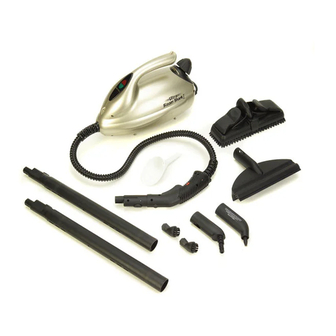
Euro-Pro EP908H 소유자 매뉴얼 - 페이지 7
{카테고리_이름} Euro-Pro EP908H에 대한 소유자 매뉴얼을 온라인으로 검색하거나 PDF를 다운로드하세요. Euro-Pro EP908H 8 페이지. 120v., 60 hz, 1550 watts

OPERATING INSTRUCTIONS
Attaching the Accessories to the
Flexible Steam Hose
Dual Edge Glass & Tile Squeegee
This attachment is very useful for
cleaning large windows, plastic material,
ceramic, tiled or marble surfaces.
To use: Connect the tile
squeegee to the hand
grip or use with
extension tube for
hard to reach surfaces.
Apply steam abundantly, rub with the
soft spongy edge, then remove excess
water and dirt with the glass wiping
edge.
IMPORTANT:
When cleaning
windows, always avoid any sudden
changes in temperature to prevent glass
breakage or cracks.
Concentrator
Attach the concentrator
to the handgrip or to the
extension tubes. Then
attach the detail brushes
to the concentrator.
Detail Brush
It is best for cleaning grout in-between
the tiles, ceramic and marble.
To use: Attach the detail
brush on to the end of the
concentrator, which
then may be used directly
on the hand grip or with the extension
tubes.
Tips On How To Use Your System
Water
•
Use tap water for all your cleaning
needs.
•
However, if you live in an area with
hard water, use de-mineralized /
distilled water when steaming light
colored fabrics to eliminate the
possibility of hard water stains.
IMPORTANT:
Do NOT add cleaning
solutions, scented perfumes, oils or any
other chemicals to the water used in
this appliance. Use tap water or
distilled/purified water if the tap
water in your area is very hard.
:
WARNING
A towel wrapped around
the brush can become hot enough to
burn. Make sure that you let the towel
cool off for 5 minutes before touching it.
Using Towels
•
For best results use 100% cotton
white terry cloth towels.
•
Use correct size of towel to allow you
to wrap the towel around the brushes
and clip it under the spring loaded
cloth holder.
•
The purpose of using a towel is to
absorb moisture and dirt being
removed. Always use dry towels.
A wet towel will smear the dirt.
•
Wash towels with strong detergent
and bleach.
•
Using scented fabric softener while
washing the towels will cause the
scent to be released into the air
when using the towels with your
steam system.
Efficient Work
•
For vertical surfaces, wipe with a
towel from the top down, in this
way the dirty water will not soil
surfaces already cleaned.
•
Avoid changing brushes back and
forth while cleaning.
•
Start with the smallest brush to
clean tight spots and corners first.
•
Use a towel to wipe dirt as soon as
possible, otherwise it will dry and
re-adhere to the surface.
8
OPERATING INSTRUCTIONS
Components
Power "On" Light (red): This light will
illuminate when the unit is plugged into
the 120V. wall outlet and will remain on
until the unit is unplugged.
CAUTION:
Read the instructions for
"Filling the Water Tank" before opening
the Safety Cap. Always depress hand
grip steam trigger until all pressure/
steam has been vented from boiler.
CAUTION:
Always unplug before
filling. ALLOW UNIT TO COOL FOR
FIFTEEN (15) MINUTES BEFORE
REFILLING.
IMPORTANT:
Do NOT add cleaning
solutions, scented perfumes, oils or any
other chemicals to the water used in this
appliance. Use tap water or
distilled/purified water if the tap water
in your area is very hard.
Filling Your Steam Cleaner With
Water
IMPORTANT:
Always insure that the unit
is "UNPLUGGED" from the wall receptacle
prior to initial filling or re-filling the water
tank. Never attempt to fill this unit under
a water tap, always use the filling funnel
provided. Failure to follow these steps will
cause the water tank to overfill and may
pose an electrical safety hazard.
Step 1: Before filling the steam cleaner,
make sure that the unit is NOT
plugged in and has been allowed to
cool for fifteen (15) minutes.
Step 2: Squeeze and hold handgrip trigger
until all pressure has been released
from the boiler. Turn Safety/Filler
Cap counter clockwise until
removed. (See caution above.)
Step 3: Place the appliance on a flat,
stable surface and insert the funnel
into the tank opening and add 40
US fl. oz. (1200 ml) of water.
(Fig. 1) Place the funnel in the tank
opening as illustrated in Fig. 1. The
funnel has been specially designed
to show when the water tank is full.
When water starts to come out of
the vent hole of the funnel, the tank
is full. Remove the funnel slowly
and let the remaining water in it to
go inside the water tank. Do Not
Overfill. Replace the Safety Filler
Cap.
Step 4: Connect desired attachments
onto the Flexible Steam Hose.
Step 5: Plug the unit into a standard (120
volt, grounded) wall receptacle.
Allow approximately 8-10 minutes
for vapor to reach its working
temperature and pressure. The
green ready light will illuminate
when the unit is ready for use.
Step 6: Upon initial use, some water will
come out from the nozzle of the
attachment. This is unvaporized
water in the hose and is normal.
Always point nozzle in a safe
direction.
NOTE:
When the steam cleaner has
run out of water, steam output will
cease.
WARNING:
Always drain the
condensed water from hose before
use or if unit has been left idle for a
period of time. To drain hose, direct
nozzle into an appropriate container or
sink and depress hand grip steam
trigger. Once hose has been drained,
normal use may be resumed. Never
direct nozzle towards people, animals
or plants.
Vent Hole
Fig. 1
WARNING:
Allow unit to cool for 15
minutes before refilling. When
refilling the steam cleaner while it is still
hot, the first drops of water might bubble
up. Use caution when opening the
Safety/Filler Cap as cap may become
hot during use and escaping steam
can cause scalding.
5
