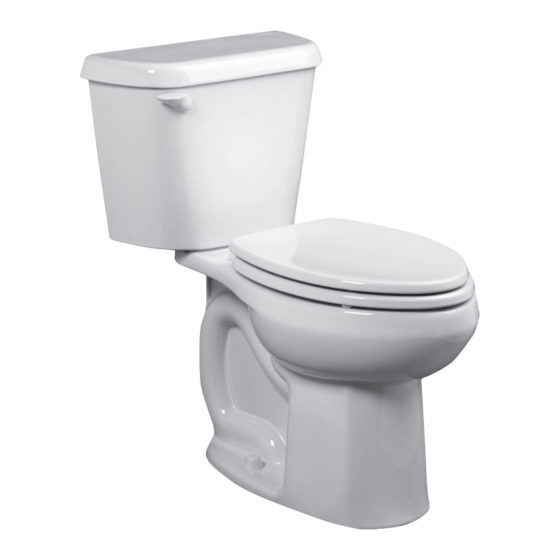
American Standard SONOMA 702 Series 소유자 매뉴얼 - 페이지 6
{카테고리_이름} American Standard SONOMA 702 Series에 대한 소유자 매뉴얼을 온라인으로 검색하거나 PDF를 다운로드하세요. American Standard SONOMA 702 Series 8 페이지.

A
Turn on water supply
Ouvrir l'alimentation d'eau
Abra el suministro de agua
B
Adjust water level to level
indicated on tank by
turning water level
adjustment knob to move
float cup up or down.
Ajustez le niveau d'eau au
niveau indiqué sur le
réservoir en tournant le
bouton de réglage du
niveau d'eau pour
déplacer le flotteur vers le
haut ou vers le bas.
Ajuste el nivel del agua
hasta donde se indica en el
tanque girando la perilla de
ajuste del nivel del agua
para mover el flotador hacia
arriba o hacia abajo.
C
Troubleshooting Guide
Problem
Possible Cause
Does not flush
a. Water supply valve closed.
b. Supply line blocked.
c. Flush valve chain too loose or disconnected.
d. Sand or debris lodged in water control.
Poor or
a. Bowl water level too low.
sluggish flush
b. Supply valve partly closed.
c. Partially clogged trapway and/or drain pipe
and/or vent.
d. Supply pressure too low.
Toilet leaks
a. Poor supply line connection.
b. Poor bowl to tank/floor connection.
Toilet does
a. Flapper seal leaking or deformed.
not shut off
b. Sand or debris lodged in water control.
c. Flush valve chain too tight, holding flapper open.
Toilet bowl
a. Wax ring not fully compressed.
rocks after
b. Floor not level.
installation
6
pg
Water Level Adjustment Knob
Bouton de réglage du niveau d'eau
Perilla De Ajuste Del Nivel Del Agua
Float Cup
Fill Valve
Or Water
Control
Robinet de
remplissage
ou de
contrôle
de l'eau
Válvula De
Llenado O
Control
De Agua
Corrective Action
a. Open valve and allow water to fill tank.
b. Shut off water supply, disconnect supply line and inspect all gaskets and washers.
c. Readjust chain length as required.
d. Shut off water supply. Remove cap and clean as per Fluidmaster maintenance
a. Check that refill tube is connected to water control and inserted into overflow tube
b. Open supply valve fully. Be sure that proper supply tube size is used.
c. Remove obstruction. Consult a plumber if necessary.
d. Normal supply pressure must be at least 20 psi.
a. Review Step 6 of installation procedure.
b. Review Step 1 through 6 of installation procedure.
a. Clean debris from seal surface. Replace flapper seal as needed.
b. Shut off water supply. Remove cap and clean as per Fluidmaster maintenance
c. Readjust chain length as needed.
a. Retighten bowl-to-floor knobs.
b. Use toilet shims and /or place a bead of caulk around the base of the toilet.
7
Flush Valve
Chain
Chaîne du
Flotteur
robinet de
Flotador
chasse
Cadena de la
Válvula de
Descarga
Overflow Tube
Tube de
Flapper Seal
Remplissage
Tubo de Desagüe
Joint de valve
de chasse
Sello del
Obturador
Flapper
Clapet
Obturador
Water Supply Line
Tuyau d'alimentation
en eau
Línea de Suministro
de Agua
SEE STEP 7 FOR DIAGRAM
Reassemble.
instructions at: www.americanstandard-us.com/enews/fluidmasterguide.pdf
without being kinked or damaged.
See web for more info.
instructions at: www.americanstandard-us.com/enews/fluidmasterguide.pdf
Trip Lever Rod
Levier de déclenchement
Barilla de la Manija
Refill Tube
Tube de remplissage
Manguera de Relleno
Approximate
Water Level
Niveau d'eau
approximatif
Nivel Aproximado
de Agua
Flush
Valve
Robinet
de chasse
Válvula de
Descarga
Tank to Bowl Gasket
Joint du réservoir
à la cuvette
Empaque de Acoplamiento
de Taza a Tanque
7302191-100 EN/FR/SP Rev. 2 8/22
