Flycam 5000 조립 설명서 - 페이지 8
{카테고리_이름} Flycam 5000에 대한 조립 설명서을 온라인으로 검색하거나 PDF를 다운로드하세요. Flycam 5000 11 페이지. Gimbal support handheld camera stabilizer
Flycam 5000에 대해서도 마찬가지입니다: 조립 설명서 (6 페이지)
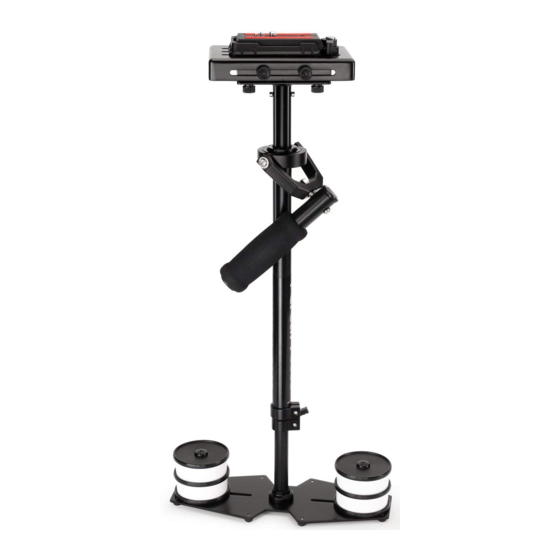
Holding your Flycam Stabilizer
When handling your Flycam 5000 Stabilizer, one hand holds onto the handle while the other is used
to gently guide the camera in the direction you wish to shoot and frame the shot. For normal
shooting, hold the handle in the middle.
For normal shooting, hold the handle in middle.
For shots that require framing the camera up, down or sideways, hold the handle firmly at bottom.
This will allow the yoke part of gimbal to rotate without hitting your hand or knuckles.
Balancing Review
Proper system balance can only be achieved once your camera is set up with appropriate accessories
ready for shooting. This means batteries, lenses, media cards, LCD viewfinder/monitor, quick release
plate, on-cam lights, and all the gear you will use for your recording session.
•
Remove top plate of FLYCAM and line up your camera so that its center of gravity is as close to the
center of the plate as possible (basically hold the camera in your hand until it feels balanced both
left and right as well as forward and back).
•
Find hole in the plate that is as close to threaded tripod mount on your camera as possible (while
you are still holding your camera's center of gravity to the center of the plate). Attach your camera
(or quick release mount if you have one). Tighten it down so it won't accidentally rotate.
•
Re-attach top plate. Center it, but don't worry about getting it absolutely perfect yet.
•
Remove most of the weights from Base Platform, but leave one on each side.
•
Insert the center post as far as it will go and tighten so it won't slide out.
•
Hold the handle normally and turn the FLYCAM so that it is horizontal to the ground. Let go of the
stalk while keeping a firm grip on the handle and count how long it takes to return to vertical again.
You should be able to count a good, "One-one thousand, two-one thousand", before it rights itself.
With only two little weights it might take considerably longer.
•
Add one pair of weights at a time and repeat the "horizontal to vertical" test until it falls at the cor-
rect rate. It will probably not be perfect.
•
You'll get one that's too slow and then you'll add a pair and it will fall too fast. When that happens,
take off the last pair of weights that you added.
•
Tighten down the weights so they don't slide around.
•
To get count perfect, slightly lower the center post that attaches the Base Platform with the
weights until you get the "one-one thousand, two one thousand" count to the vertical position.
8