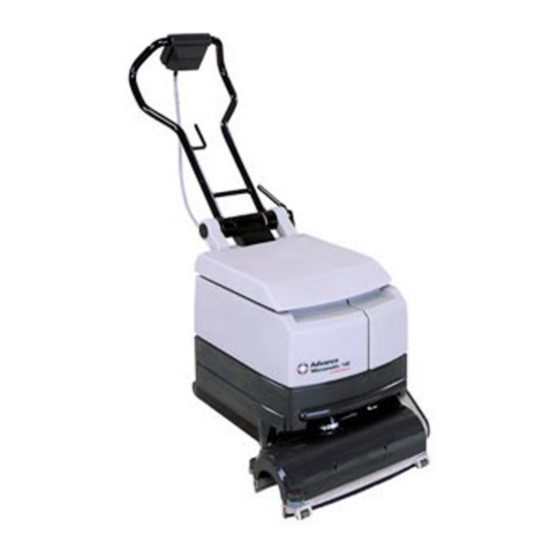
Advance acoustic Micromatic 14 E 사용 설명서 지침 - 페이지 5
{카테고리_이름} Advance acoustic Micromatic 14 E에 대한 사용 설명서 지침을 온라인으로 검색하거나 PDF를 다운로드하세요. Advance acoustic Micromatic 14 E 14 페이지.

2 . Screw in safety screw with bushing and tighten brush.
❸
Brush pressure adjustment
+ more brush pressure = turn adjustment knob to the right
- less brush pressure
= turn adjustment knob to the left
❹
Filling the Solution Tank
1 . Fill the solution tank with 11 litres/ 3 gallons cleaning solution.
2 . Do not fill up the solution tank completely: 2.5 cm (1") should be left
free at the top of the tank
3 . The solution should be a mixture of water and a cleaning chemical
appropiate for the type of job.
4 . Always follow the dilution instructions on the chemical container label.
5 . The temperature of the cleaning solution must not exceed 40°C/100° F.
!
Caution!
Use only low-foaming, non-flammable liquid detergents intended for
machine application.
❺
Wet Scrubbing
1 . Sweep or vacuum floor first to remove litter
2 . Adjust handle bar to working position.
3 . Plug in machine to a properly grounded outlet
4 . Press the master switch ON. The brush motor will run
5 . Switch vacuum motor ON.
6 . Switch pump ON. The solution is supplied to the brush.
NOTE: Solution flow is pre-set
There are two switch positions.
min. - low solution supply
max. - high solution supply
7 . Press foot peddle down. Brush and squeegees are lowered to the floor.
8 . For best results, move machine at a slow walking speed. In case of
heavy soilage, scrub floor first with water and switch vacuum motor
OFF. Then scrub floor again and pick up the water (double scrub).
!
Caution!
To avoid damaging the floor, keep the machine moving while the
brush is turning.
9 . The recovery tank has an automatic float shut-off to prevent solution
from entering the vacuum system.
When the float closes, the recovery tank must be emptied.
The machine will not pick up water with the float closed.
10 . When the recovery tank is full turn the master switch OFF.
Take out recovery tank at the handle and drain it If machine has previously
been used, rinse tank with clean water.
❻
After Use
1 . Turn master switch OFF.
2 . Press the foot peddle down to raise brush and squeegee.
3 . Unplug machine
4 . Empty solution tank and rinse it with clean water.
5 . Empty recovery tank and rinse it with clean water.
6 . Inspect hoses and replace them if damaged.
7 . Remove brush and rinse it with clean water.
8 . Inspect squeegee inlet channels for litter and rinse them with clean
water.
9 . Inspect solution filter and vacuum pre-filter. Clean them or replace it if
damaged.
10 . Inspect vacuum exhaust filter. Clean it with air or replace it if clogged.
11 . Store the machine in a clean, dry place.
Maintenance schedule
Maintenance item
Clean and Inspect Tanks
Clean and Inspect Hoses
Clean Brush
Clean and Check Squeegees
Check Filters
Check Power Supply Cable
Check Spray Nozles
Vacuum Motor Carbon Brushes
❼
Squeegee Replacement
If the squeegee leaves narrow streaks of water, it is probably dirty or
damaged. Remove the squeegee, rinse it under clean water and inspect the
Once a
Once
Daily
Week
a year
X
X
X
X
X
X
X
X
squeegee blades.
Reverse or replace the squeegee blade if it is cut, torn, wavy or worn to a
radius.
To Reverse or Replace the Squeegee Blade:
1 . Unplug machine
2 . Remove tanks
3 . Tilt machine backwards
4 . Remove the two screws at nozle.
Take out nozle and exchange squeegees.
Trouble Shooting
There is no power. Motors do not work
1 . Check plug and cable
2 . Check main fuse
3 . Defective switch on operating panel
Brush motor does work brush does not turn
1 . Defective drive belt
2 . Brush not fixed
Inadequate suction
1 . Worn or defective squeegees
2 . Suction inlet clogged
3 . Suction hose loose, defective
4 . Tank lid defective
5 . Float valve jammed
6 . Vacuum pre-filters dirty
Poor cleaning
1 . Worn brush
2 . Brush to soft
3 . Walking too fast
4 . Water supply clogged
5 . Solution filter clogged
❽
Transport
1 . Unlock handle bar.
2 . Fold handle bar over the machine.
3 . Lock it.
!
Warning!
Do not carry the machine without a folded down handle bar.
Carry the machine only on the specified positions.
Accessories
1 . Scrubbing brush, Nylon, soft-medium~
2 . Scrubbing brush, Silicon Carbide, medium~*
*= standard
**= optional
Technical Specifications
Model
Voltage, frequency
Rating of brush motor
Rating of vacuum motor
Rating of pump
Number of brushes
Brush diameter
Brush speed
Brush pressure max.
Vacuum max.
Airflow max.
Sound pressure level
Cable length
Suction width
Working width
Solution tank
Recovery tank
Machine, length
Machine, width w/squeegee
Machine, height
Machine, height w/handle
Weight empty
Operating weight
2
08603313
14E
V/Hz
120/60
hp (Watt)
0,4 (320)
hp (Watt)
1,2 (900)
hp (Watt)
0,03 (25)
piece
1
inch cm
4 (10)
rpm
1000
lbs (kg)
35 (16)
inch (cm)
96 (244)
cub.ft/min (l/min)
95 (2700)
dB (A)
68
ft. m
75 (23)
inch cm
17 (44)
inch cm
14 (34)
gal (l)
3 (11)
gal (l)
3,2 (12)
inch cm
24,4 (62)
inch cm
17/18,8 (44/48)
inch cm
18,8 (48)
inch cm
41 (105)
lbs (kg)
84 (38)
lbs (kg)
108 (49)
