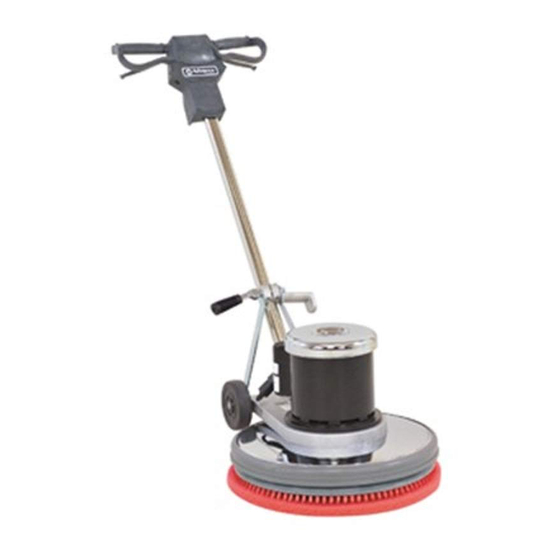
Advance acoustic Pacesetter 200 사용 설명서 지침 - 페이지 7
{카테고리_이름} Advance acoustic Pacesetter 200에 대한 사용 설명서 지침을 온라인으로 검색하거나 PDF를 다운로드하세요. Advance acoustic Pacesetter 200 9 페이지.
Advance acoustic Pacesetter 200에 대해서도 마찬가지입니다: 사용 설명서 지침 (15 페이지)

INTRODUCTION
This manual will help you get the most from your Nilfisk-Advance floor
machine. Read it thoroughly before operating the machine.
This product is intended for commercial use; polishing, spray buffing, scrubbing,
stripping and rotary carpet shampooing.
PARTS AND SERVICE
Repairs, when required, should be performed by your Authorized Nilfisk-
Advance Service Center, who employs factory trained service personnel, and
maintains an inventory of Nilfisk-Advance original replacement parts and acces-
sories.
Call the NILFISK-ADVANCE DEALER named below for repair parts or service.
Please specify the Model and Serial Number when discussing your machine.
(Dealer, affix service sticker here.)
NAME PLATE
The Model Number and Serial Number of your machine are shown on the
Nameplate on the bottom of the machine. This information is needed when
ordering repair parts for the machine. Use the space below to note the Model
Number and Serial Number of your machine for future reference.
MODEL NUMBER
SERIAL NUMBER
UNCRATE THE MACHINE
When the machine is delivered, carefully inspect the shipping carton and the
machine for damage. If damage is evident, save the shipping carton so that it
can be inspected. Contact the Nilfisk-Advance Customer Service Department
immediately to file a freight damage claim.
(A)-KNOW YOUR MACHINE
1
Operator Handle Grips
2
Switch Lever Safety Lock Button
3
Switch Levers - Squeeze - ON / Release - OFF
4
Handle Release Lever (HD Models only)
5
Handle Release Compression Lever (Standard Models only)
6
Power Cord
7
Operator Handle
8
Cord Hook
9
Circuit Breaker (All Models)
WARNING!
This machine contains moving parts. To reduce the risk of injury,
always unplug the power cord before servicing.
(B)-INSTALLING THE BRUSH OR PAD
HOLDER
Align the lugs with the corresponding slots in the brush or pad holder and turn the
brush or pad holder counterclockwise to lock it in place. To remove brush/pad
holder, give it a quick, hard turn clockwise.
CAUTION!
Using the wrong brush or pad on this machine can damage the
floor or overload the motor.
6 - FORM NO. 56041584 - Pacesetter 170, 200 / 170HD, 200HD
OPERATION
1
Unwrap the Power Cord and plug it into a properly grounded outlet.
2
Lift up on the Handle Release Lever (4) or pull up on the Handle Release
Compression Lever (5). Move the Operator Handle downward until
your arms are almost straight. Then let go of the Handle Release Lever
(4) or push down on the Handle Release Compression Lever (5) to lock
it in place.
3
Lift up on the Operator Handle (7) until the brush (or pad) is flat against
the floor.
WARNING!
Be prepared to control the machine as soon as the motor starts.
Just a slight up or down movement of the Handle will make the
machine move from side to side. Raise the Handle to go right.
Lower the Handle to go left.
CAUTION!
Immediately start moving the machine back and forth. Keep the
machine moving while the motor is running to avoid damage to
the floor or carpet.
4
Hold one of the Operator Hand Grips firmly, push the Safety Lock
Button (2) and then compress the Switch Levers (3) to start the motor.
NOTE: When the Switch Levers (3) are released, the machine shuts
off immediately.
NOTE: When spray buffing, check the pad every 15 minutes for dirt and
wax build-up. If the pad is dirty, turn it over to expose the clean side or
install a clean pad.
AFTER USE
1
Place the Handle in the upright position and unplug the Power Cord.
Wrap the cord around the Operator Handle Grips (1) and the Cord Hook
(8).
2
Remove the pad holder or brush from the machine. Clean the pad or
brush and hang it up to dry. Allow buffing pads to dry completely before
using again.
Store brushes and pad holders separate from the machine. Never store
the machine with the pad holder or brush on the machine.
3
Wipe the entire machine with a clean, damp cloth. Wipe the underside
of the brush housing after wet use.
4
Inspect the entire machine and all accessories for damage. Perform
any required maintenance or repairs before storage.
5
Store the machine in a clean, dry place with the Handle locked in the
upright position.
