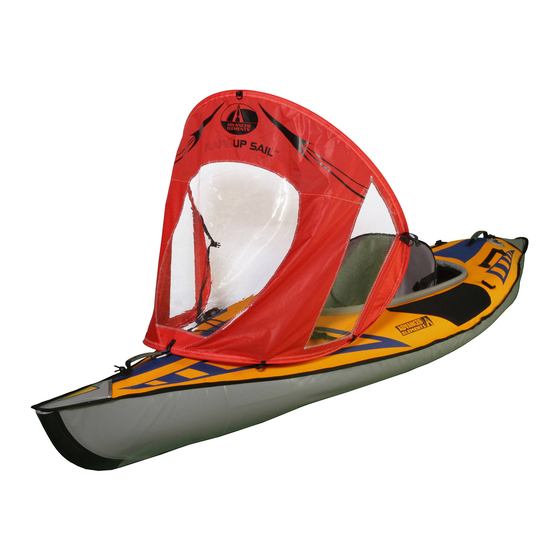
Advanced Elements RapidUp Sail 소유자 매뉴얼 - 페이지 4
{카테고리_이름} Advanced Elements RapidUp Sail에 대한 소유자 매뉴얼을 온라인으로 검색하거나 PDF를 다운로드하세요. Advanced Elements RapidUp Sail 10 페이지.

TM
2.2 Deck Mounted Use - Introduction
The following steps will assist you in setting up your RapidUp Sail™ on any kayak.
After following these first steps please proceed to your Advanced Elements model
listed below to receive further instruction for proper set up on your specific kayak.
If you do not have an Advanced Elements kayak, you may need to experiment with
the set up, but most kayaks have d-rings and other hardware that you can utilize to set
up the RapidUp Sail™. You can also visit a local marine store or the internet to find
d-rings and other hardware options that you could use to outfit your kayak for setting
up the sail.
For Use With Advanced Elements Kayaks
For all Advanced Elements Kayaks, start with these first few steps and then move to
your specific model listed below.
1. Take the RapidUp Sail™ out of its carry bag and unfold it. BE CAREFUL WHEN
UNFOLDING THE SAIL. HOLD AWAY FROM YOUR FACE WHEN OPENING!
2. After opening the sail, lay it out flat on the front deck of your kayak with the name
of the sail facing up. The name of the sail should also be near the cockpit, not the
bow. In other words, if you are standing at the bow of the kayak facing it, you
should be able to read the name on the sail.
Next: Locate your specific kayak model below and complete the setup instructions.
Advanced Frame Kayaks: (Models AE1002, AE1012, AE1007, AE1009)
1. Clip the Carabiner (located on the central bottom d-ring) to the handle of your kayak.
2. Clip the Forward Snap Hooks to the kayak d-rings closest to the bow of the kayak
(see image 1). You will need to adjust the snap hooks, shortening them up to the
sail as much as possible.
3. Clip the Rear Snap Hooks to the kayak d-rings closest to the cockpit of the kayak
(see image 1). You will need to adjust the snap hooks, shortening them up to the
sail as much as possible.
4. Clip the Stabilization Lanyards to the top side d-rings of the sail.
5. Tie the two Stabilization Lanyards to the cockpit buckle located at the front of
the cockpit. Tie the lanyards so that they are taught, but do not tie them so tight
that you are pulling the sail inwards.
Advanced Frame Sport: (Model AE1017)
1. Clip the Carabiner (located on the central bottom d-ring) to the handle of your kayak.
2. Clip the Forward Snap Hooks to the kayak d-rings closest to the bow of the kayak
(see image 1). You will need to adjust the snap hooks, shortening them up to the
sail as much as possible.
4
