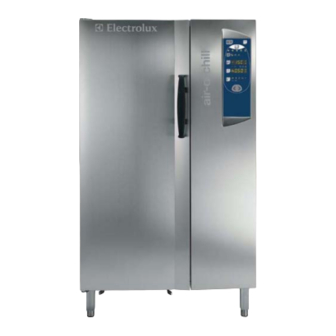
Electrolux AOFP101U 운영 및 유지보수 지침 매뉴얼 - 페이지 11
{카테고리_이름} Electrolux AOFP101U에 대한 운영 및 유지보수 지침 매뉴얼을 온라인으로 검색하거나 PDF를 다운로드하세요. Electrolux AOFP101U 27 페이지. Bcf 30kg 6 gn1/1 lw (240/3/60hz), bcf 50kg 10 gn1/1 lw (240/3/60hz) / bcf 100kg 20 gn1/1 lw (240/3/60hz) / bcf 70kg 10 gn2/1 lw (240/3/60hz) / bcf 180kg 20 gn2/1 lw (240/3/60hz) / bcf 30kg 6 gn1/1 lw (208/3/60hz) / bcf 50kg 10 gn1/1 lw (208/3/60hz) / bcf
Electrolux AOFP101U에 대해서도 마찬가지입니다: 매뉴얼 (11 페이지)

B.1.3 MAINTENANCE CYCLE OR PRESERVATION CYCLE
The maintenance cycle is the maintenance of the food at a
chosen temperature so that it does not alter over time, is started
automatically at the end of the blast chilling or freezing cycle.
The preservation cycle is continuous. To interrupt it you have to
stop or make changes to the program.
B.1.4 STERILISATION CYCLE (appliances with germicidal light
option)
The UV lamps have a direct germicidal action and are used to
sterilise the surfaces and air in the appliance chamber. This
function can be used to sterilize kitchen utensils such as knives,
carving forks, etc. (the process should be done in two steps,
turning the utensils over to make sure both sides of utensils are
sterilized) and can be activated at the end of each working day.
Do not use this function if there is food in the chamber.
ATTENTION:
The appliance has a safety device that switches off the lamps
when the doors are opened. This safety device is provided
because exposure to the U. V. rays emitted by the lamps is
harmful and can cause damage to eyes.
C.1 ANALYSIS OF USER INTERFACE
O•I
C.1.1
I = ON / O = OFF
This button indicates the status of the appliance: I=On,O=Off.
When appliance is switch on, the whole interface lights up.
C.1.2 START/STOP CYCLE
This button starts or stops the selected cycle.
The selected cycle starts immediately when enabled. To stop
the cycle, keep the button pressed for at least 3 seconds.
If the door is closed when a cycle is started the button will light
up continuously. If the door is opened during a cycle it will start
blinking continuously.
1- "PREP" To optimize appliance performance when the need
arises, a preparation cycle can be chosen at the beginning of
a chilling cycle which is signalled on the temperature display
by the message "PREP".
2- If the chiller has been inactive for a long time, the compressor
will be started by impulses to guarantee maximum efficiency.
C.1.3 SELECT CYCLES
The default setting on the appliance is the SOFT chilling cycle.
Use these buttons
options:
From left to right:
• Positive "SOFT CHILLING"
• Positive "HARD CHILLING"
• Positive "COOLER" maintenance (or preservation)
• Negative "BLAST FREEZING" chilling or freezing
• Negative "FREEZER" maintenance (or preservation)
When choosing a cycle, press the
the next option; the options are in a loop and so you can either
scroll forwards
or backwards
C.1.3.1 Chilling with "cruise chilling" key
The "cruise chilling" cycle automatically controls the chilling
process. It sets up the machine to complete the process within
times required by standards while conserving the quality of the
foods (without burning the surface of the foods).
When the
cycle is launched, it starts running immediately.
Stopping it requires the button to be held down for at least three
seconds.
When the cycle is started with the door closed the key will light up.
It will instead flash if a cycle is in progress and the door is open.
1- In order to improve machine performance and only if
required, at the start of the chilling cycle, a preparatory cycle
may start. This is indicated
on the temperature display by the message "PREP".
2- Also, if the chiller is not used for an extended period of time,
the compressor is started in impulses in order to assure
maximum efficiency.
ATTENTION:
The "cruise chilling" cycle works only if the shaft probe is
inserted. If it is not, the cycle automatically changes over to
timed soft positive chilling.
11
to select one of the following
button to move on to
.
