Casio KL-60 - Label Printer 사용자 설명서 - 페이지 9
{카테고리_이름} Casio KL-60 - Label Printer에 대한 사용자 설명서을 온라인으로 검색하거나 PDF를 다운로드하세요. Casio KL-60 - Label Printer 20 페이지. Casio label printer user's guide kl-60
Casio KL-60 - Label Printer에 대해서도 마찬가지입니다: 제품 카탈로그 (16 페이지)

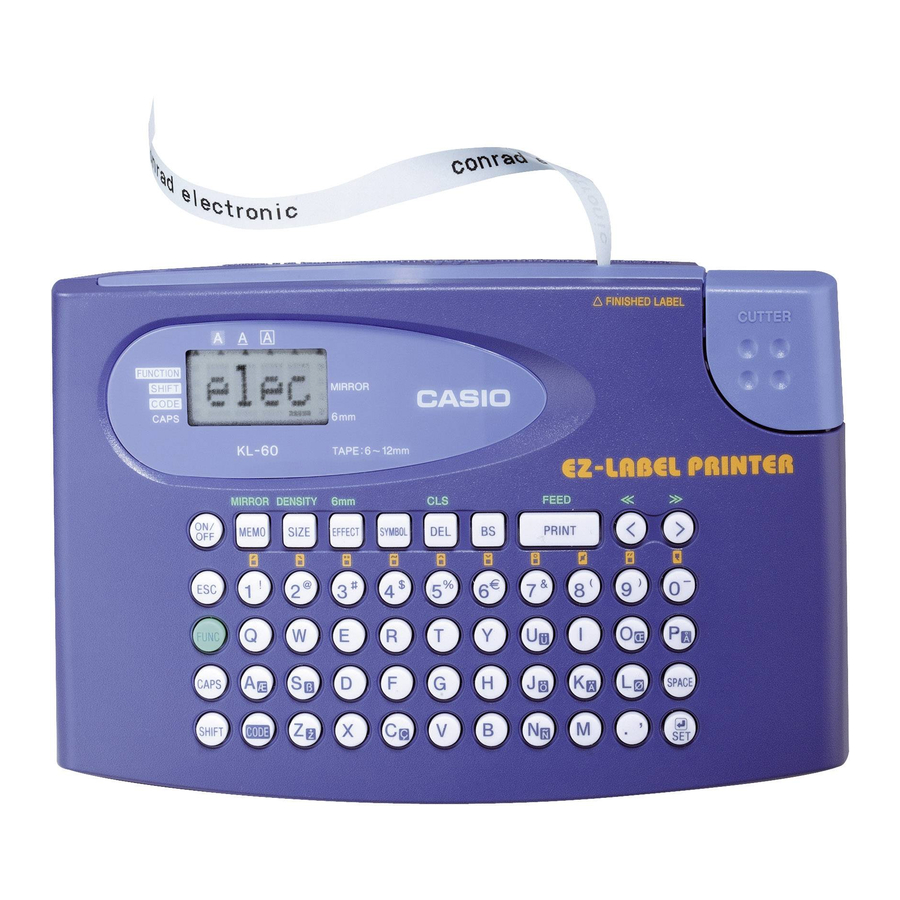
Function indicator
This indicator appears when you press the FUNC key. Pressing a key while this
indicator is on the display causes the function marked above that key to be
executed.
Shift indicator
This indicator appears when you press the SHIFT key. While this indicator is on
the display, the keyboard is shifted, so the letter keys input upper-case alpha
characters. The number keys input the punctuation symbols marked in the up-
per right corners of the keys.
If both the caps mode indicator and the shift indicator are shown on the display,
the keyboard is shifted to lower-case input.
The keyboard automatically unshifts (and the shift indicator disappears) as soon
as you input a character.
Code indicator
This indicator appears when you press the CODE key. While this indicator is on
the display, number keys 1 through 0 input the accents marked above them and
the U, O, P, A, S, J, K, L, Z, C and N keys input the special characters marked
in their lower right corners.
The keyboard automatically returns to normal (and the code indicator disap-
pears) as soon as you input an accent.
Caps indicator
This indicator appears when the Label Printer is in the caps (upper-case) mode.
All letters you input in the caps mode are upper-case. When the caps mode
indicator is not shown on the display, all letters are input as lower-case.
Note that the Label Printer stays in the caps mode until you press the CAPS
key again.
If both the caps mode indicator and the shift indicator are shown on the display,
the keyboard is shifted to lower-case input.
Effect indicators
These indicators point to the character effect that is currently in use. You can
select between shading, underline, and box.
Mirror image printing indicator
This indicator appears when the Label Printer is set up for mirror image printing.
Normal (non mirror image) printing is performed when this indicator is not shown.
E-8
6mm tape indicator
This indicator appears when you use the procedure on page E-7 to specify you
are using 6mm tape. No indicator is shown when you are using other (9mm,
12mm) tape.
Cursor
The cursor shows the next input position. Any character you input appears at
the point where the cursor is located.
Character position marks
These marks show where characters will appear as you input them. This part of
the display is always blank when you turn power on.
Basic Alpha-Numeric Input
The following operation shows you the basic procedures for inputting letters
and numbers. We will explain the procedure by inputting the following charac-
ters using the default initial power-on screen.
Note
If you hold down any key, it will repeat its operation or input at high speed until
you release it.
To input alpha-numeric characters
1. Turn power on.
2. Input the first line of characters.
To input the upper-case letters, you can use either SHIFT or CAPS. With
SHIFT you must shift the keyboard for each character. With CAPS the key-
board stays in upper-case until you press CAPS again.
Press SPACE to input spaces.
If you input a wrong character, press BS to delete it and input again. See
page E-9 for other details on editing text.
3. When you reach the end of a line of text, press B (the SET key) to input a
newline mark.
A newline operation is indicated on the display by the B symbol. This shows
where you changed lines.
You cannot input a newline mark when using 6mm tape.
4. Input the characters in the second line.
5. To print the text that you input, press PRINT. For details on printing, see
page E-12.
