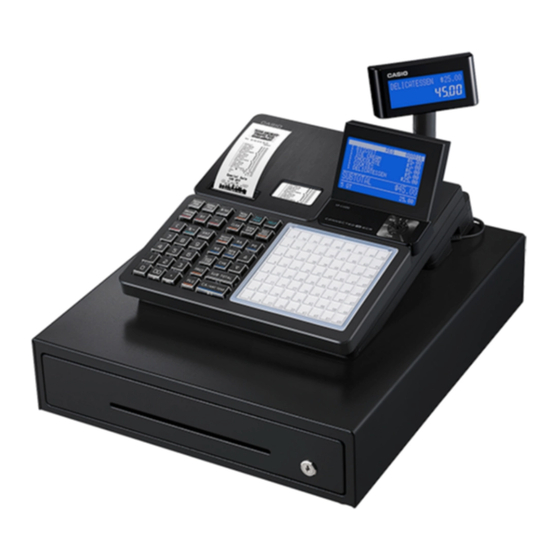
Casio SR-C4500 빠른 참조 매뉴얼 - 페이지 3
{카테고리_이름} Casio SR-C4500에 대한 빠른 참조 매뉴얼을 온라인으로 검색하거나 PDF를 다운로드하세요. Casio SR-C4500 10 페이지.

IMPORTANT: Do not use decimal points while entering cash amounts (i.e. $15.00 = 1500)
CLOSE TAB
1.
Using the Numeric Keypad, enter tab button.
2.
Press the Open/Close Tab button.
3.
The current total of the selected tab will display.
4.
Enter the amount of payment received and press the Cash
Amount Tendered key.
5. The tab is now closed.
REFUND
1.
Using Managers key, turn key to RF.
2.
Enter dollar amount using Numeric Keypad.
3.
Choose corresponding Product/Department key.
4.
Press the Cash Amount Tendered key to complete.
*Only one refund can be performed at a time. In order to refund further items, the manager key
must be switched back to REG and back to RF.
REFUND - CREDIT CARD
1.
Using Managers key, turn key to RF.
2.
Enter dollar amount using Numeric Keypad.
3.
Choose corresponding Product/Department key.
4. Press Subtotal to total sale.
5. Press Credit Card Sale key.
6. Insert/tap/swipe card or mobile device to issue refund.
7. Refund will process and receipt will print.
*Only one refund can be performed at a time. In order to refund further items, the manager key
must be switched back to REG and back to RF.
CORRECT AN ITEM DURING A TRANSACTION
During a transaction, if an item previously submitted needs to be
voided, you can do this by pressing the Item Correct key and then
selecting the Product/Department key that corresponds to that item.
The receipt will display "- $$" with the designated Product/Depart-
ment label.
CANCEL ENTIRE TRANSACTION
If an entire transaction needs to be canceled before Cash Amount
Tendered is pressed, follow the steps below. If the sale has already
been completed, refer to Refund instructions.
1.
Press Subtotal key.
2.
Total amount will display.
3.
Press the ERR CORR/Cancel key.
4.
Display shows "CANCEL OPERATION".
5. Press Cash Amount Tendered to confirm cancellation of
transaction or press Clear Entry to return to the sale.
PROGRAMMING TAX TABLES
1. Using managers key, turn key to PGM.
2. Use the Down Arrow to highlight "Tax Setting".
3. Press Cash Amount Tendered.
4. The screen will have the "rate" selection highlighted.
5. Press Cash Amount Tendered.
6. Using the Down Arrow, highlight the Tax Table Rate that needs to
be changed.
7. Use the numeric keypad to type the new tax rate and press Cash
Amount Tendered.
8. When programming is complete, press Subtotal to return to the
previous screen or press Subtotal twice to exit to the main PGM
screen.
9. When the main PGM screen is displayed, the manager key can
be returned to REG mode.
Note: To adjust Rounding or Calculation of a particular Tax Table,
follow the same steps above but at step 4 select "Round" or "Cal
Type".
CORRECT A TRANSACTION/SALE
If an error is made while entering a transaction, you can void it only
immediately after the mistake has been made by pressing the ERROR
CORR / CANCEL key. Transaction will then be documented on the
receipt with "ERROR CORR" along with a negative price amount.
Once the sale is voided, you may enter in the correct transaction
amount/type.
PROGRAMMING DEPARTMENT KEYS
1. Using managers key, turn key to PGM.
2. The screen will have the "DEPT Setting" selection highlighted.
3. Press Cash Amount Tendered.
4. "Input DEPT No." will be displayed.
5. Press Cash Amount Tendered.
6. Use the Down Arrow to highlight the department in need of
programming and press Cash Amount Tendered.
7. The display shows the program input screen. From this screen,
input the name and price of the key by highlighting each and
using the numeric keypad to enter the appropriate values.
Selecting "Taxable Status" by highlighting it and pressing Cash
Amount Tendered will give you options to change the Tax Table
assigned to the department.
8. When programming is complete, press Subtotal to return to the
previous screen to edit more departments or press Subtotal
twice to exit to the main PGM screen.
9. When the main PGM screen is displayed, the manager key
can be returned to REG mode.
3
