Audiotec Fischer Match UP C42BMW-FRT.3 매뉴얼 - 페이지 11
{카테고리_이름} Audiotec Fischer Match UP C42BMW-FRT.3에 대한 매뉴얼을 온라인으로 검색하거나 PDF를 다운로드하세요. Audiotec Fischer Match UP C42BMW-FRT.3 17 페이지. Upgrade speaker systems for bmw vehicles

Installation
Removal of the door panel / rear side panel
In order to install the MATCH speakers in the origi-
nal mounting positions it is mandatory to remove
the door panels / rear side panels.
If you are uncertain how to remove the panels,
please either ask your local BMW dealer or an ex-
perienced car audio dealer for assistance. In any
case follow the instructions of the car manufacturer.
Please pay attention to the following notes:
1. The panel is fastened with several hidden screws
to the metal sheet of the car. Make sure that you
have loosened all screws before you try to re-
move the panel.
2. Additionally the panel is fixed by numerous plas-
tic clips, which may be damaged during the dis-
assembly when the ambient temperature is be-
low 10°C. Always pull the panel horizontally to
loosen the clips – never apply any vertical force.
Note that broken plastic clips have to be replaced
before reinstalling the panel in order to avoid un-
desired rattle and noise.
Installation of the UP C42BMW-FRT.1, .2 & .3
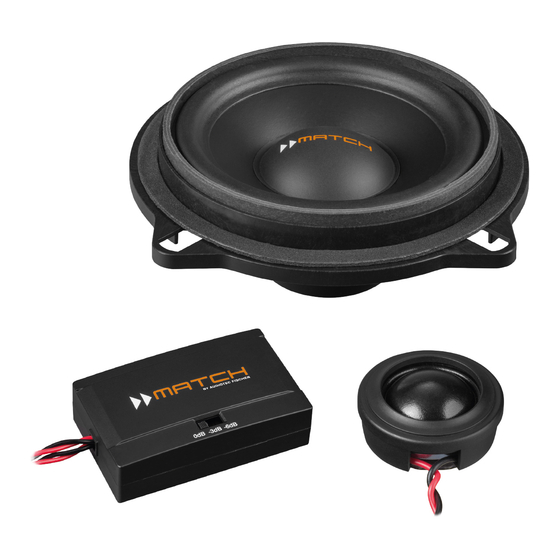
The UP C42BMW-FRT is a 2-way component
system, which will be connected via the enclosed
2-way crossover and mounted in the original speak-
er locations. After you have dismantled the panel,
you can remove the original midrange speaker.
Then connect the mid-woofer UP S4BMW-FRT.1 /
.2 / .3 to the speaker cable of the crossover which
is labelled with "MID" and insert it into the original
mounting position.
For the installation of the tweeter you have to re-
move the mirror triangle that incorporated the origi-
nal tweeter. Extract the original tweeter and replace
it by the new MATCH tweeter UP S1BMW-FRT. If
you own a car that hasn't any tweeters installed ex
works, you have the possibility to buy the appropri-
ate mirror triangles as spare parts from your BMW
dealer.
After the tweeter is installed, connect it to the cross-
over.
Then connect the cable of the crossover which is
labelled with "IN" to the original speaker cable har-
ness. The crossover is equipped with a 3-stage
tweeter level adjustment and a bridgeable high-
pass filter for the mid-woofer. The switch on top of
the crossover allows to adjust the level of the con-
nected tweeter. Therefore adjust the switch to the
desired switch position.
0 dB: The tweeter has the optimum level for most
applications.
-3 dB: The level of the tweeter is reduced by 3 dB.
-6 dB: If you choose this switch setting, the level of
the tweeter is reduced by 6 dB. This setting is
recommended if no tweeter was installed ex
works.
If the loudspeakers are used in combination with a
DSP amplifier, the highpass filter of the mid-woofer
inside the crossover must be deactivated.
Therefore, the crossover has to be opened and a
jumper must be changed (see figures below).
Highpass filter configuration
adjustable inside the crossover
3 2 1
Jumper
Driven by DSP amplifier
Highpass filter deactivated
3 2 1
Directly driven by car radio
Highpass filter activated (default)
3 2 1
Next, the crossover should be properly fixed to
the panel, e.g. by using some strong, double-
sided adhesive tape or hot glue. Make sure that you
choose an appropriate recess in the panel as posi-
tion for the crossover network itself, so that it does
not collide with any other part when you reassemble
the panel.
11
